Baby animals in the zoo (photos)

I went to the zoo – again. Now is exactly the right time to go to the zoo because you can see many baby animals.
Weather was not so good because it was very hot and humid.
But to see the baby animals was worth it.

This baby lion was the first thing I took pictures of today.

Lion baby

The tiger is not a baby but he has not let the lion baby out of his sight! Maybe he thought it would be his next meal hehe (and I liked this photo)

Tiger

Bear mommy never let her baby out of her sight. If the little one went anywhere, mommy would run after the baby

Mama bear with baby

I felt sorry for the little monkey. He was playing alone with the sticks the whole time. No grown-up monkey came to him once…

Baby ape

The scene with these monkeys was funny. At first I thought the little guy wanted to drink. But he bent over and over again and looked at the water. Maybe he wanted to know who the monkey was looking at him in the water.

Mama ape with baby

I have no idea what the bird is called but these huge Feet!!!!! 😀

Bird with huge feet

This little calf must have been very young. It was very unsteady and fell into a small ditch. Luckily, nothing happened.

Zoo baby

DIY A cute Kids rain coat

Last year I saw a children’s coat in “my” fabric shop. Sellers sometimes sew clothes so you can see how a fabric might look dressed. The coat was so cute.

When I saw the coat, I immediately thought of Miss M.
Unfortunately I didn’t like the fabric and didn’t find anything suitable in the next months. Until a month ago!!!

I found a totally cute laminated cotton fabric.

Originally I wanted to sew a coat for fall / winter. But this fabric isn’t warm enough for that.
So I decided on a raincoat that was finished yesterday and I love it ❤ ❤ ❤

Rain coat Front

Rain coat hat

When I started to learn how to sew I got printed badges. I still like the motive very much but I wanted something new 🙂
That’s why I got 2 woven badges this time. Here’s my first one. I just love it ❤

Rain coat with new label

DIY Make a pillow look like a gift – Tutorial

Pillow Giftl 20

I saw those pillows on Pinterest last year. I liked them so much I wanted to sew them.
Actually, they’re meant for Christmas, which will last forever until next time hehe
But I always forgot to do this tutorial. Better late than never 😀

Something fun about it. I found the pillows on Pinterest first with my cell phone. Then I bought the fabric (canvas) and the zippers, copied the picture to my iPad and took it with me to my sewing course. Only when I wanted to show the teacher the now larger picture on the tablet, I saw that the pillows are not sewn but knitted.

My cushions have the approximate size 24 x 16 inch.
If you want to copy my tutorial, you have to make the bows bigger or smaller depending on the size of your cushions.

First start with the ” bands “.

Pillow Giftl 00

Sew the band together on the left side. Then turn it to the right. Lay the band so that the seam is at the back and iron it. I then triple-stitched both edges.

Pillow Giftl 01

Sew the two bands to the fabric you cut for the pillow.

Pillow Giftl 02

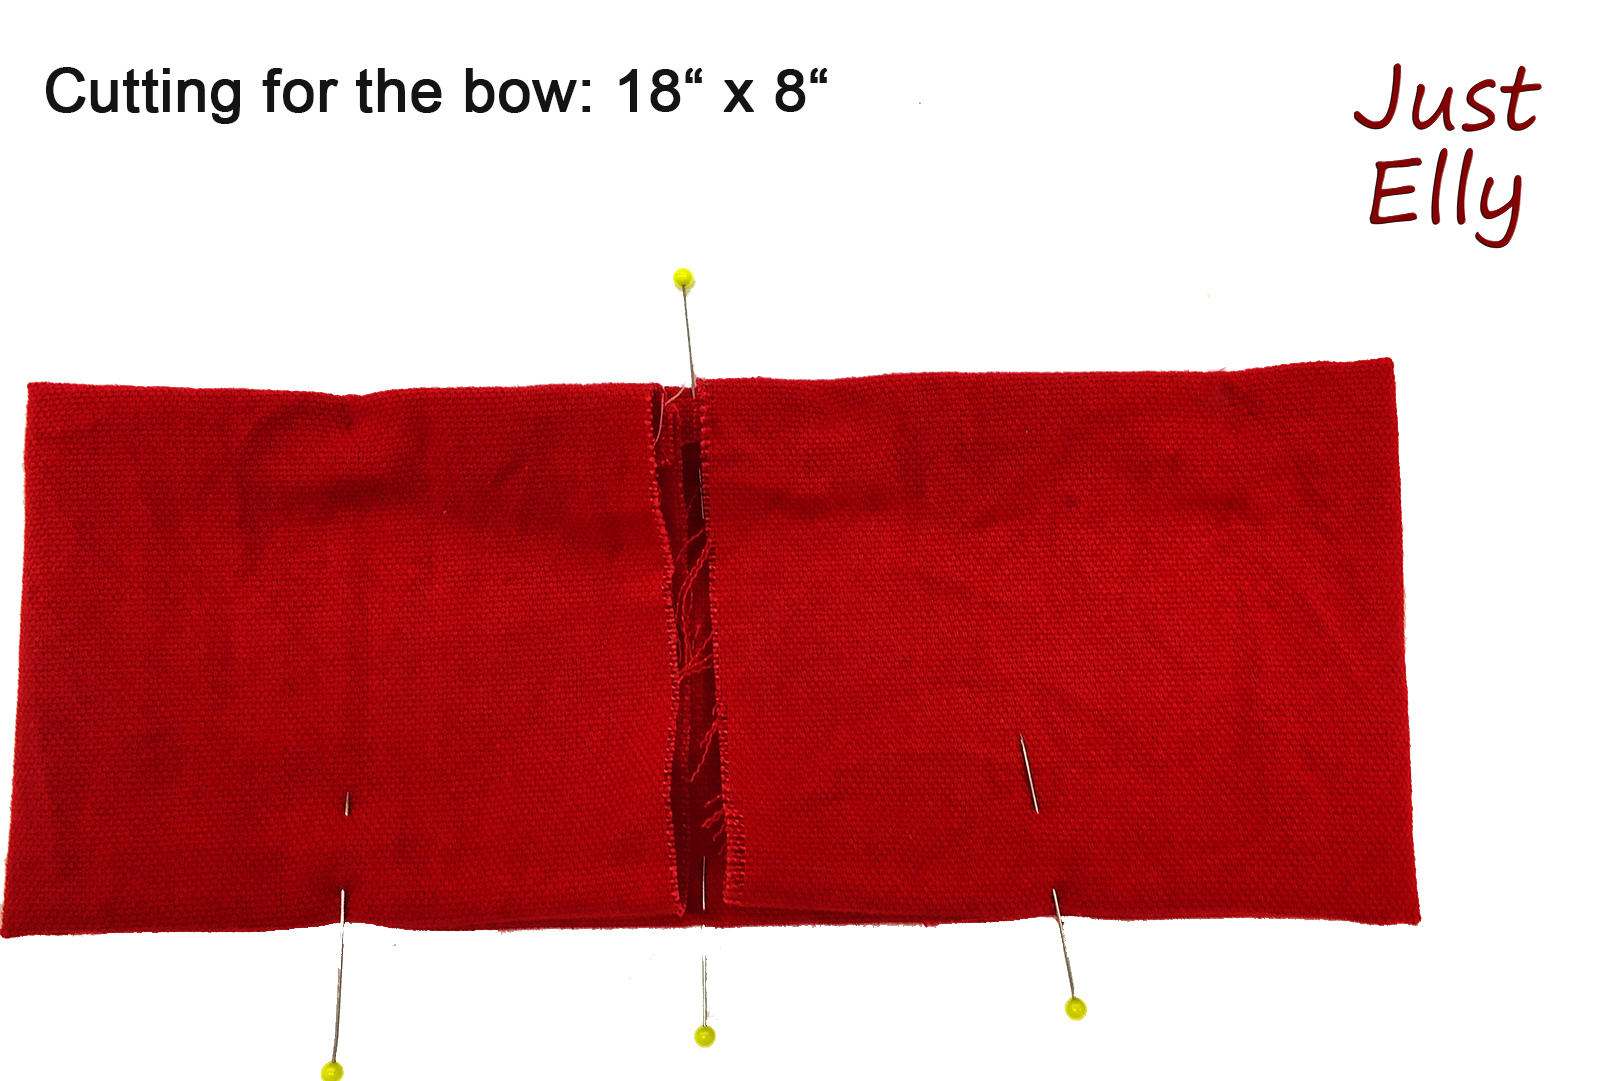
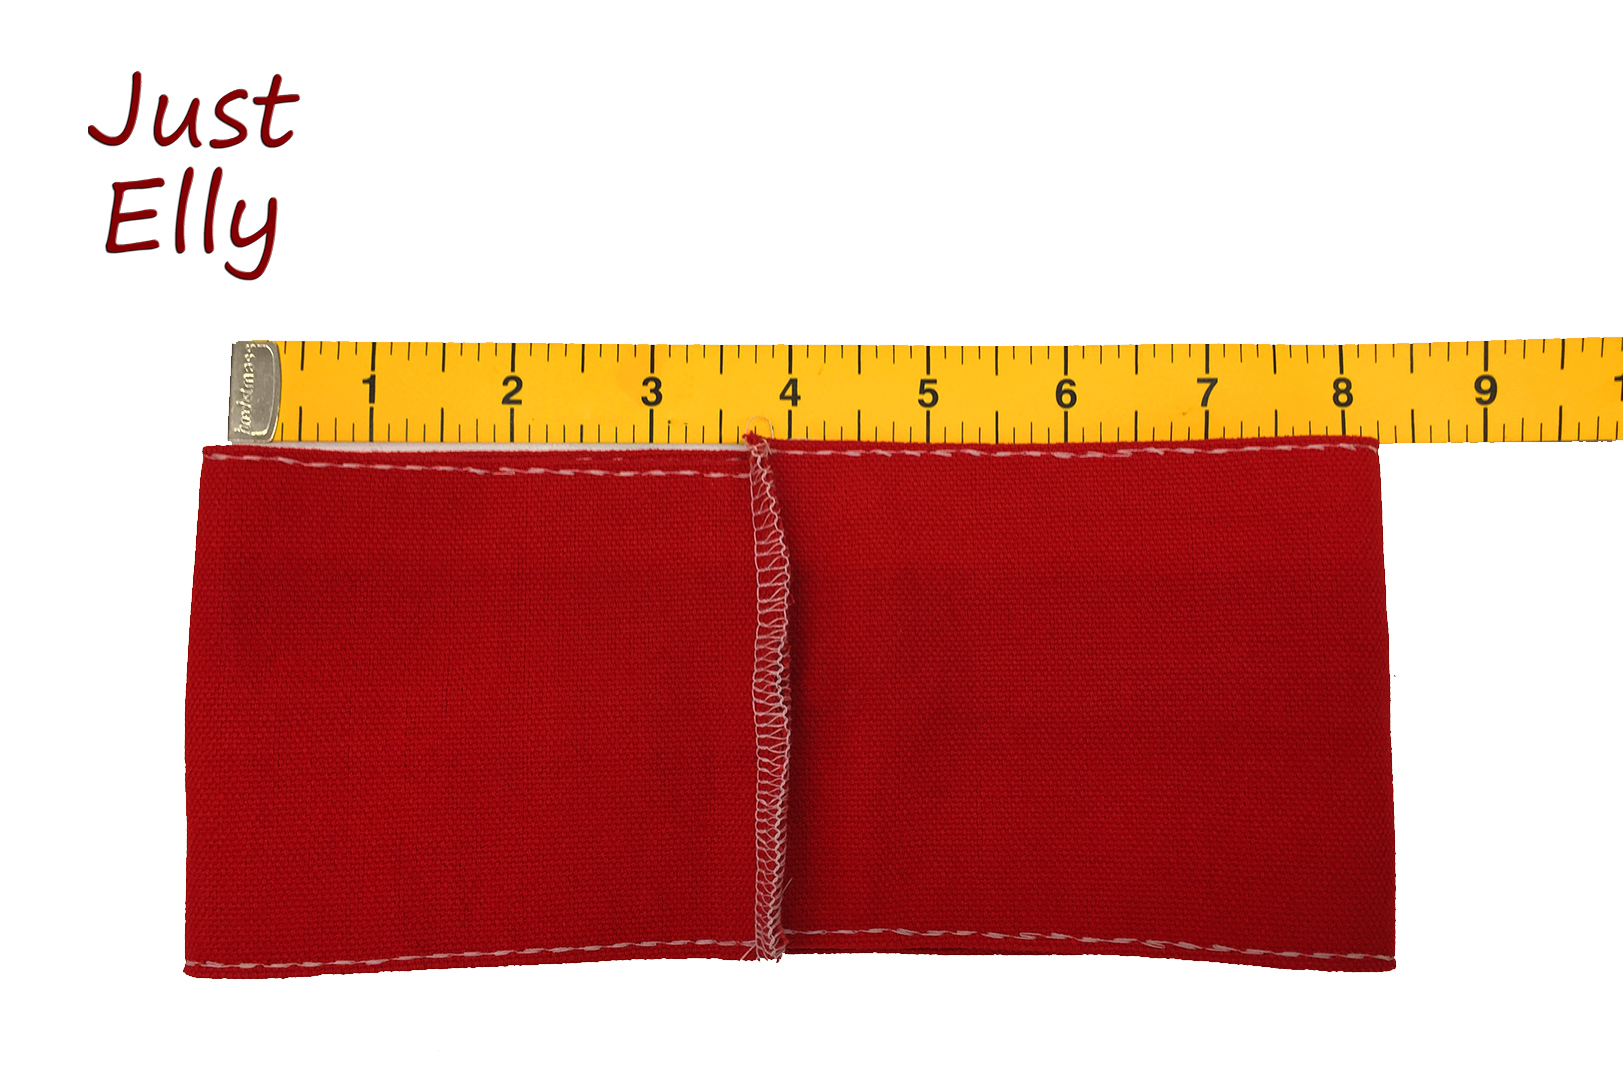
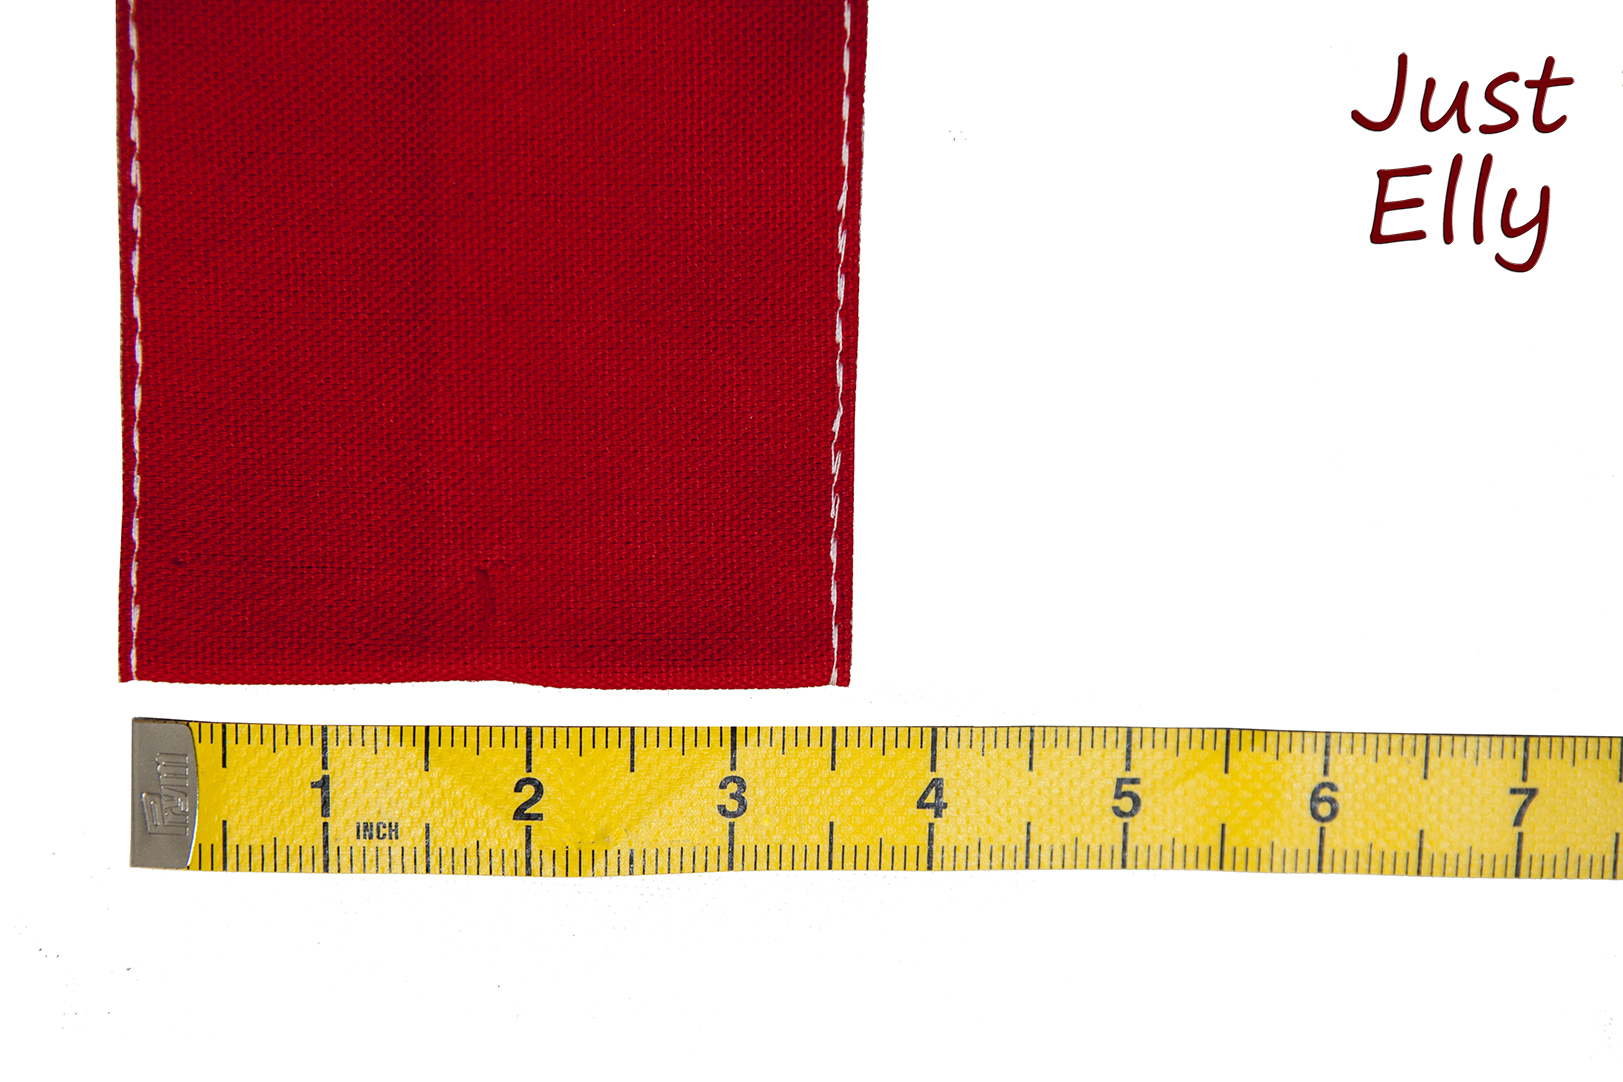
Here comes the bow. Sew together on the left side and turn to the right. Decorate the edge with the triple stitch. Then sew the bow together

Pillow Giftl 03

Pillow Giftl 04

Pillow Giftl 05

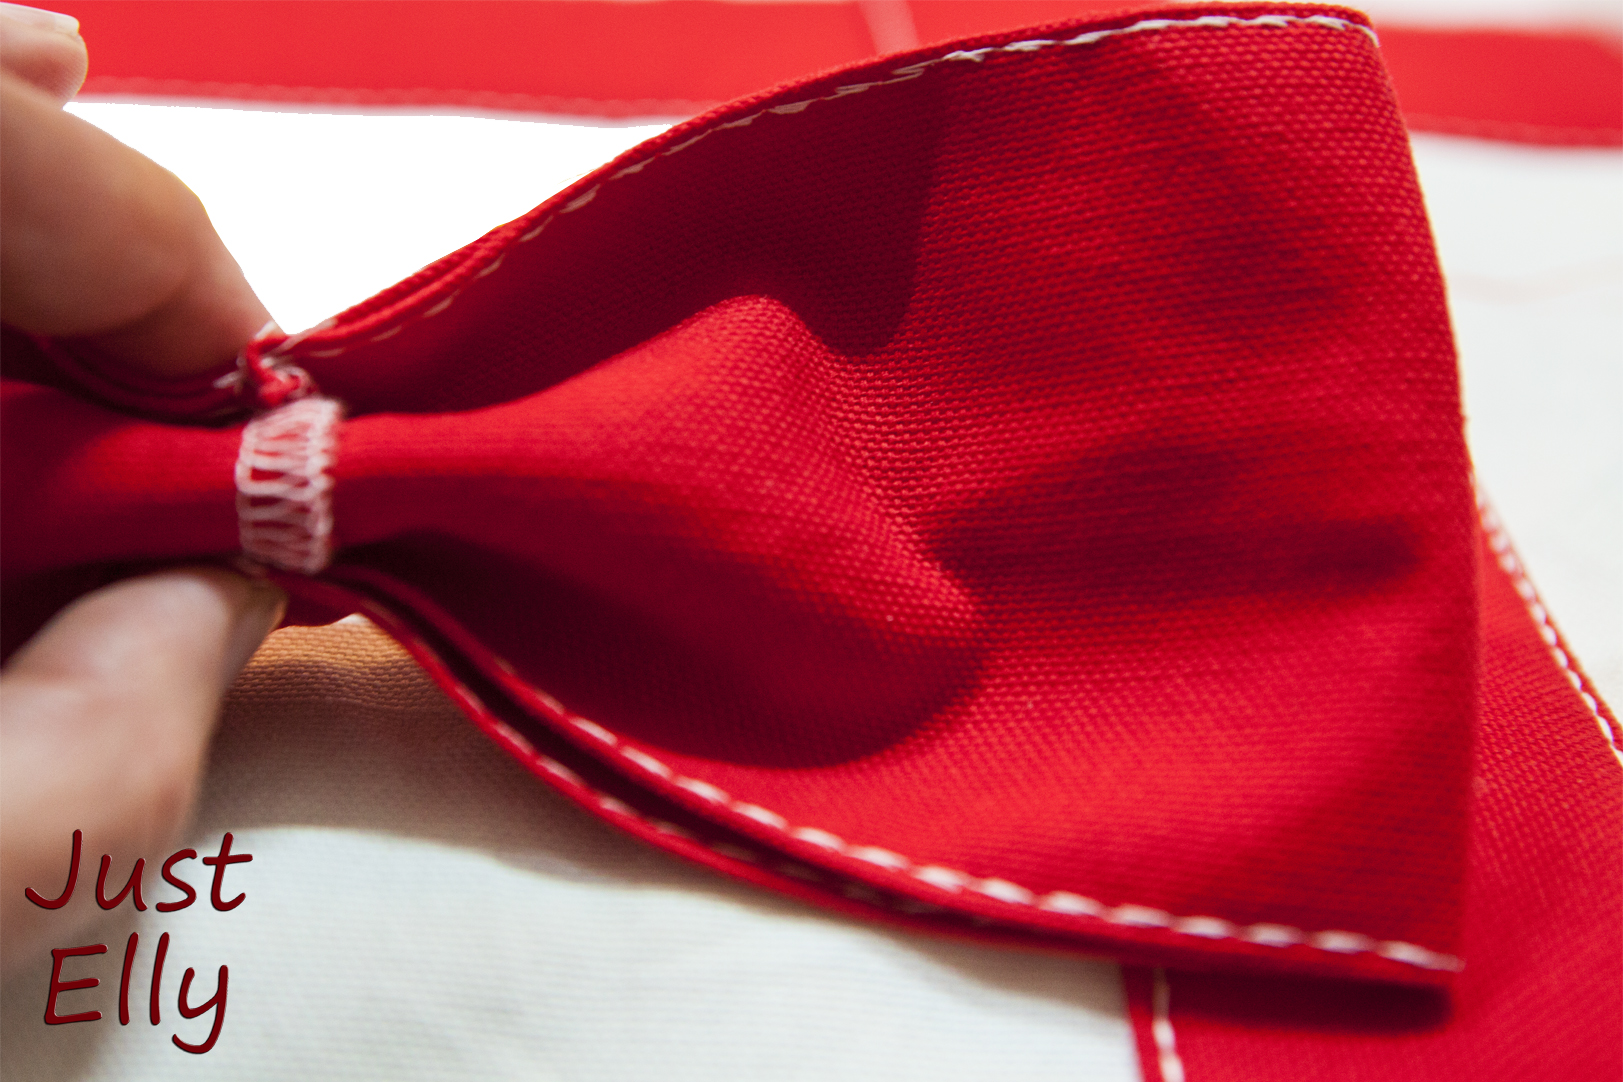
Now the bow should also look like a bow. Press the middle together with your fingers and sew together.

Pillow Giftl 06

Pillow Giftl 07

To make your pillow look even more like a gift, it also needs the bands on the bow.

I have tried it with different widths and have decided for this width.

Pillow Giftl 08

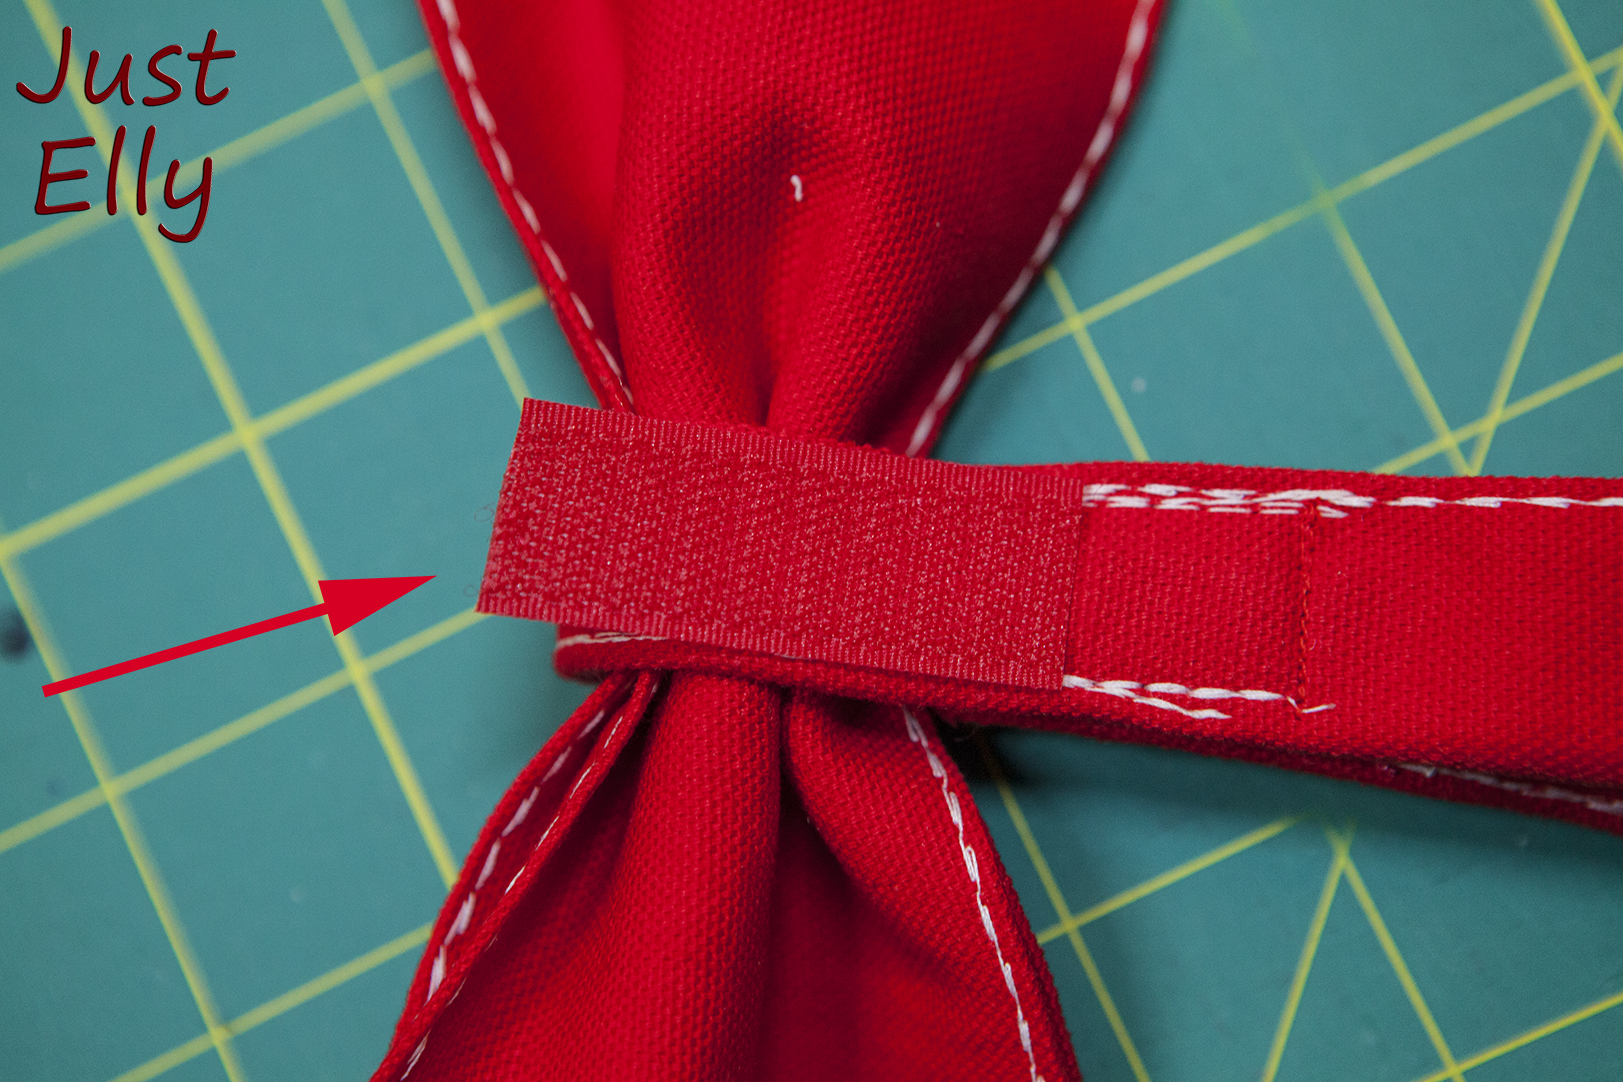
Because the strip on the bow looked too wide, I folded it in half. Place the strip around the bow so that it is the same length at both ends.

Pillow Giftl 09

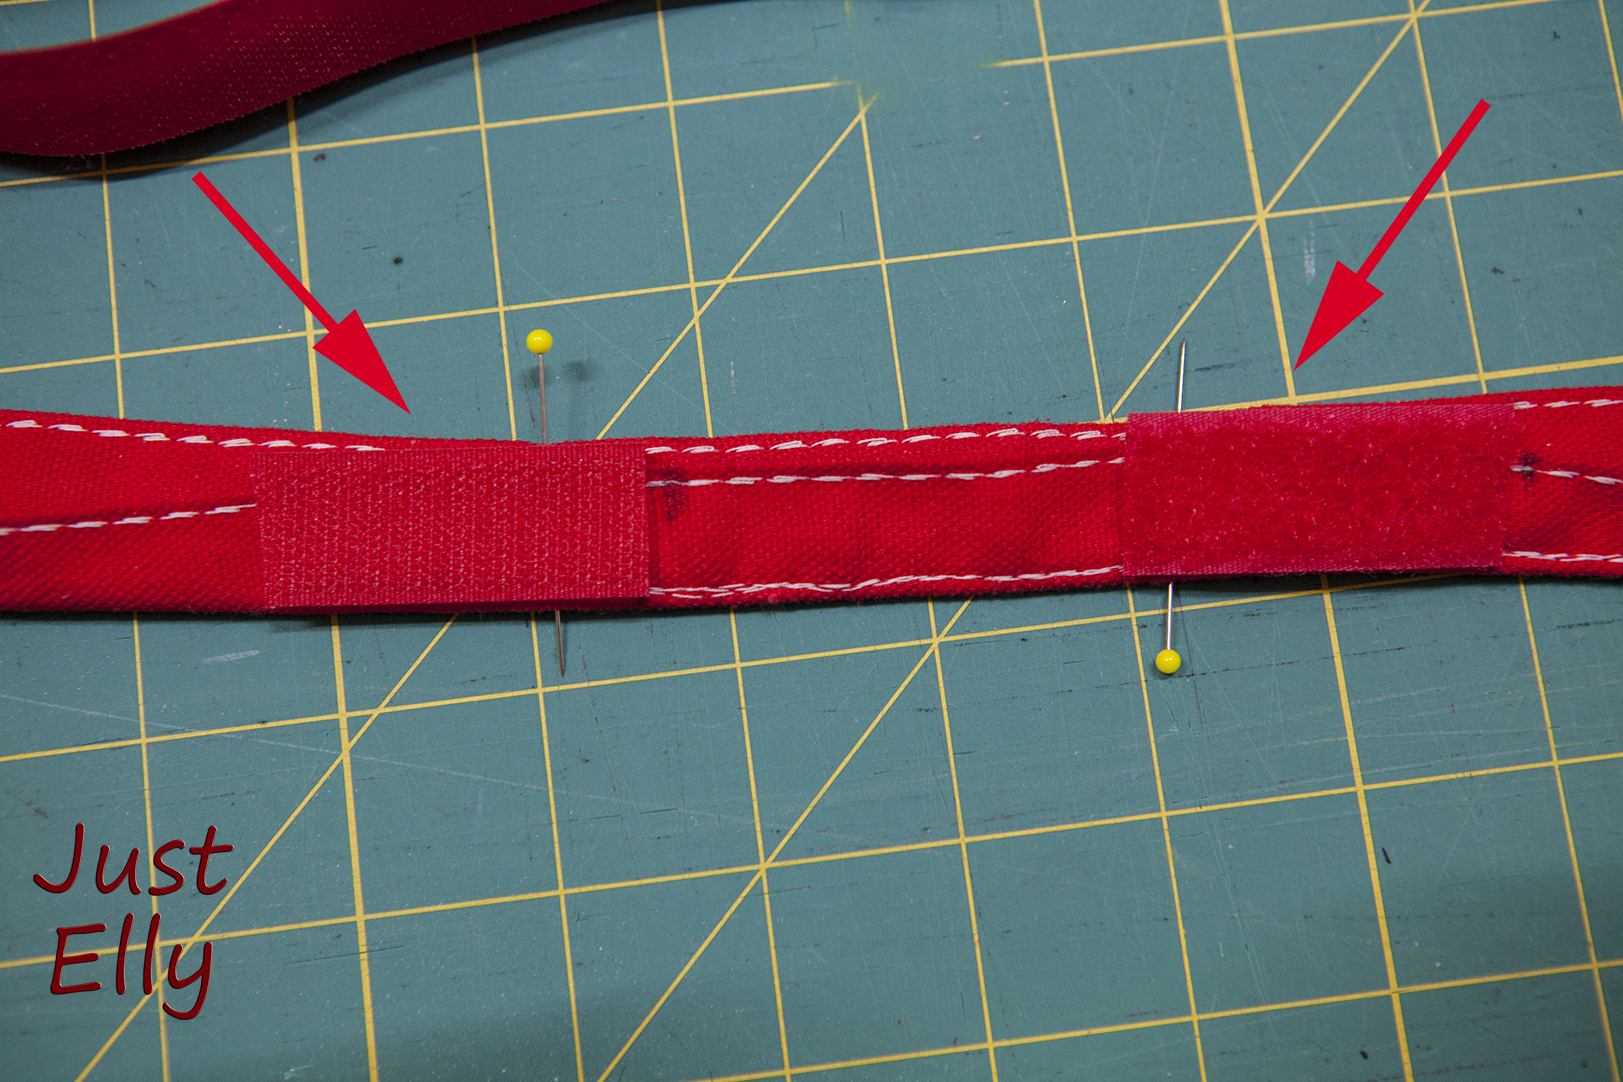
Now hold the strip tightly around the bow and mark it with pins.

Pillow Giftl 11

Pillow Giftl 12

Sew on 2 strips of velcro on the back side at the marking. Don’t cut the velcro too small so you have some room to adjust later.

Pillow Giftl 15

Because I also want to attach the bow to the pillow with velcro, I put a piece of velcro on the back of the ribbon. Always make sure to take the “hard” part of the velcro for it!

If you want to wash the pillowcase, simply take off the bow and the fluffy part of the velcro won’t damage your other clothes.

Pillow Giftl 16

Now you have to decide WHERE to put your bow on the pillow!!!
Just try different places and where you like it best, make a mark and sew the counterpart of the velcro.

Pillow Giftl 17

If you need to shorten the band from the bow, do it now and sew the ends.

Then you can sew the pillowcase and zipper.

Your pillowcase is DONE 🙂

Pillow Giftl 19

You want to know how I made those three pillows with the Christmas songs?

I found a free font on the Internet called “Christmas”. I mirrored the writing and printed it out in enormous size. Then I applied the writing and decorated it a little, depending on the song.

Whoever made the knitted pillows on Pinterest, thanks for the inspiration ❤ ❤ ❤


DIY Your own window seat (Tutorial)

I live in a small apartment with a sloping roof. This means that almost all walls are slanted at the top.
Unfortunately, this also means that you can hardly buy any finished furniture. That’s why I taught myself to build my furniture to match my apartment.
Today I describe how I built myself a bench under the window…

First you have to measure the place very accurately. And I mean VERY EXACTLY!!!
I used a laser measuring tool for this.

For the height, I calculated about 15 – 16 inch including the seat cushion.

Then you buy the wood panels you need. For the sides, the back and the bottom I used laminated panels. For the top and the front I used spruce or fir. I don’t remember because I made the window seat months ago and I’m just posting now. I bought the wood panels in a shop that had sawn the wooden panels according to my wishes.

_MG_9749

I started with the wooden front.

I wanted the front to look like it was made of three pieces. That’s why I sawed 2 lines into each front piece with my saw.

IMG_1131

IMG_1136

IMG_1134

I wanted the window seat to turn white, but no bright white. And I wanted to use chalk paint because it looks so matt. On the Internet I found a retailer in the Netherlands who had sold chalk paint white as “historical white”.
I had a little sample sent to see if I liked the color. The color was perfect for me.

_MG_9865

IMG_1148

Sand between each coat after the paint has dried.

_MG_9844

Also paint the lid with the chalk paint. I painted the front and lid 3 times so that the white completely covers the wood colour.

Finally, you have to seal the paint.

The next step is to dowel the sides and the bottom together. I started with the front, then the two sides and finally the back part.

Here you can see what mistake I made in the first part: First I doweled the front part, removed the dowels and then painted the front. What do you want me to say? After drying the paint the dowels didn’t fit anymore and I had to make a new front part.
So first paint the wood and then dowel it!!!!

_MG_9681

_MG_9847

When the glue dried, I strengthened the inside of the seat with metal angles.

_MG_9873

I have glued the edges of the laminated wooden boards with edgings.

_MG_9864

In the hardware store I found protection for the wooden floor that I glued under the seat. I can’t remember what it’s called.

_MG_9767

I attached the lid with piano hinge.

_MG_9745

I found the seat and back cushions at Ikea 2 years ago. They are designed for outdoors but they fit perfectly and are very comfortable. Under the pillow I put this one on the wood to prevent the pillows from slipping. It’s for carpets, but who cares

_MG_9814

Here the first window seat. I needed a total of three of them.  I also use them as storage for my tools and handicrafts.

IMG_1820

My window seat for Christmas. In the next post I will write a tutorial how I sewed these pillows 🙂

Pillow Giftl 19

Spring and Easter. Yes I know. Too many pillows. Next year I won’t use all of them

Pillow Giftl 21

and today 🙂 I love these pillows. I didn’t make the design, but I liked it so much that I copied it.

Pillow Giftl 22

Pillow Giftl 23