My first apron

I bought  patterns from Burda Style 2 weeks ago. I wanted to make special curtains I have seen on the picture from this pattern. Besides my curtain there has been a pattern for an apron.

No, I dont wear aprons and I dont own one.But my best friend does 🙂

We will meet today. I have to give her the christmas gift (a bought one) . Why dont give a special self made gift too?

I startet yesterday evening and worked till 4 am. Yes, I’m not the fastest sewer so far, but hey, I’m still a beginner. I checked my fabrics, and chose 2 different cottons, same pattern but different colors.

Here is my apron:

_MG_9803

_MG_9806

I’m damn proud of it. I love the colors and the compass logo makes it more special hihi

Little icicles on my window (photos)

OK, winter and it’s cold temperature isnt really my favorite season hehehe

But a few things I like about winter 🙂 Christmas, the feeling when coming from the cold outside into your warm home, snow, hot tea with lemon or hot chocolate

When I woke up we had freezing 25 °F and I found icicles on my window. Only small ones about 1 inch, but I couldnt resist to make photos with my macro.

When checking this photos on my computer some icicles looks like they have a plant on it. Amazing. Havent seen this before. Maybe wind did this art with water drops. I dont know

Take a look for yourself (the black on the top of the photos is the shadow of my window)

_MG_9792 _MG_9779 _MG_9790

I made my first Loop

OMG OMG I did it.

My first sewing project all by myself !!!!

As I postet before we had the first snow 🙂 I took my camera and made photos. When doing this the snow were falling on my neck because. I forgot my scarf at home. Not so bad because of this I had an idea. Why dont sew a loop?

I wanted a loop which would be warm and with my favorite color and motive. In one of my first posts I wrote about my fav color = red and that I love polka dots and stripes.

For the loop I took flannel with polka dots and cotton with stripes. Both in red 🙂

MG_9704

And this is how my loop looks like

_MG_9726

I needed a little longer for it because I made a mistake and couldnt turn it inside out. I had to cut both seams and sew it again. This time it worked

And I so LOVE it !!!!

The first snow (photos)

Today we had the first snow this winter 🙂

I had to go out with my camera and make a few photos.

I like it when the last flowers are with snow. I found a few of them.

Take a look at my photos 🙂

_MG_9690 _MG_9472 _MG_9552 _MG_9576

When I will feel my fingers again – feels like they are frozen – I will make a loop today 🙂

How to make a travel pillow

This one I have done long time ago but I couldnt post it because it has been a gift for my godchild Sonja.

She loves to travel a lot with bus, car, train. She never travels without her own pillow.

When traveling she runs with her suitcase in one hand, her bag in her other hand and her pillow under her arm. When I saw this for the first time I thought about how to make it easier for her.

We bought a new pillow for her. Did she choose a small one? NOPE, it has to be a big one LOL

 Case 1

And this is how I made it for her:

Material:

1 Pillow

2 different fabrics ( pillow 1 yard flannel, bag 1 yard cord fabric)

1 Zipper

3 x Clip buckles

2 different ribbons (pillow 40 inches, bag 2x 40 inches)

1 cord 40 inches

2 cord stops

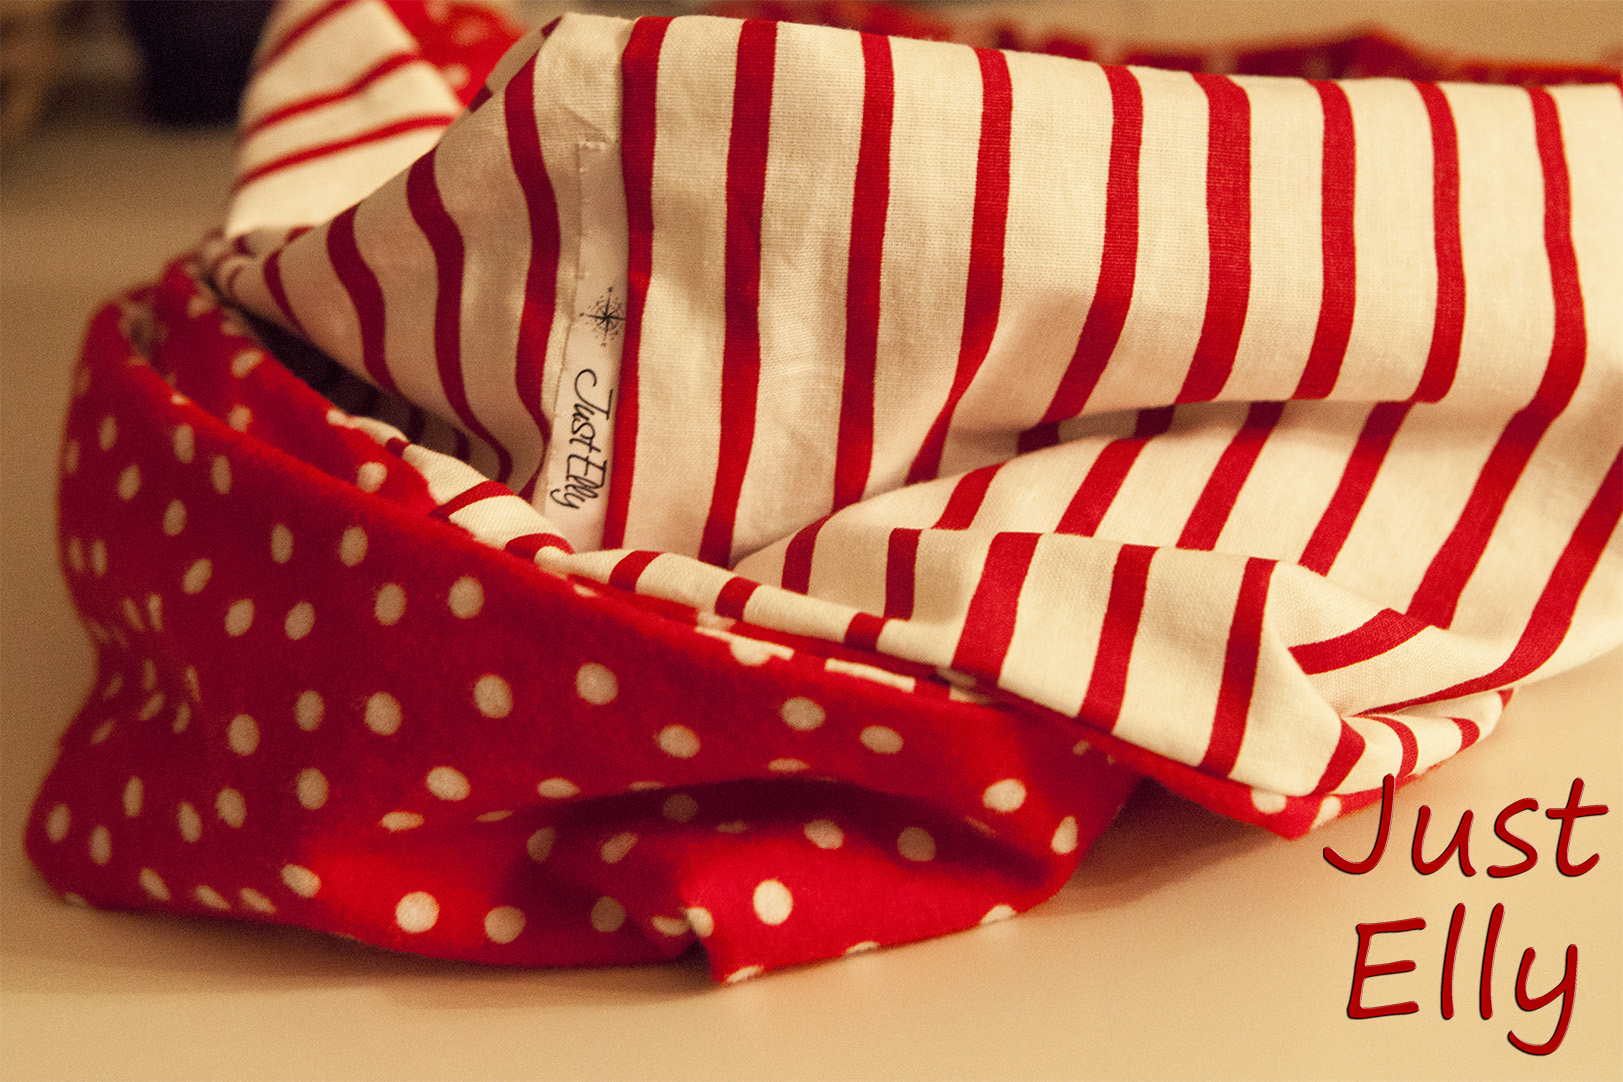
I have chosen a nice flannel with cameras for the pillow.Sonja is an amazing photographer and what better motive I could have bought for her?

First cut the fabric for the pillow,sew the zipper on one of the larger side. (dont buy a zipper about the whole lenghts of the pillow because of the ribbons with the clip buckles.

Then cut the 40 inch ribbon in half.and put the clip buckle on one of it.

Case 7

Lay this ribbon in half like on the picture above and pin it with a needle 4-5 inches from the end of this side. When sewing this side, sew 3-4 time forward and back over the ribbon.

Close both shorter sides of the pillow. ( Open your zipper after this a little. Had a real fight to turn my pillow because I couldnt opened the zipper LOL )

On the last side put the second ribbon (dont fold it this time !!! ) in the the same distance as you did with the first ribbon and close this side.

Case 8

On the picture above you see the pillow with the ribbons, one folded, the other not. Put the other part of your clip buckle on it. Fold the end of this ribbon 3 or 4 times and sew it together. Otherwise your clip buckle will slip and will get lost.

Case 2

your pillow will look like this, when you attach it to a car seat or a bus seat 🙂

It isnt very hygienic to run with your pillow outdoors:Plus Sonja chose a very large pillow. Not so perfect when you will take it on your journey.

Birgid, the dressmaker of my sewing course made the proposal to sew a bag for this pillow. Not for the whole lenghts of the pillow but half of it. So I made the bag big enough to fold the pillow.

AND SHE WAS RIGHT!!!

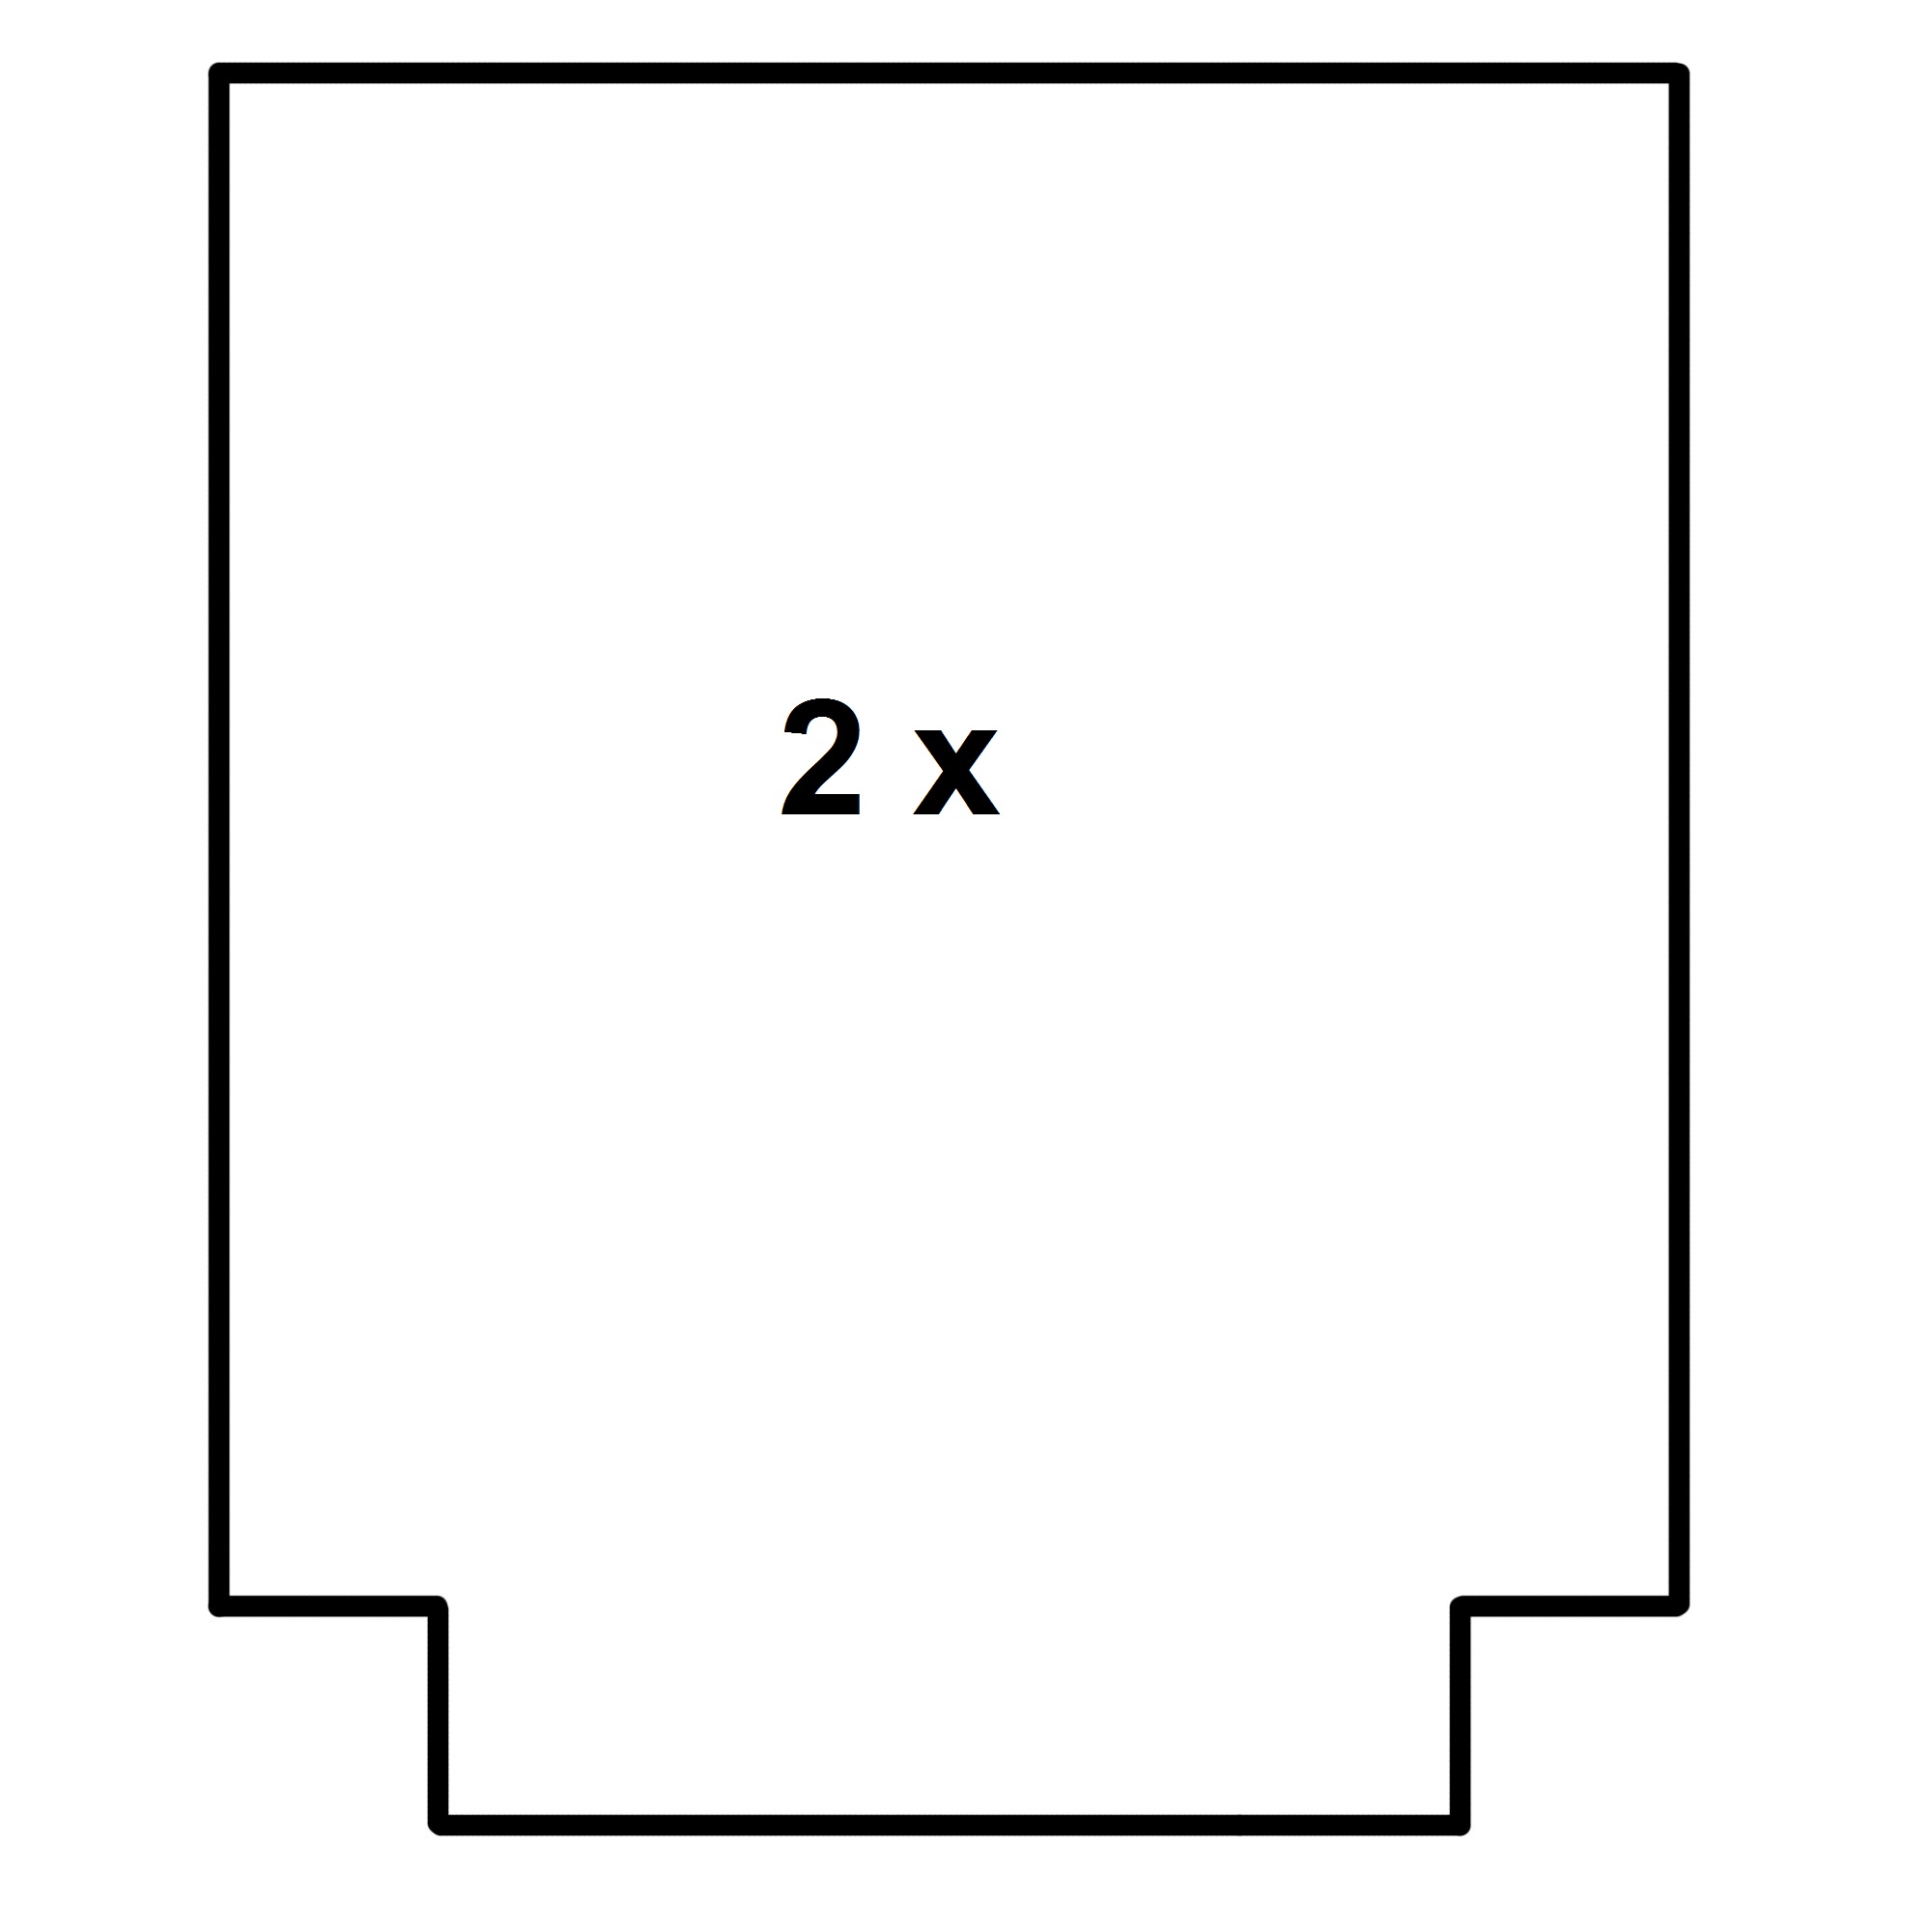
Here comes the bag for your pillow:

Case9

Cut the fabric:  2/3 the length of your pillow and add on each side of the bag 4 inch more then the width of your pillow.

Bag 1

Bag 2

Bag 3

Bag 4

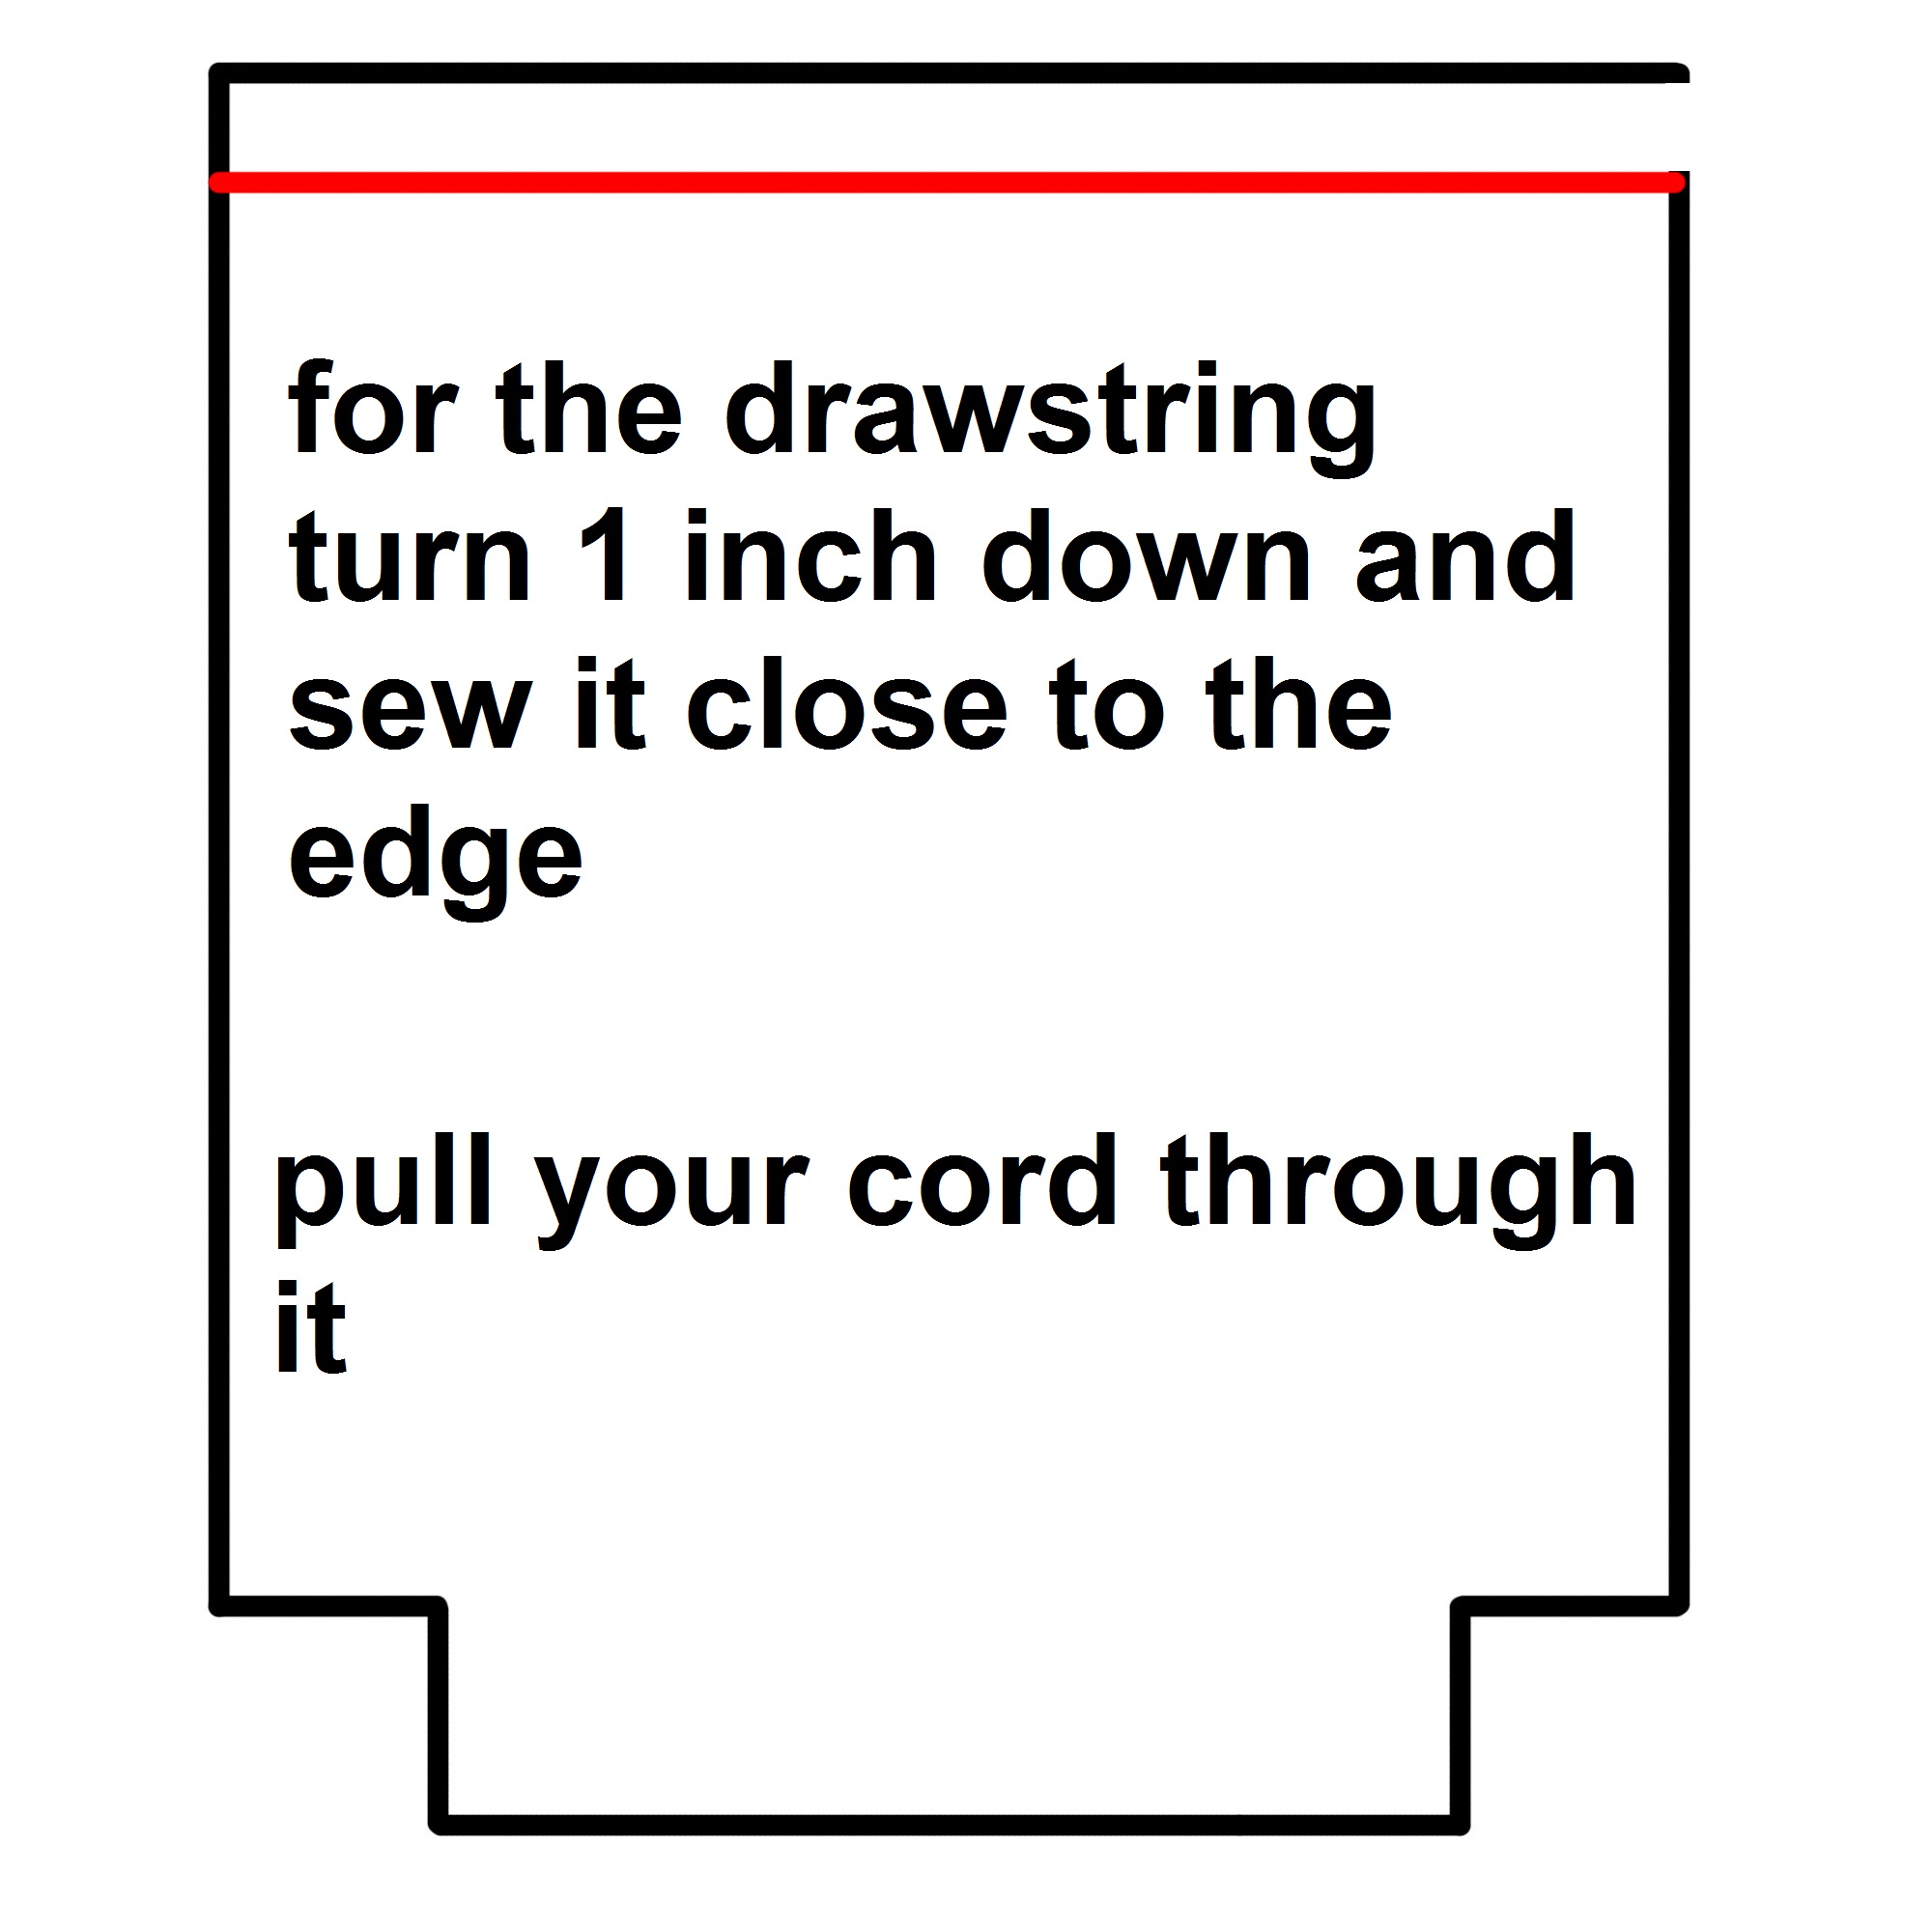
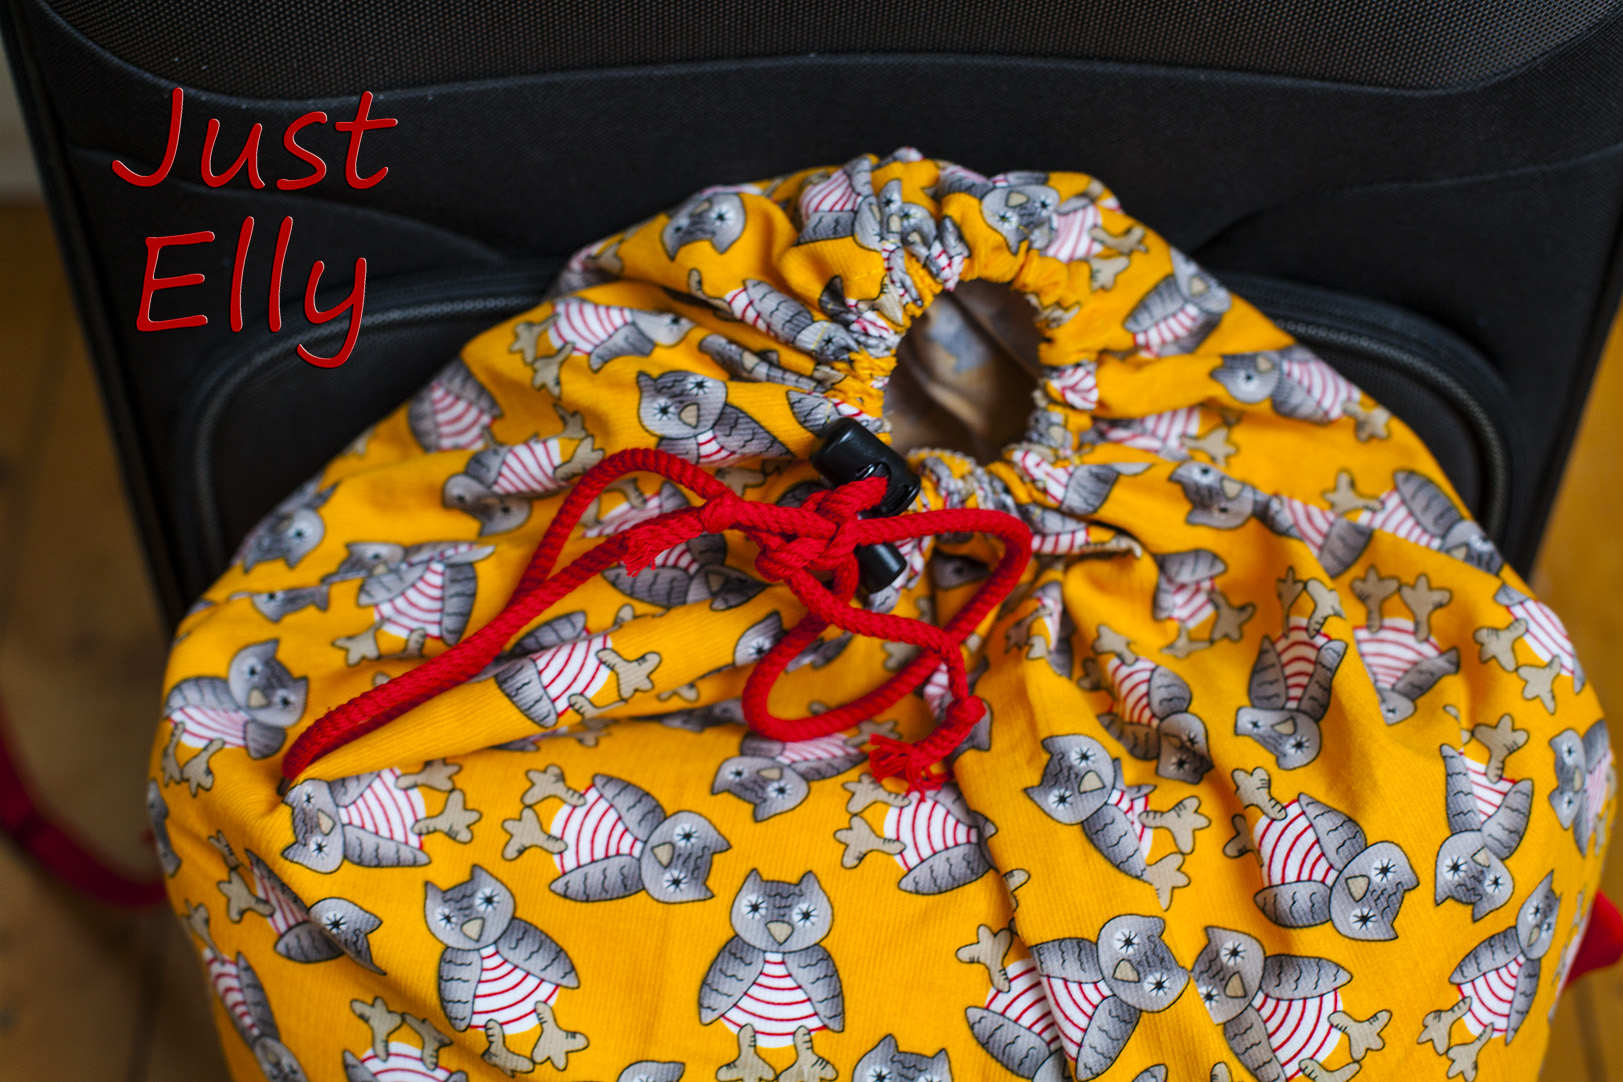
Put the cord stops on your cord.

Fold your pillow and take it into your bag 🙂

Case 5

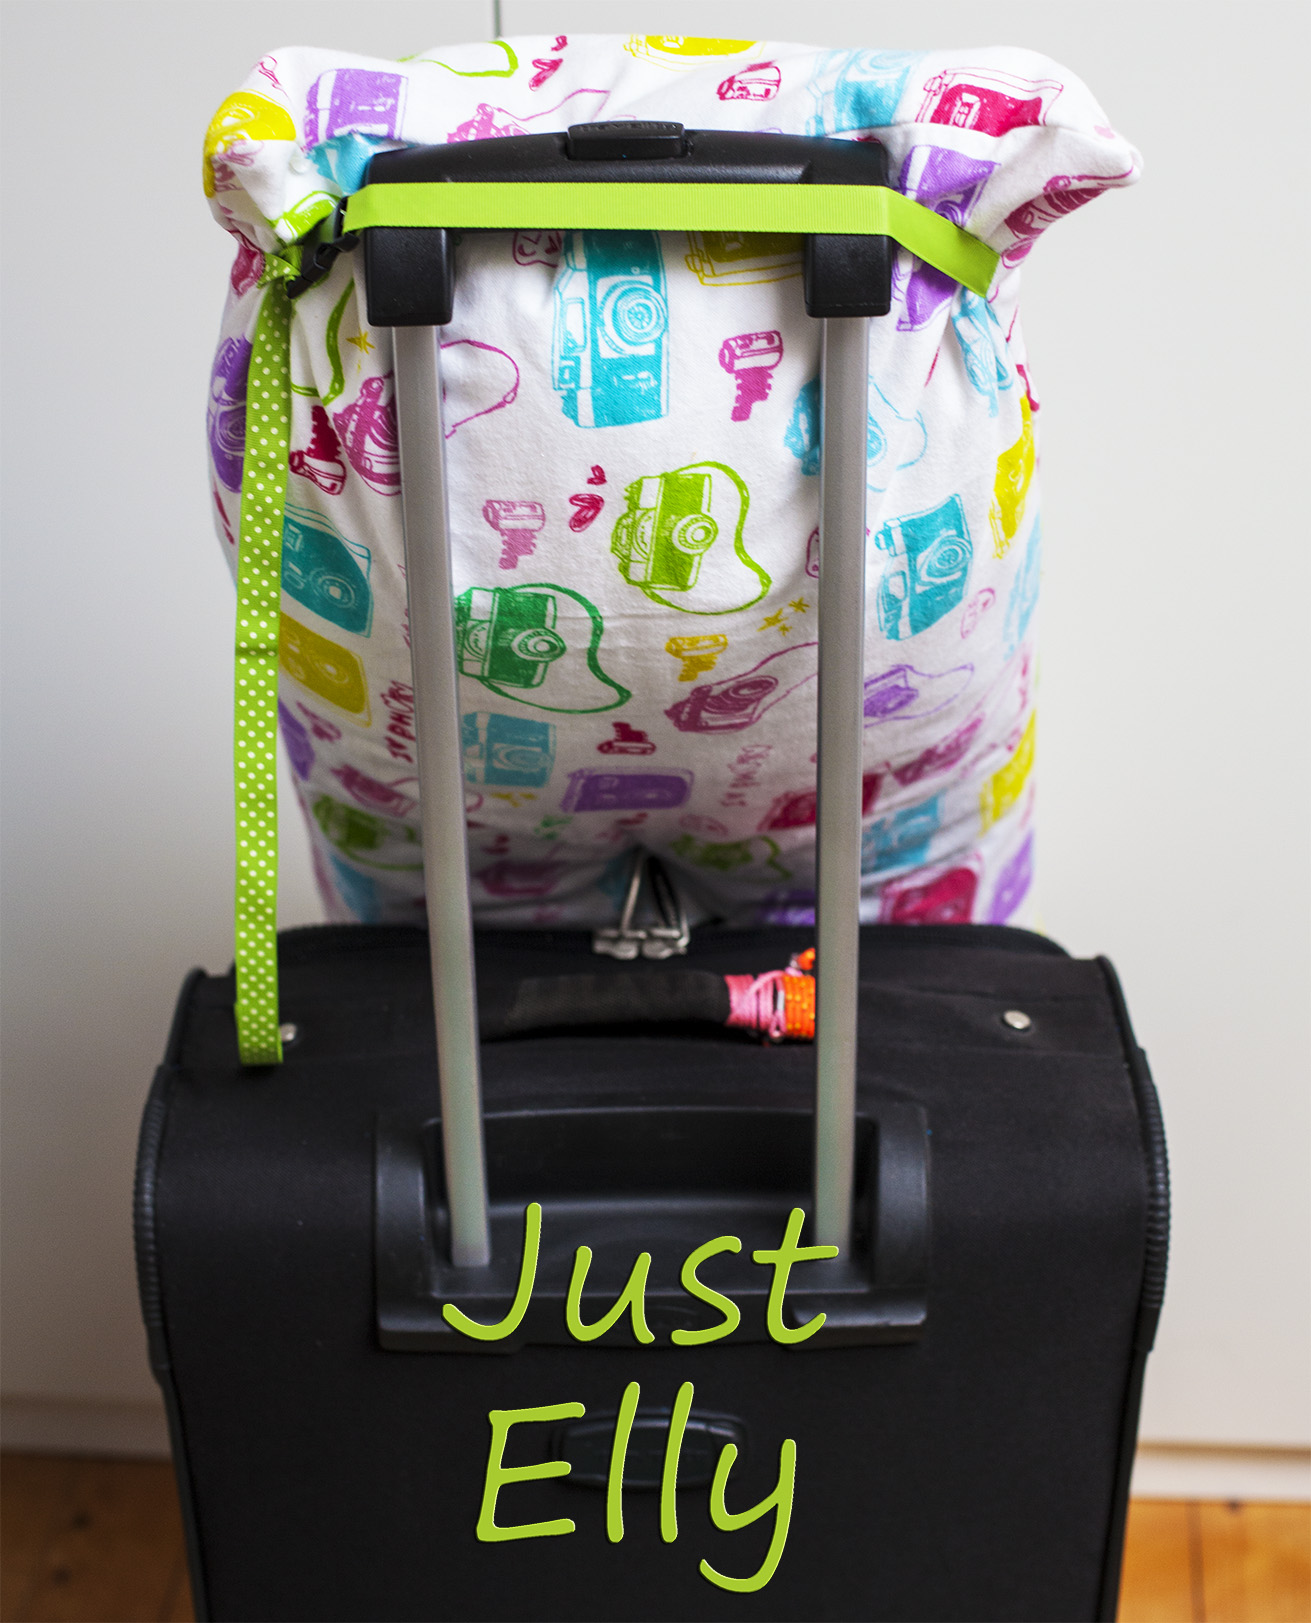
If I would do it again I would take a much larger ribbon below. This bag cant be attach directly to your suitcase because the ribbon is to short.

I also would chose a stronger ribbon for the bag and bigger clip buckles.

This is how it looks like.

But it will work this way too 🙂

Case 6

Merry Christmas and a Happy New Year

XMAS

I didnt blog for some times because I have been sick for weeks.

No energy to work on my shelf, even missed some sewing lessons.

Now I have a few days off. I will using this time to go on with my shelf 🙂

Merry Christmas and a Happy New Year to everyone 🙂 🙂 🙂

Elly