DIY Windbreaker with Dots Dots Dots

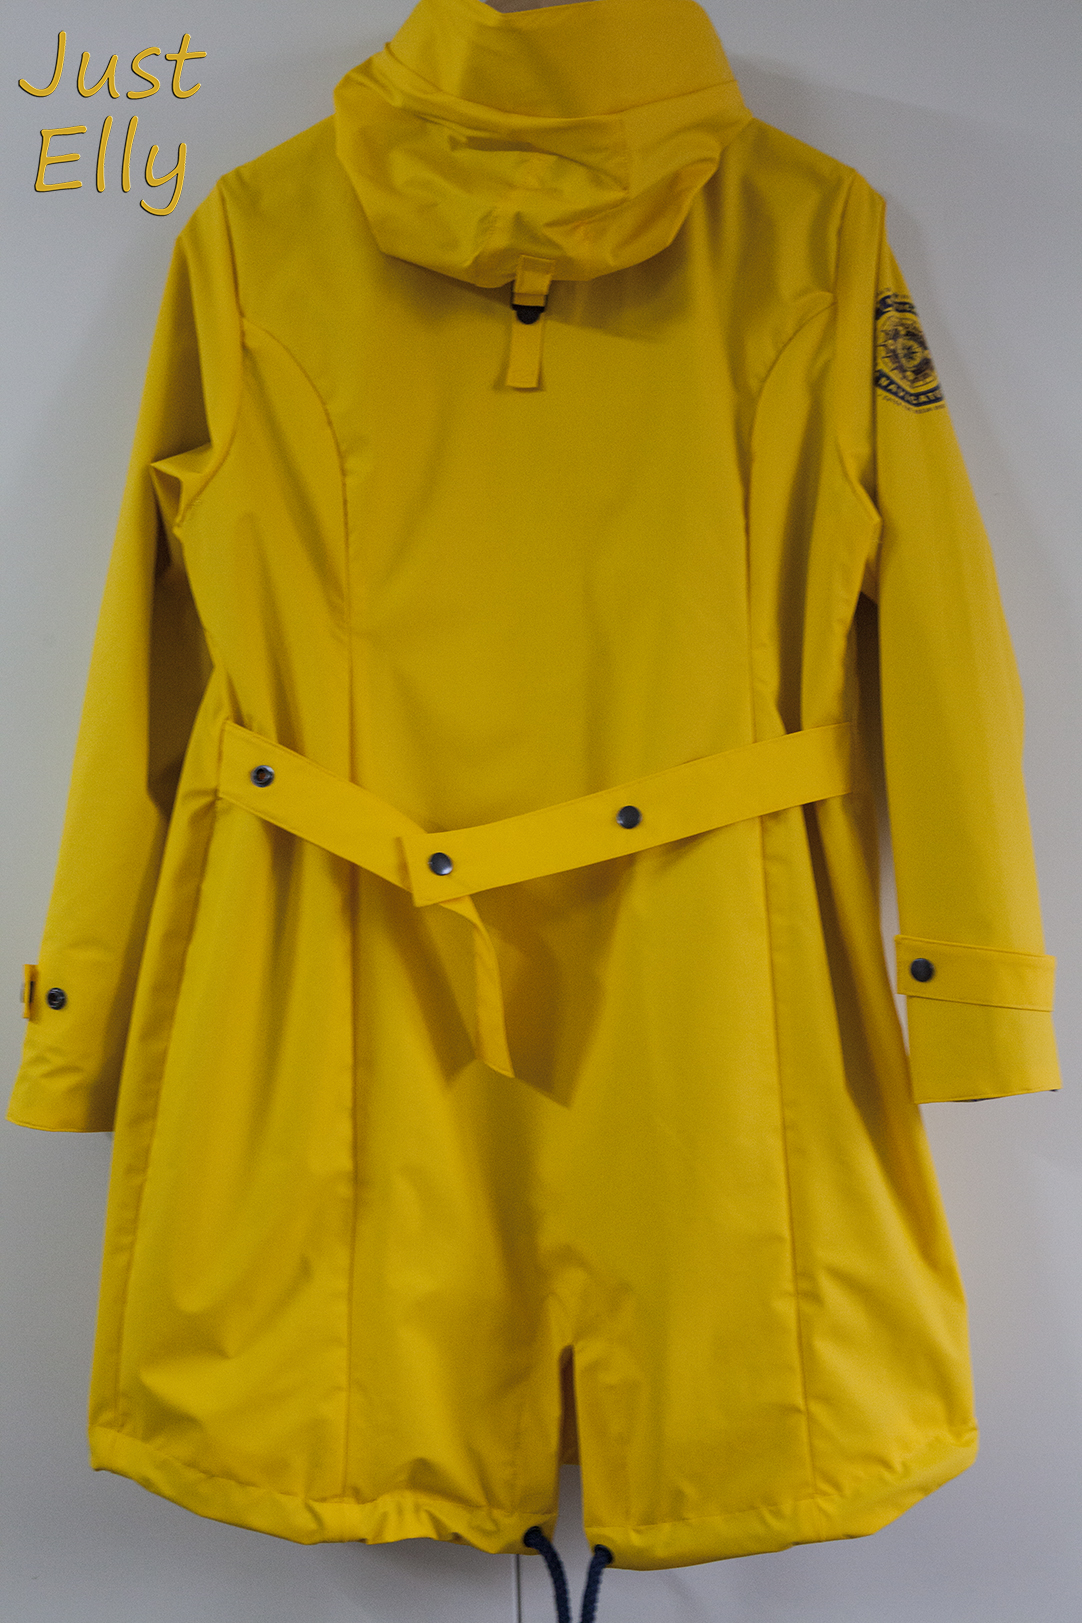
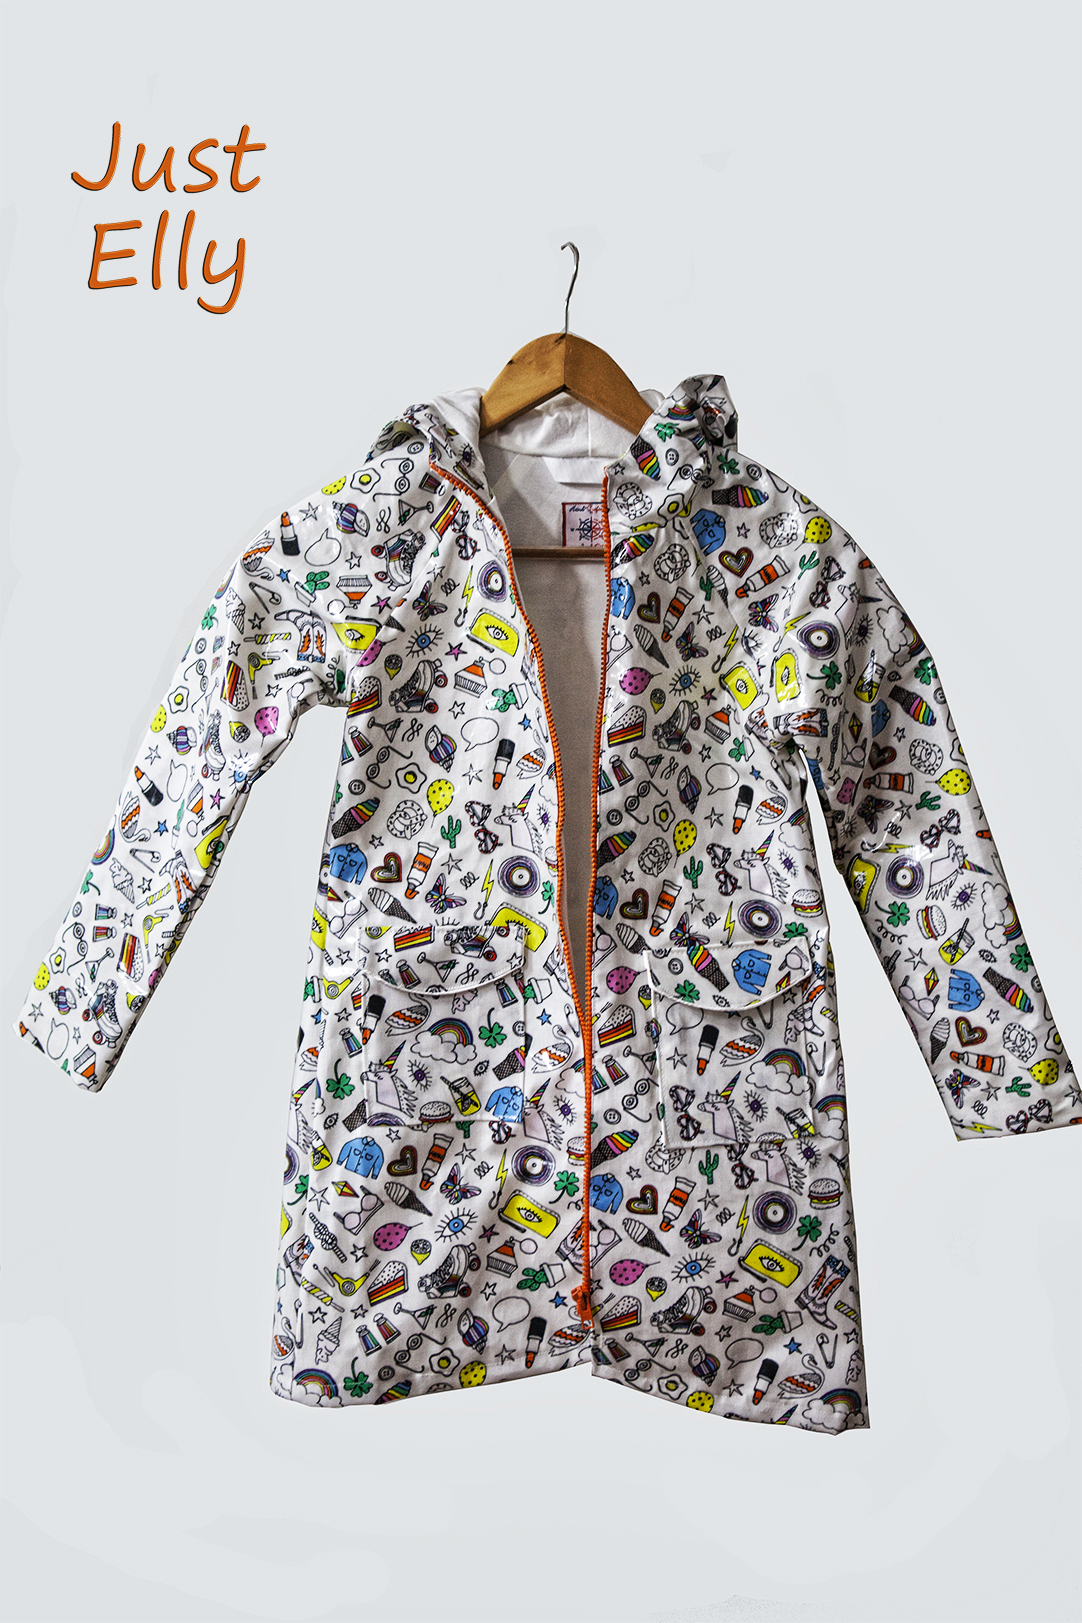
I can hardly believe it. I’ve finally used the laminated fabric I bought in 2014!!!!!. You can see it in the post:

You can not have enough fabric

I actually wanted to sew a raincoat from it. But I thought there wasn’t enough fabric 😦
Apparently I was wrong. The fabric would have been enough. Never mind. There was enough fabric for 2 windbreakers. So I made myself a windbreaker and gave the rest of the fabric to a friend from the course who had also made a windbreaker.
They are similar but not identical.

Here is my latest project ❤

Windbreaker with Dots 01

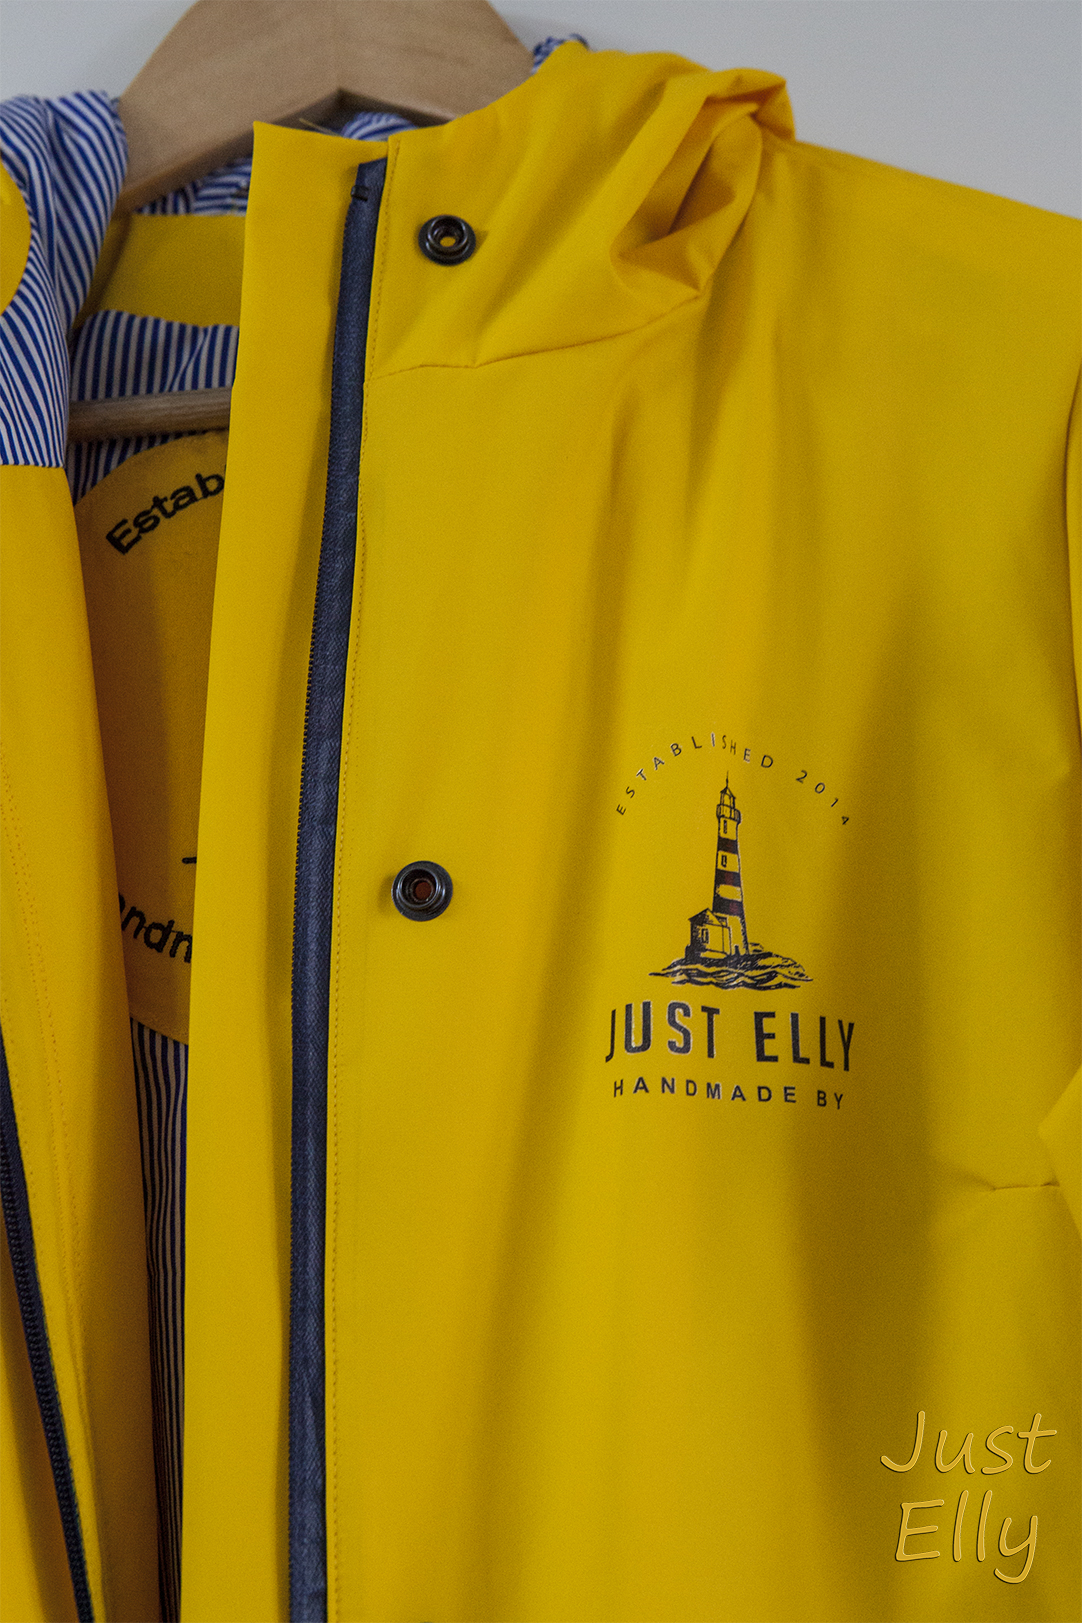
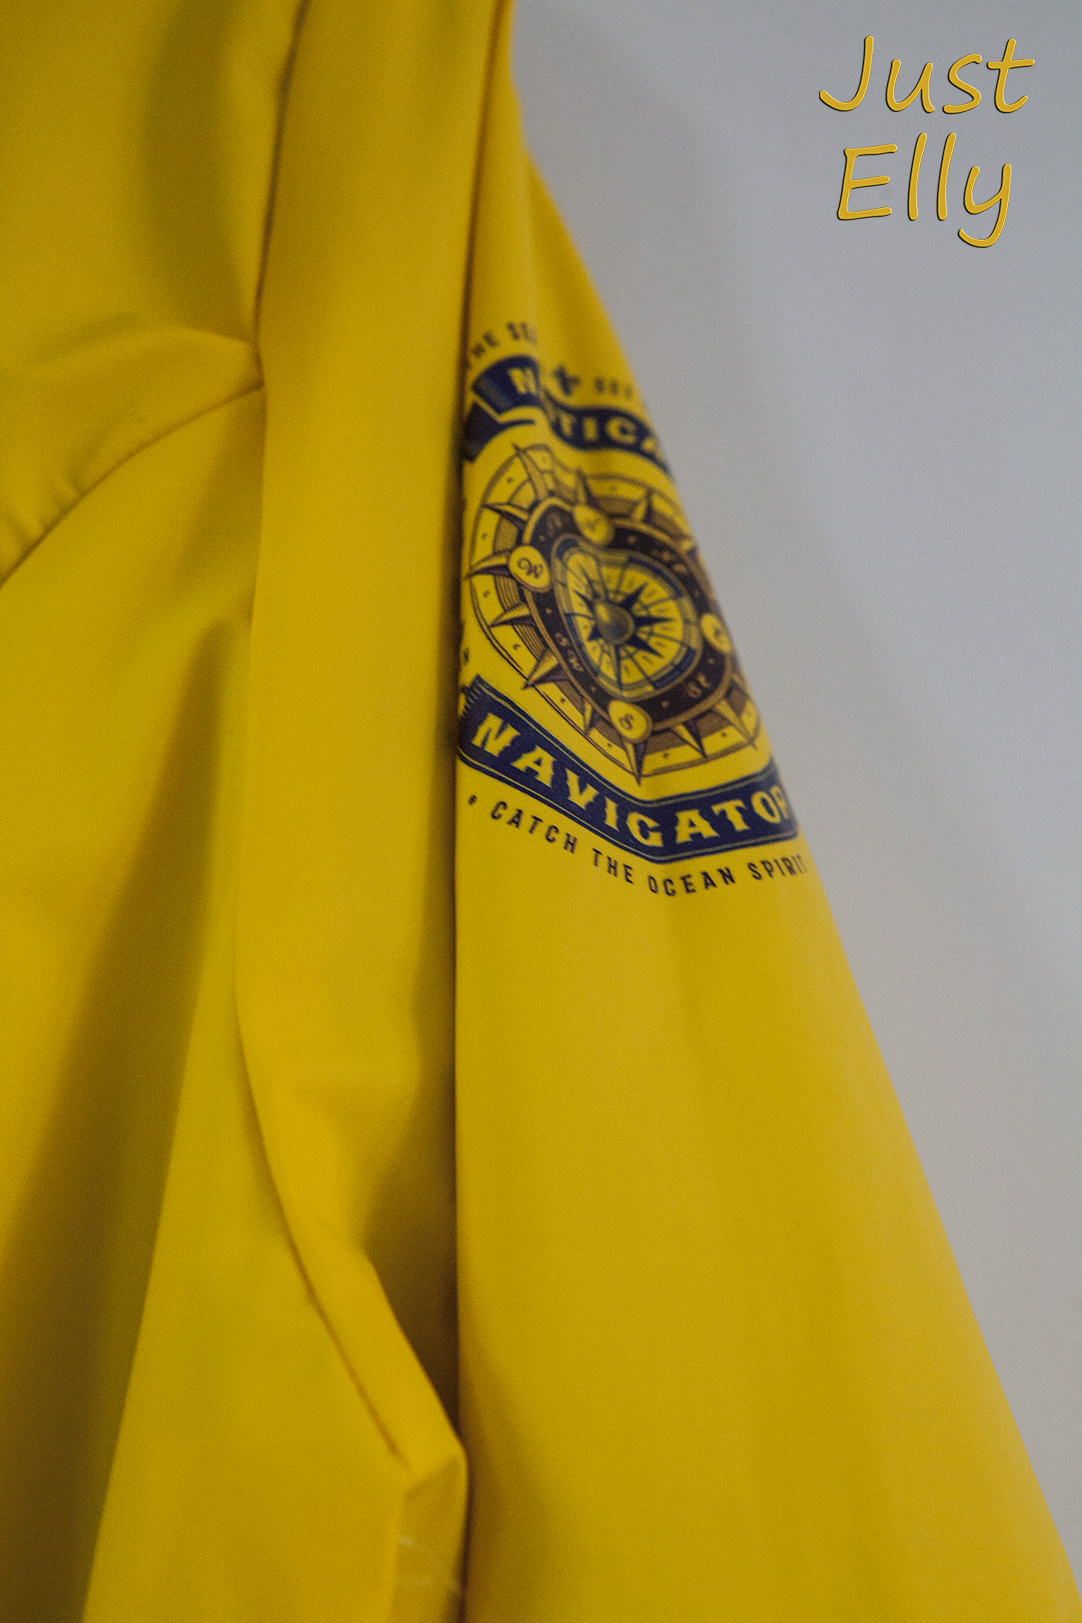
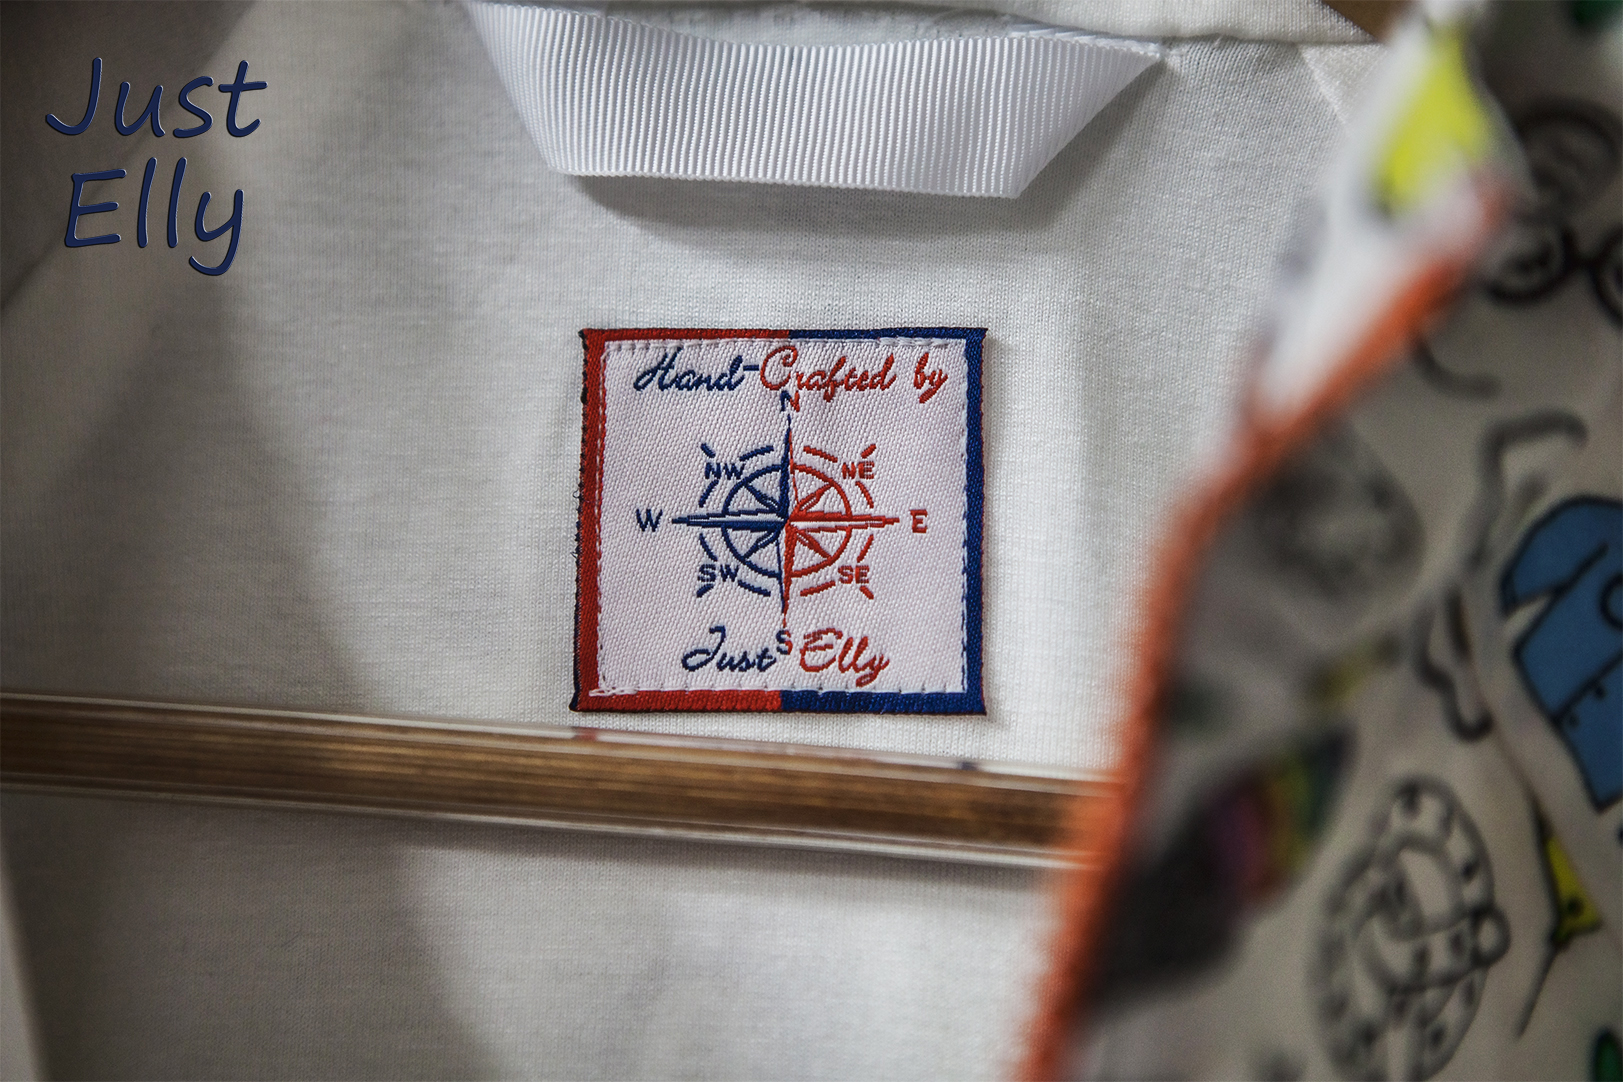
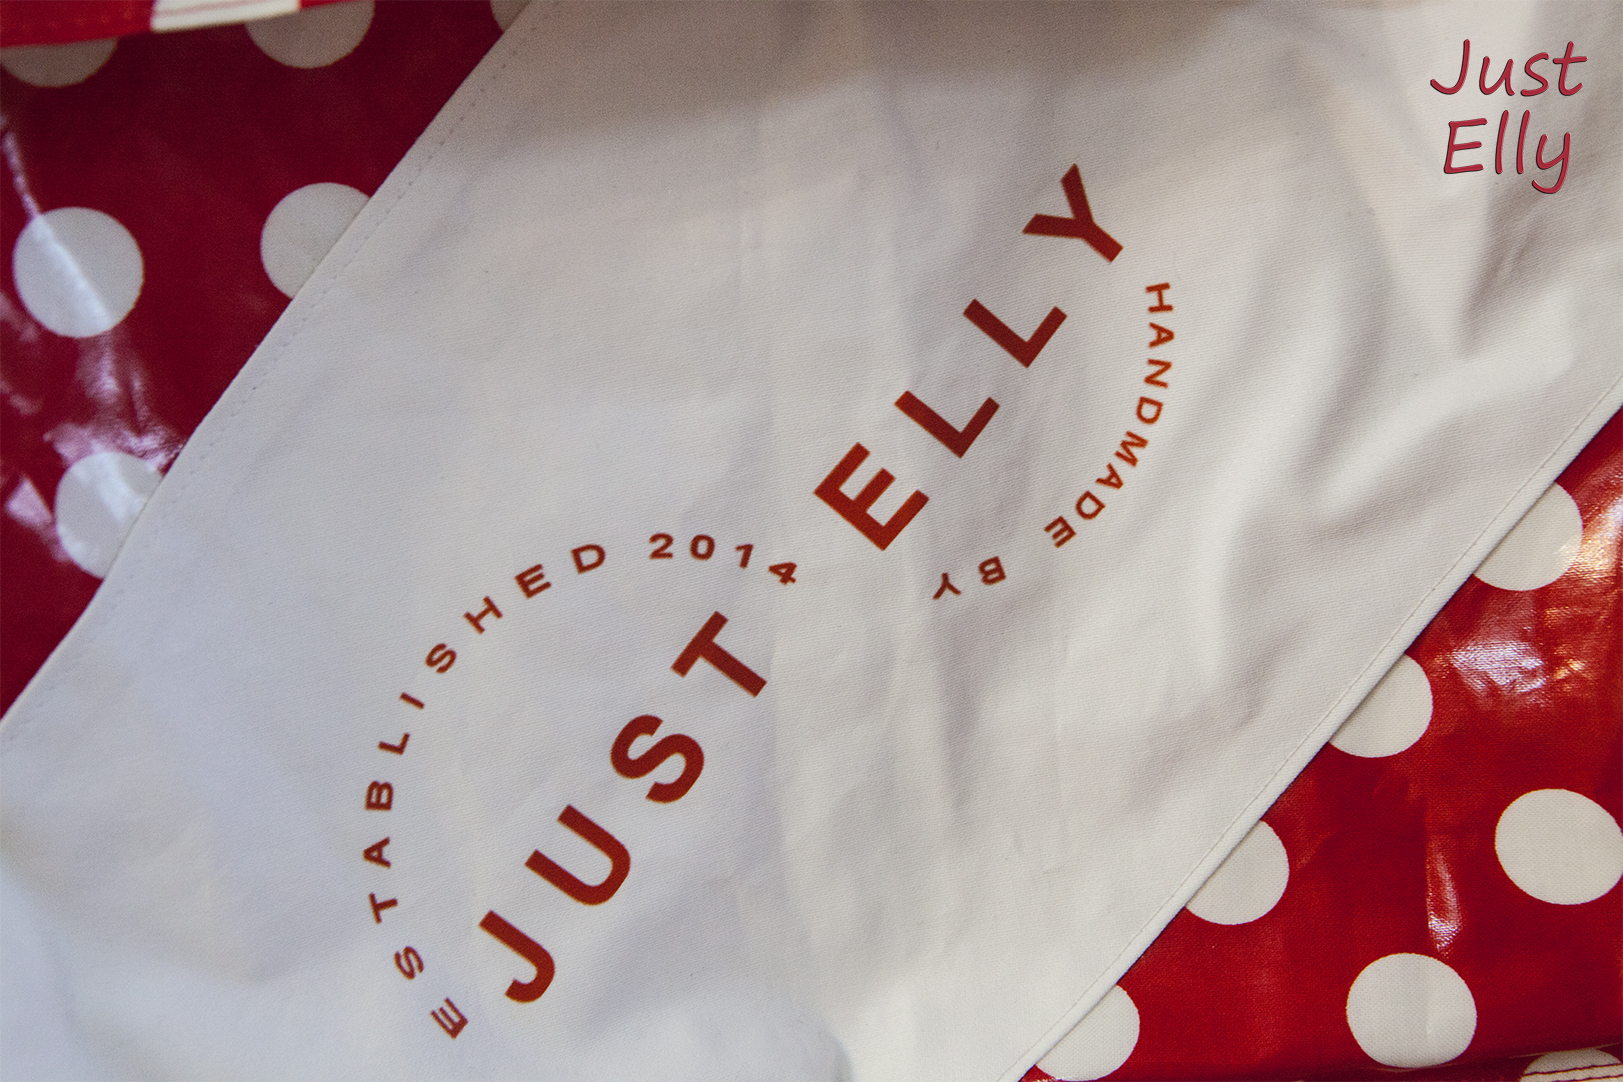
Somehow all my logos have something to do with maritime 😀
That wouldn’t have fitted here. That’s why I designed a new logo and had it printed on the front pocket.

Windbreaker with Dots 02

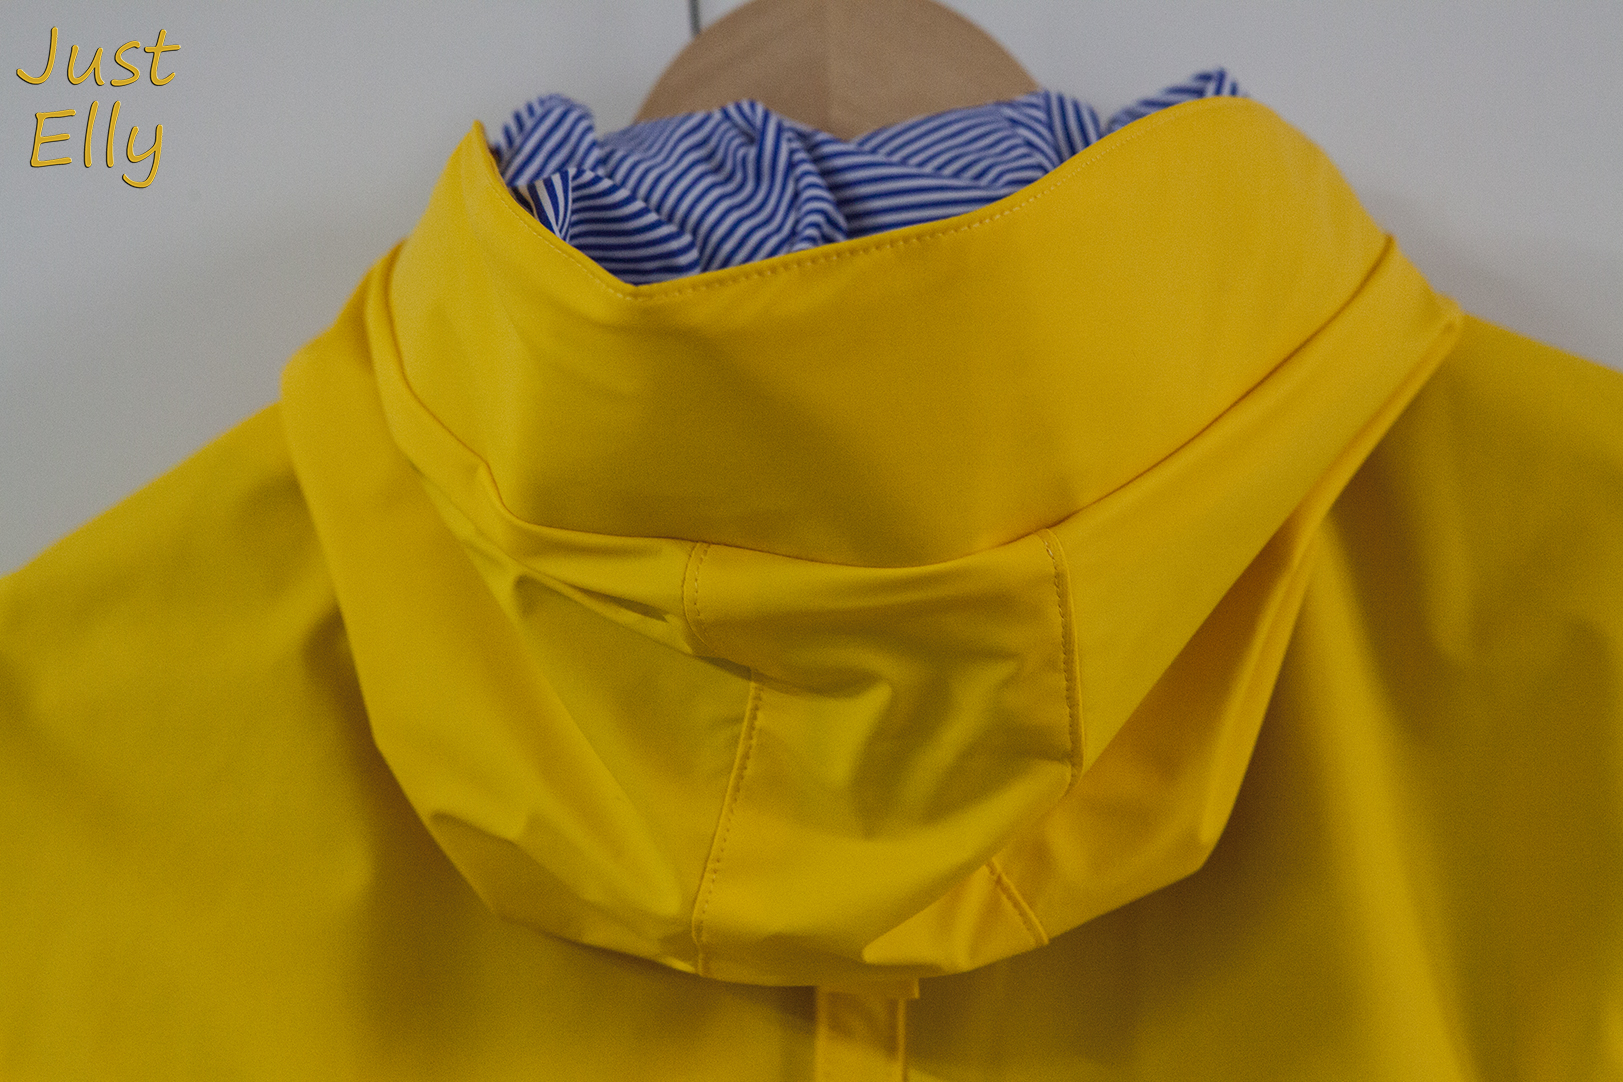
The laminated fabric is very similar to that of my raincoat. That’s why I knew it wouldn’t stretch and wouldn’t slip easily if I tried to pull it over my head.
That’s why I had the idea of sewing the opening on the side of the windbreaker to put it on and take it off. This means you only put one arm through the sleeve and the other arm is closed from the lower cuff to the cuff of the arm with a zipper.
It’s as quick as zipping up a regular jacket ❤

Windbreaker opened:

Windbreaker with Dots 03

Windbreaker closed:

Windbreaker with Dots 04

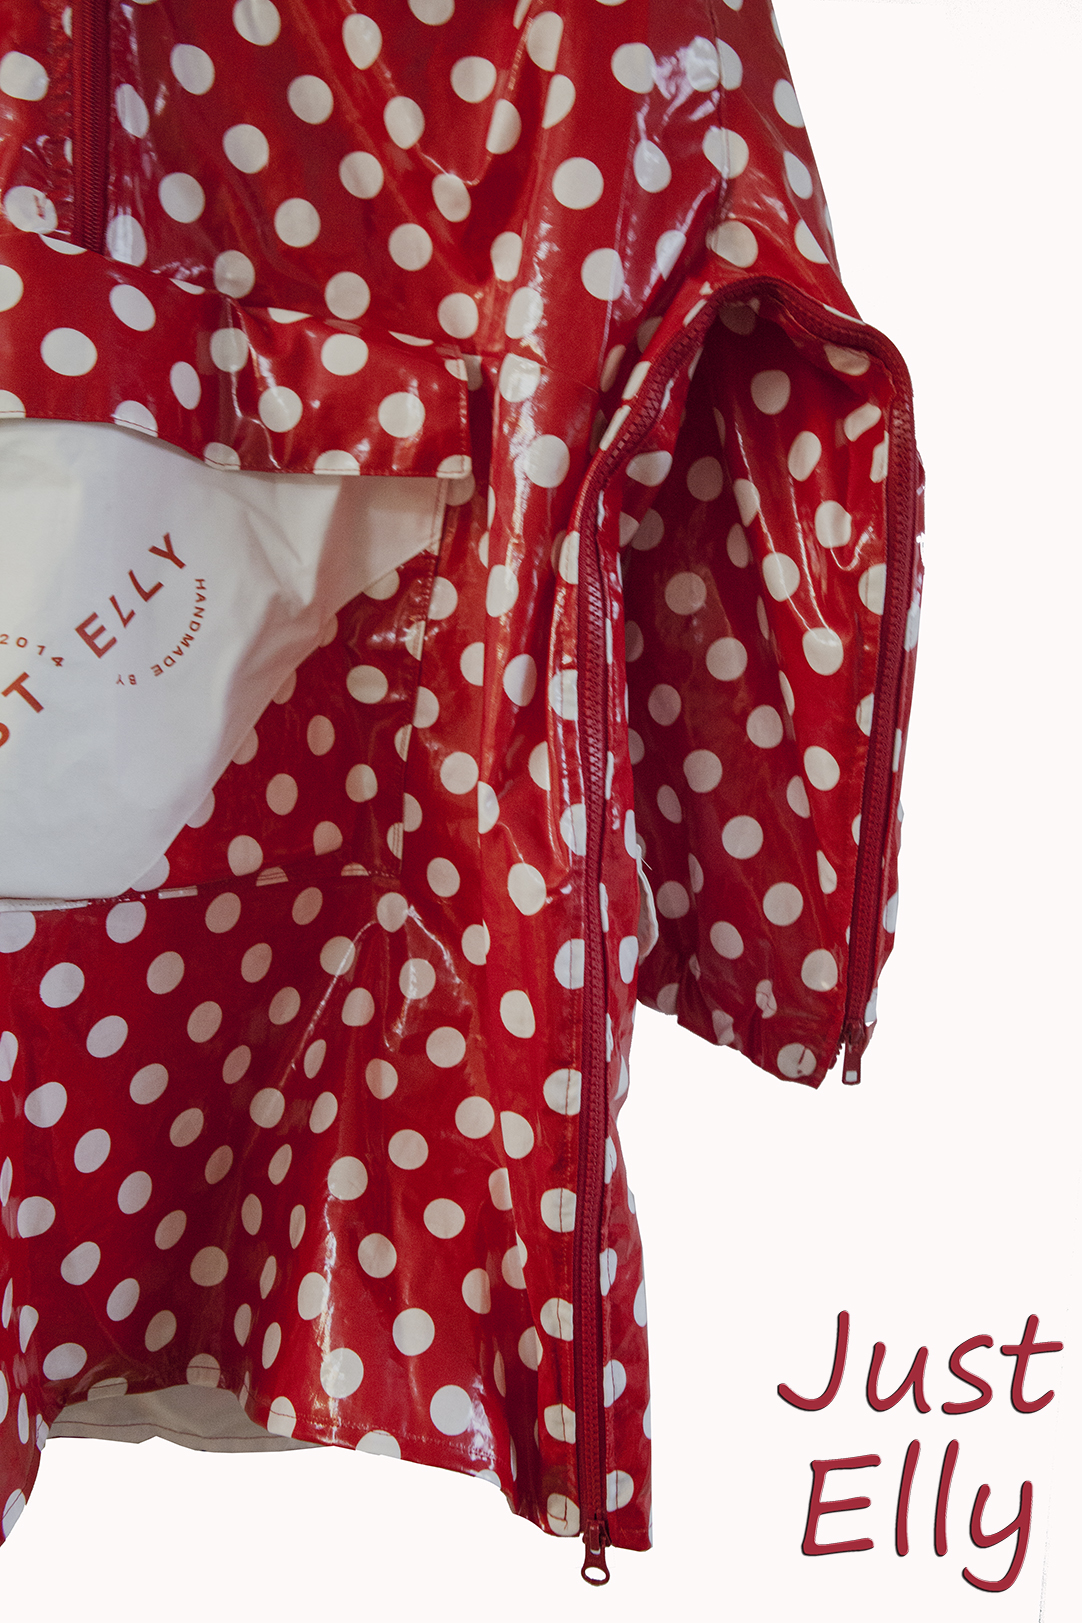
I also sewed a large pocket on the back. As big as the white patch.
This means I can completely do without a handbag or backpack.

Windbreaker with Dots 05

I love the windbreaker, but sewing laminated fabric is so unpleasant. You can’t sew quickly, you can only sew at the slowest speed because the fabric is so badly transported by the machine.

My longest sewing project – A yellow raincoat

Yes, this raincoat was extremely elaborate. I had sewn a coat years ago that also took a long time, but not as long as the raincoat.

Look here at my first coat

https://justelly.com/2017/06/10/my-own-sewing-masterpiece-a-jacket/

I started with the raincoat 2021!!!.

Unfortunately, there was already Corona. My fabric store that offers the sewing classes had to close, open, close, open again.

On top of that, the seamstress who does the sewing classes is already retired, so she was part of the Corona risk group. Therefore, even if the store was open, she did not do the courses for her own safety.

Everyone knows what the situation was.

That’s why it took almost 15 months to get the coat done!

And here’s my new masterpiece 🙂

Raincoat yellow 01

Raincoat yellow 05

If anyone asks if this pattern is available for purchase. It is not 😀

I think I almost drove Moni crazy with my special requests 😀
The original pattern had an elastic band in the waist. Then I came from class one Saturday and saw a woman who had these bands, I don’t know what they’re called, on the back of her coat. I wanted THAT too!

So both sides were opened again so that you can sew these bands in. I find them great and you can also beautifully emphasize the waist if you want that. Plus, through the snaps you have a nice contrast to the yellow fabric.

My hood was also already sewn when I didn’t like it anymore. So it had to be changed. But then it was too big. For this I sewed in a ribbon to change the size. I copied this from my parka. And again a little more contrast on the back thereby

Raincoat yellow 03

Raincoat yellow 04

The same for the sleeves. When I had the bands on the back, I wanted the same on the sleeves. When it’s very windy, I can make the sleeves nice and tight with it, so that no wind comes in.

As you can also see, I have again sewn with stripes. I would not be me if it was completely without stripes or dots or plaid 😀

Raincoat yellow 08

Raincoat yellow 09

I love the finish at the bottom of the coat. With the dark blue band looks really great ❤

Raincoat yellow 06

Before I even started the coat, I knew I wanted this fabric printed. I had the logo on the front made on Etsy, and the image on the sleeve I bought on a graphic site.

Then I took a piece of my fabric plus the two graphics and went with it to a store that prints or embroiders clothing. They should first test if they can do that on this special fabric,

Btw, the year 2014 refers to the fact that I had attended a sewing class for the first time in my life ❤ ❤ ❤ 

As you can see here, it worked. And very well.

Raincoat yellow 02

Raincoat yellow 07

How do you like my latest sewing project?

Small tip if someone also wants to sew a raincoat.
I have taken laminated cotton as a fabric. When you make the visible seams on this yellow fabric, always select only the slowest sewing speed!!! Only then will the stitches be somewhat even. The reason is that the fabric is not slippery, but still not evenly transported if you sew too fast.


DIY A cute Kids rain coat

Last year I saw a children’s coat in “my” fabric shop. Sellers sometimes sew clothes so you can see how a fabric might look dressed. The coat was so cute.

When I saw the coat, I immediately thought of Miss M.
Unfortunately I didn’t like the fabric and didn’t find anything suitable in the next months. Until a month ago!!!

I found a totally cute laminated cotton fabric.

Originally I wanted to sew a coat for fall / winter. But this fabric isn’t warm enough for that.
So I decided on a raincoat that was finished yesterday and I love it ❤ ❤ ❤

Rain coat Front

Rain coat hat

When I started to learn how to sew I got printed badges. I still like the motive very much but I wanted something new 🙂
That’s why I got 2 woven badges this time. Here’s my first one. I just love it ❤

Rain coat with new label