My first apron

I bought  patterns from Burda Style 2 weeks ago. I wanted to make special curtains I have seen on the picture from this pattern. Besides my curtain there has been a pattern for an apron.

No, I dont wear aprons and I dont own one.But my best friend does 🙂

We will meet today. I have to give her the christmas gift (a bought one) . Why dont give a special self made gift too?

I startet yesterday evening and worked till 4 am. Yes, I’m not the fastest sewer so far, but hey, I’m still a beginner. I checked my fabrics, and chose 2 different cottons, same pattern but different colors.

Here is my apron:

_MG_9803

_MG_9806

I’m damn proud of it. I love the colors and the compass logo makes it more special hihi

Merry Christmas and a Happy New Year

XMAS

I didnt blog for some times because I have been sick for weeks.

No energy to work on my shelf, even missed some sewing lessons.

Now I have a few days off. I will using this time to go on with my shelf 🙂

Merry Christmas and a Happy New Year to everyone 🙂 🙂 🙂

Elly

Am I a fabric junkie?

I had my third sewing lesson, and no, I cant show pictures of it. First its not ready and second, it will be a gift …

So I will show what I bought the last weeks since my sewing course startet 🙂

After my first lesson I checked my tons of fabric and decided to remove some of the fabric – with other words I gave it to a friend. It was way to much of the same style. Would you like to have a lot of blouse in same colors, stripes? I wont either !!!

I gave away nearly one third of the fabric I had.

But it hasnt been me if I didnt filled my fabric shelf again hehe.

But this time I didnt only bought what I liked. This time I thought about what I will sew when I’m better with the maschine and then I bought the fabric.

Fabric 2

the left fabric with my favorite nautical theme will get a shirt with white arms.

The fabric in the middle will get little bags for christmas. Doesnt it look a little like velvet? Its 100% cotton

the fabric on the right side is flannel and will be part of a sweatshirt

Fabric 3

I couldnt resist this fabric. Its nearly the same pattern as my chucks. I got 4 yards of it. I will make a jacket and a backpack  out of it

Fabric 4

I will make some sweatshirts. On the inside with flannel like the one on this picture. And yes, this will get really warm sweatshirts. If you would freeze all the time like I do you would do the same. The nautical fabric will get a jacket.

Look what I found on the internet !!!! Fabrics like photos !!!

Fabric 5

OK, shame on me. I dont know what to do with the fabric that looks like the sky. But the water fabric will be part of my decoration. It will be sooooooooo cool to have this as a tablecloth and some nautical deco on it.

Fabric 6

Yes I know. Easter is far far away. But the gras fabric will get a tablecloth too. The straw fabric will get little baskets. What do you think when I put some colored eggs into the baskets? I’m sure it will look great.

Fabric 1

look what I found last week in the swedish store? This fabric is huge !!!!

Over 2 yards in lenght and over 1.5 yards in width. This will get one curtain. I wont cut it in the middle. So it has to be as a whole. I dont think its so bad to close the curtain only from one side. Hey I will only use it in advent 🙂

Next saturday when I’m done with the gift, I will start with my first sweatshirt YEAHHHHH

Soon it will be cold outside  and I can wear my very first selfmade sweatshirt

My second sewing course day

I had my next lesson. This saturday I learned to sew a zipper

I made a pillow for my god child. She loves penguins, owls, foxes

Few months ago I found a beautyful penguin fabric on Ebay and my first thought has been its a must have for Sonja.

I choosed an orange zipper, because its the color of the feet and the pecker.

The teacher said its called invisible zipper. And she is right. If the zipper is closed, you cant see it anymore.

I also worked the first time with an overlock. And felt in love !!!! LOL

An overlock is now on my wishlist.. Its so easy to work with an overlock.

I always wondered about the stitches on t-shirts and sweatshirts. Now I know how they are made.

Today I got my first sewing “job” hehehe

A friend wants a  new zipper on her favorite bed linen. I will get payed with a cake.

3

1 2

Isnt this fabric cute???

Do you see my work with the overlock? I Love It !!!

Start to pimp my sewing shelf Part 2 – The first 2 doors

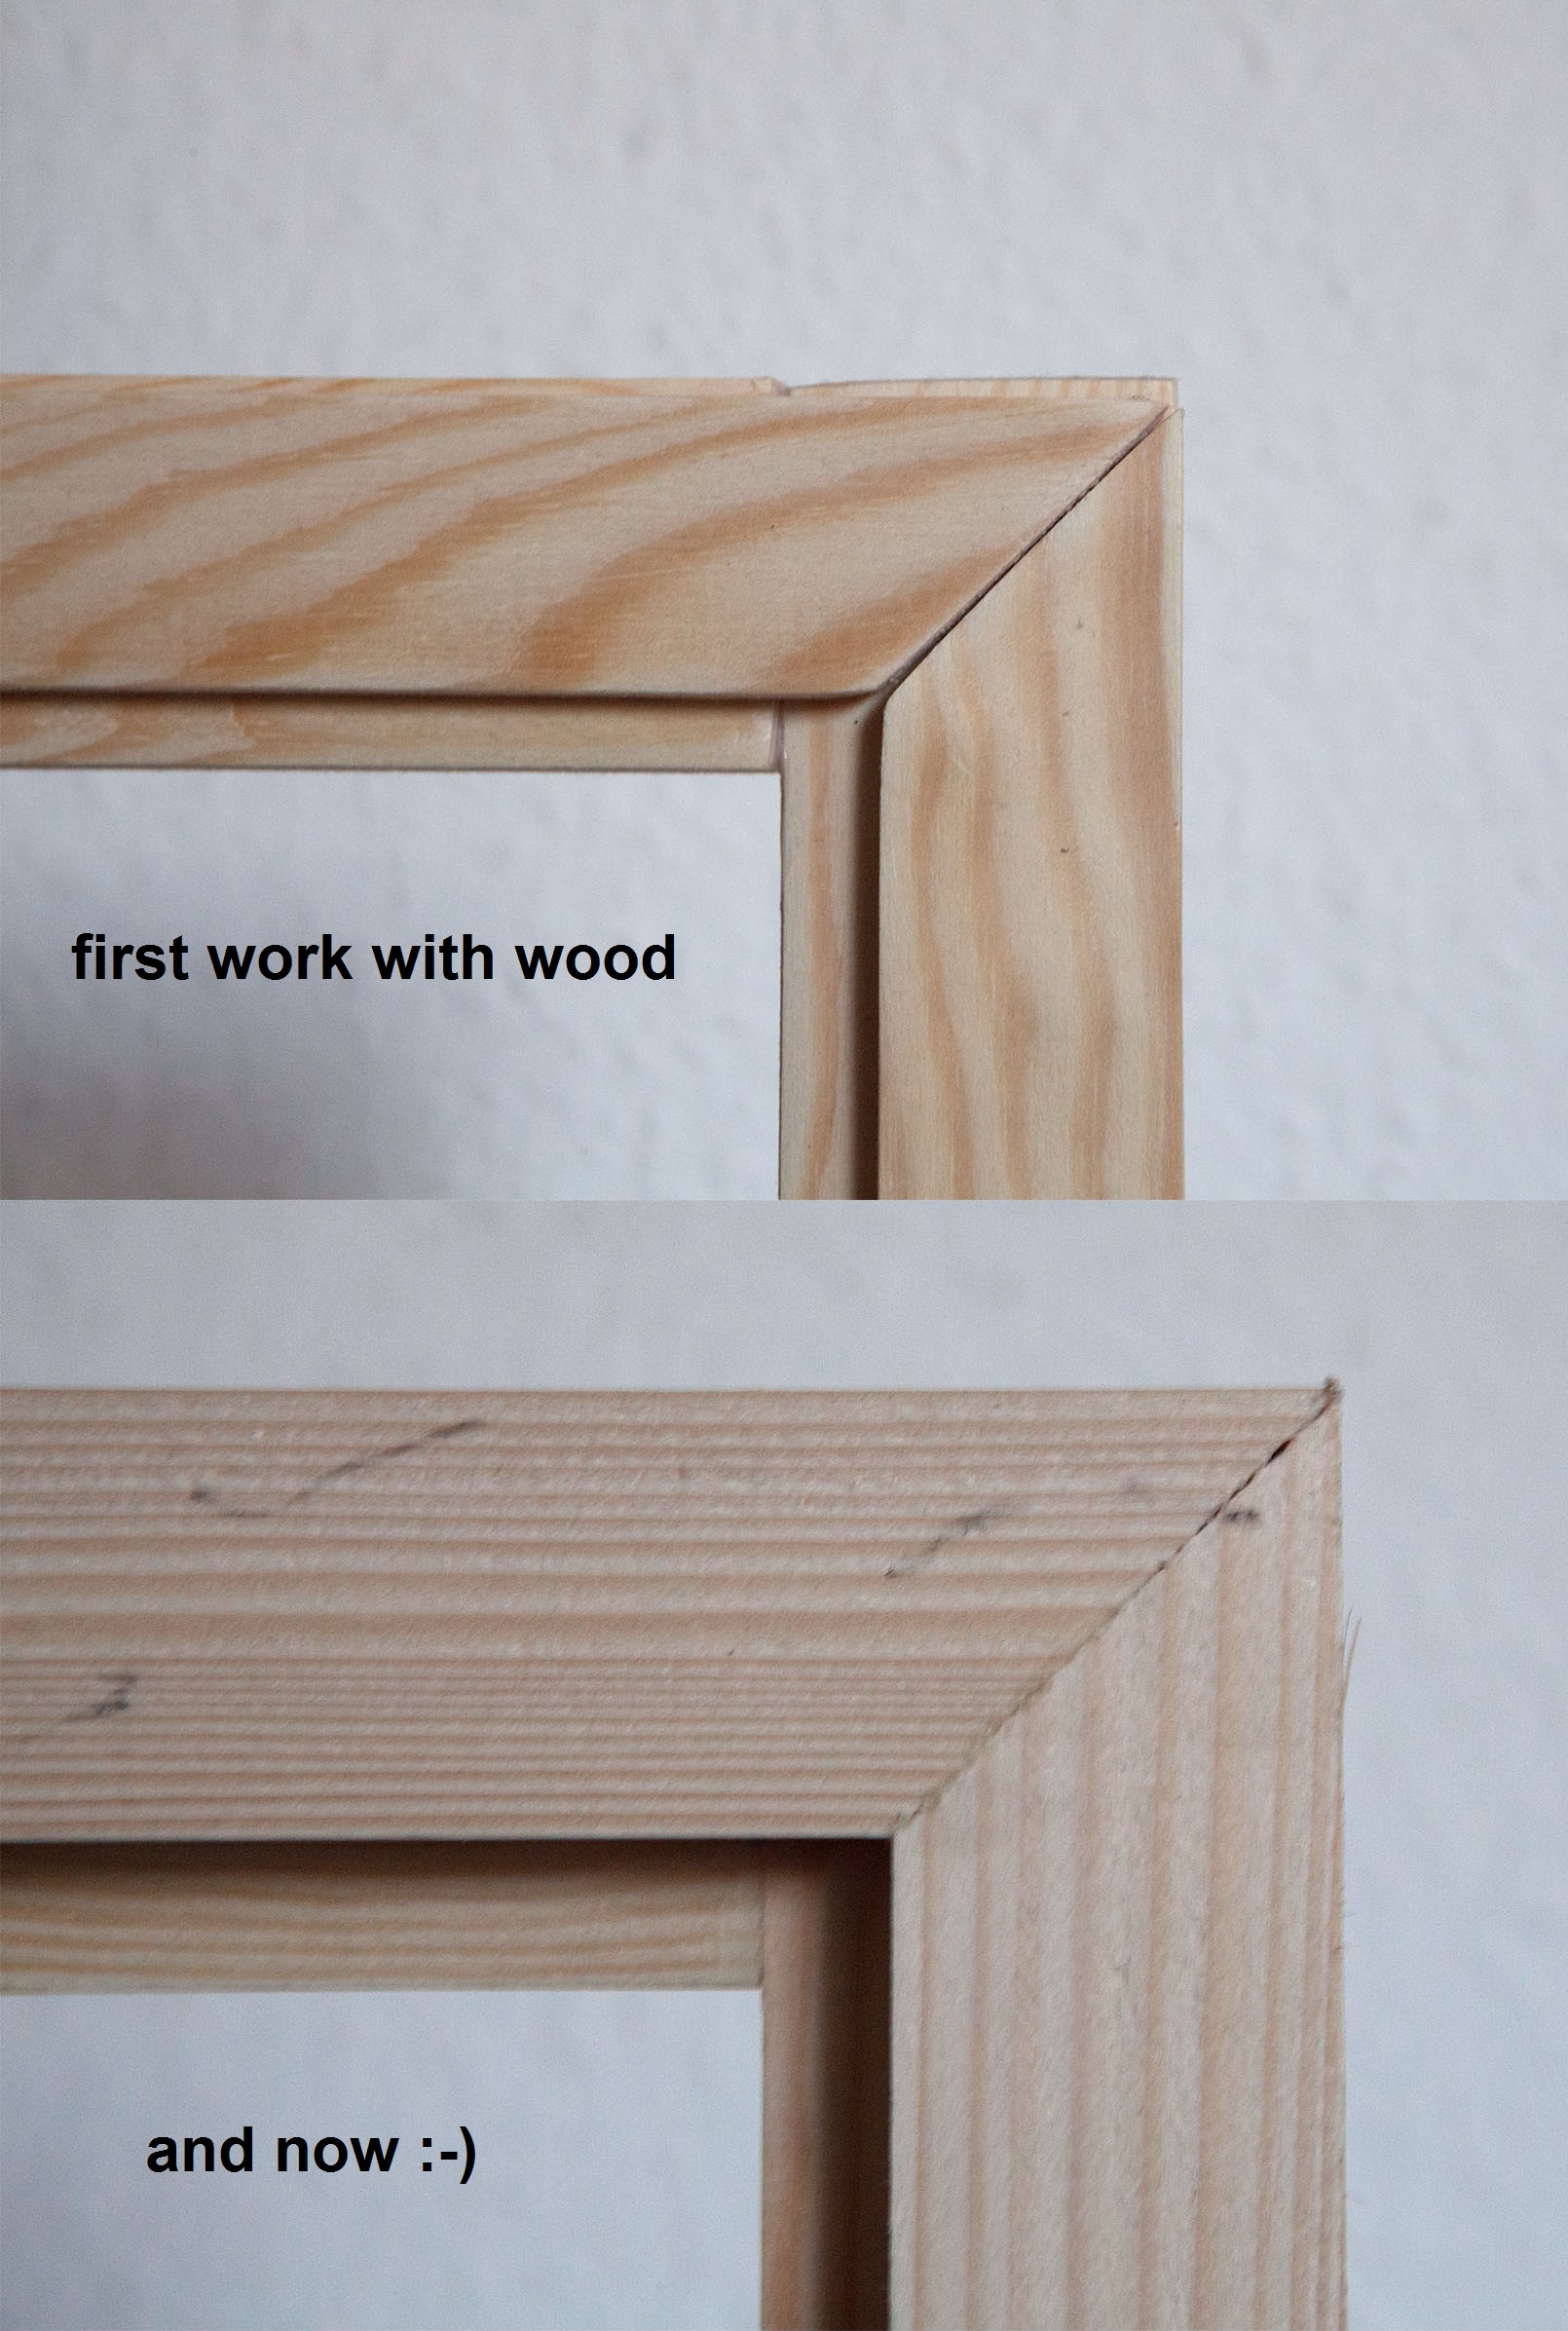
Yes, even if my sewing course startet, I’m still working on my shelf 🙂

I wish I could practice what I learned the last 2 saturdays with my sewing course, but my shelf wont do the pimp by itself LOL

Here is a picture of one of the doors. I will make 8 doors in 4 different styles.This is the first of them. I have to grind and paint these 2 doors, but the most wood work is done

door 1

As good as I can, I try to explain what I used and what I did.

But as a beginner with wood working I’m not sure if the way I did this is circuitous or not. Maybe there is an easier, faster way to do this work, but I dont know it.

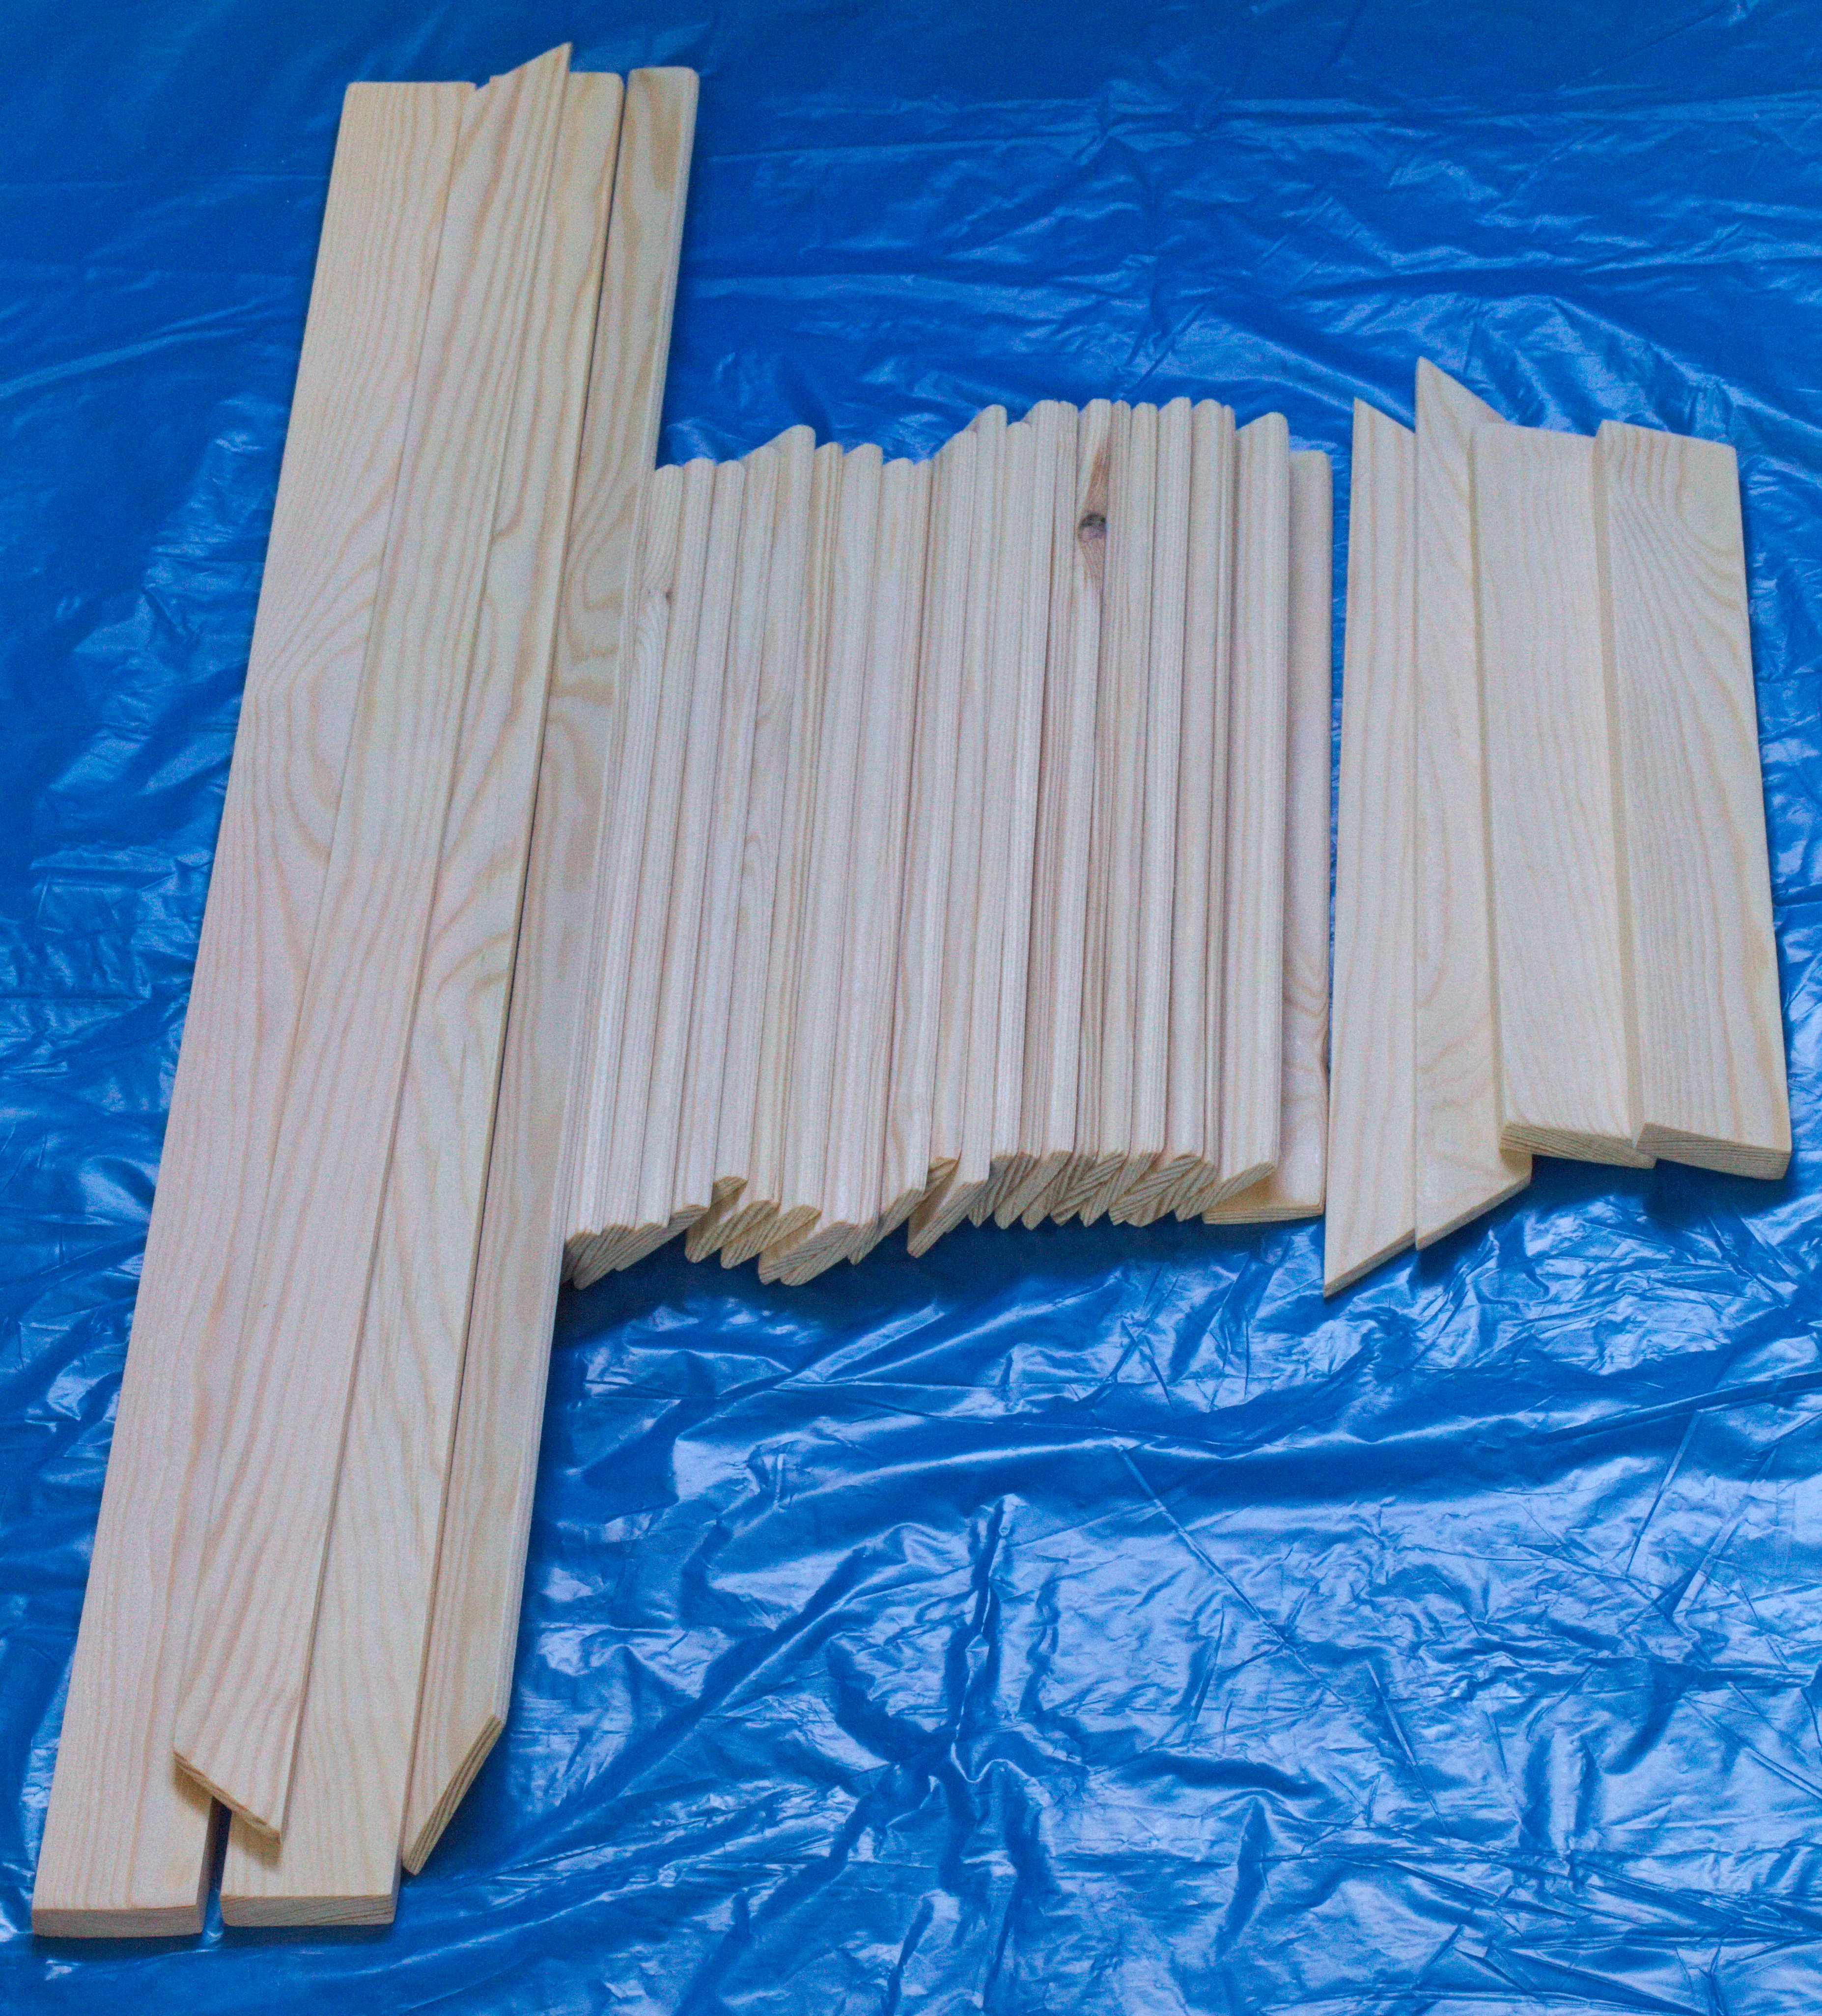
Before I finished this door I tried laths with different widths and different thicknesses.

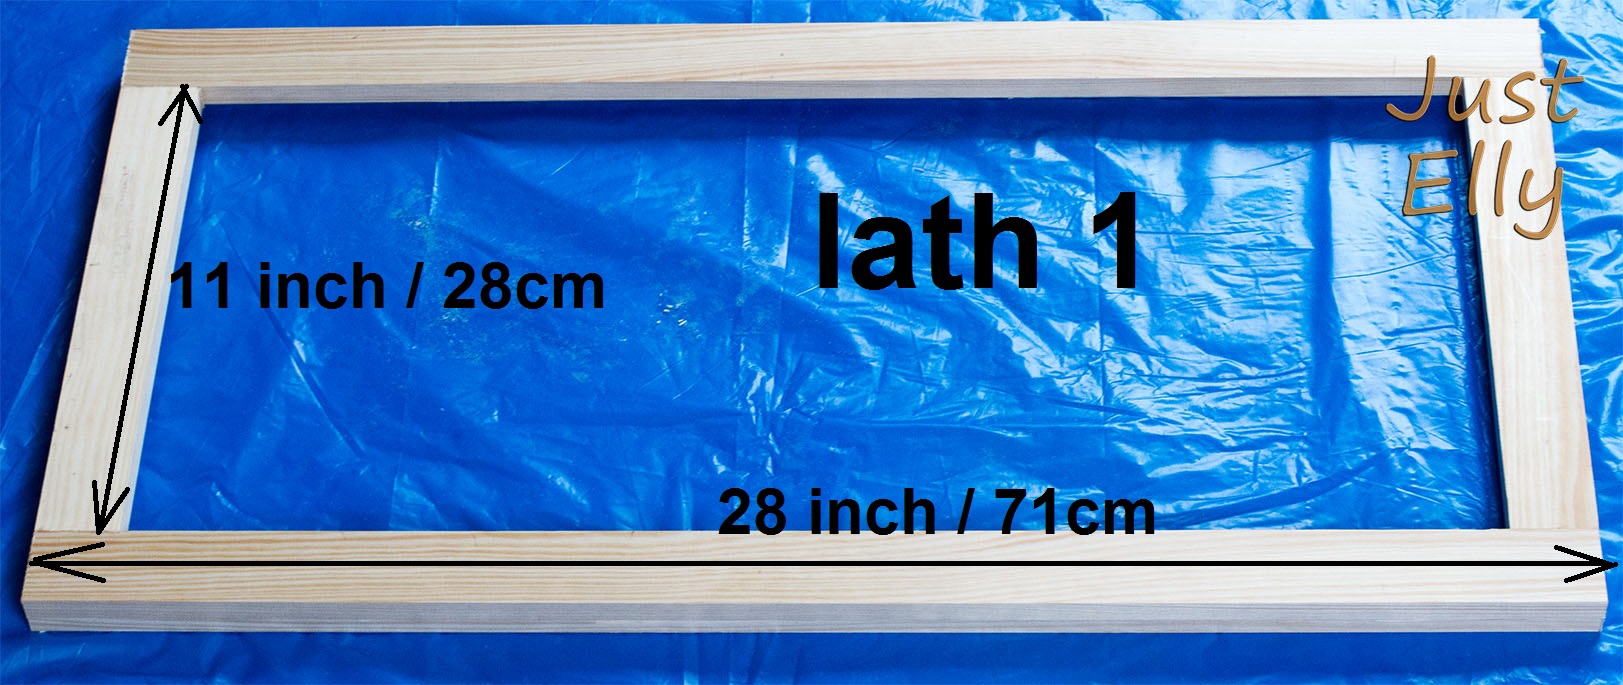
This is what I used at the end

Door 5

Door 6

lath 1

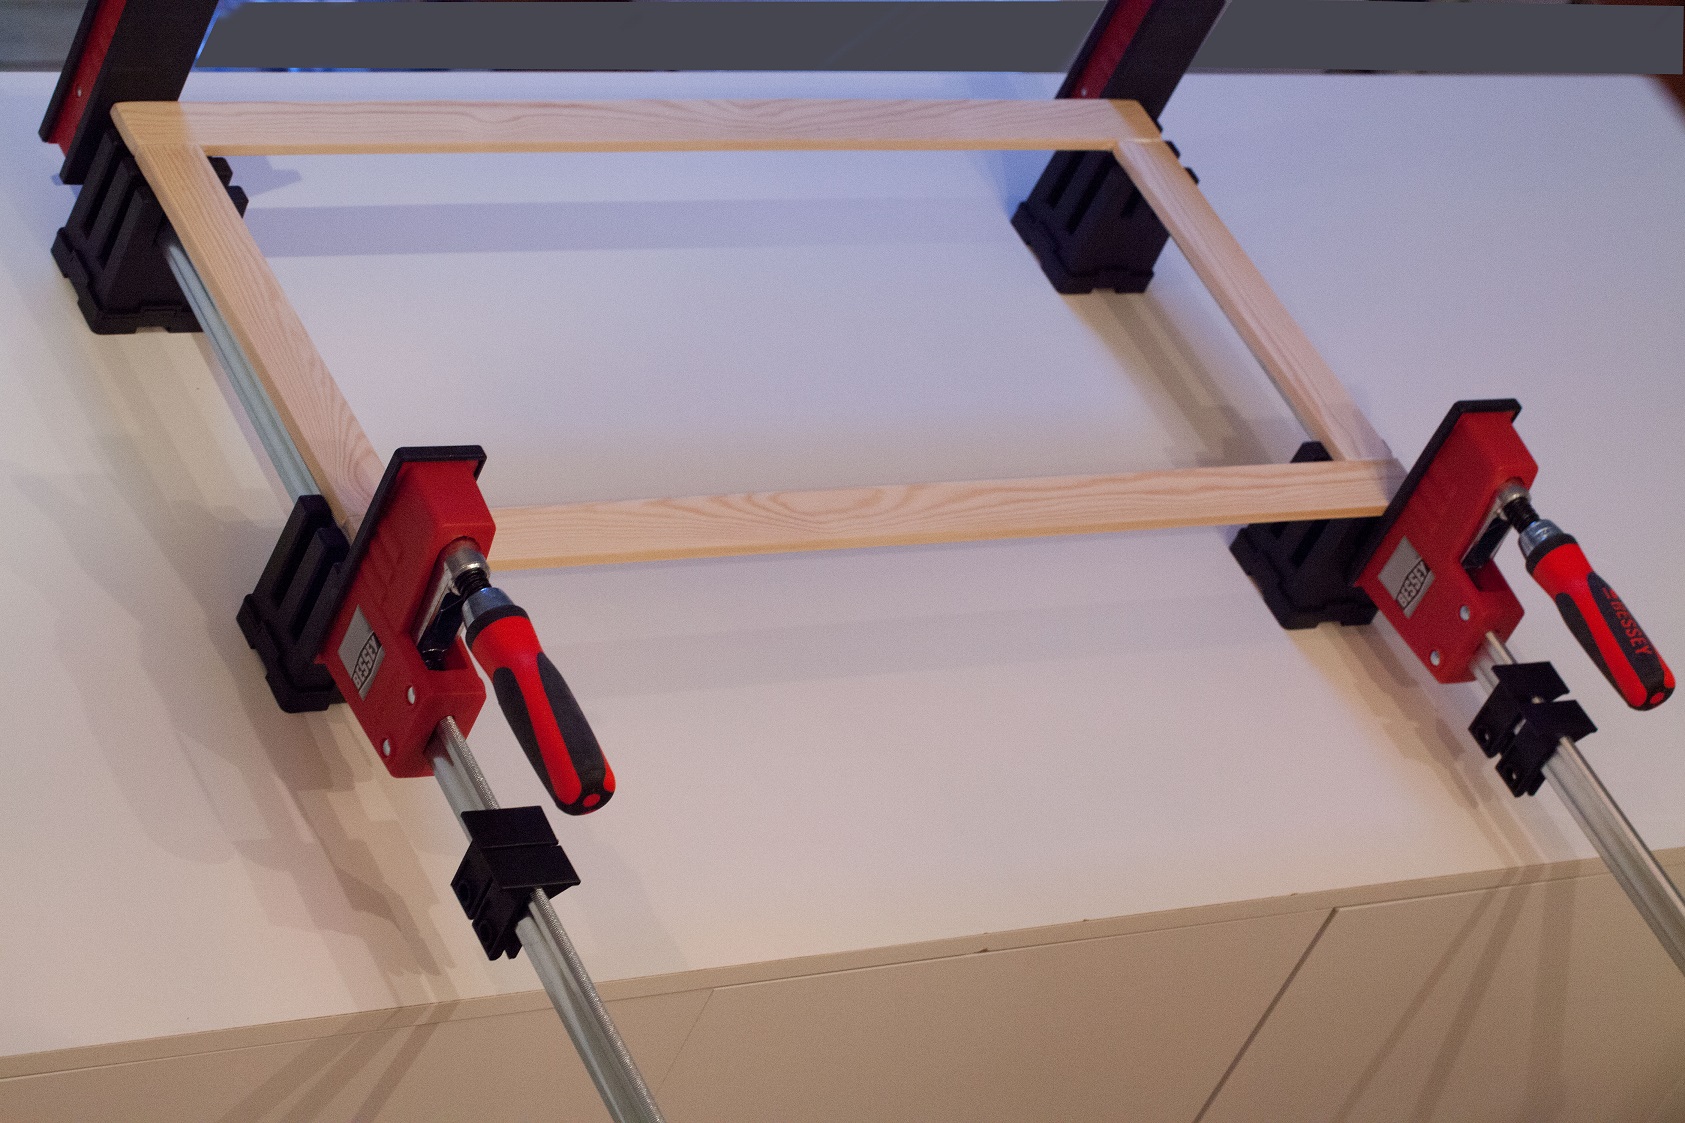
From lath 1 saw the 4 parts and glue them as seen on the picture above.

Door 7

 lath 2:

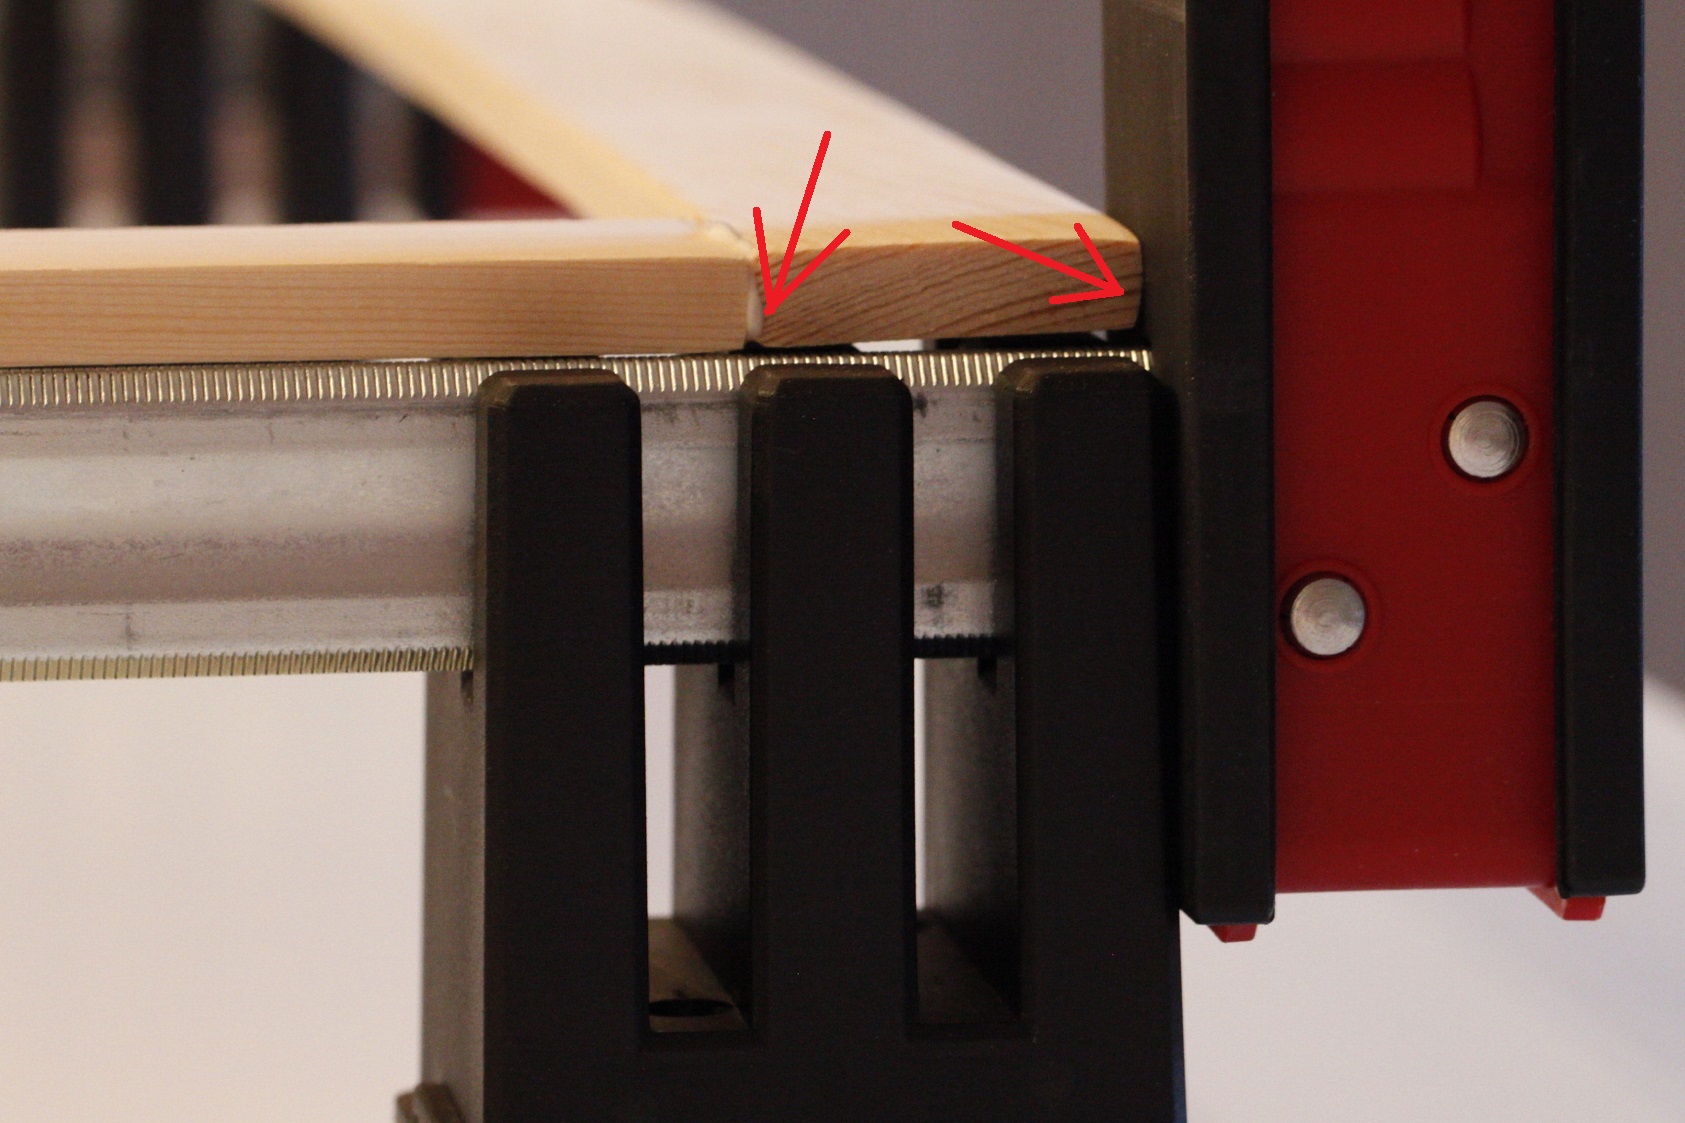
saw the miter at the longer sides first. Put them on the frame from lath 1 and measure if you really have 14.17inch on the open sides. If not, change the length of them and then saw the miter. Check again if it fits now!

I made the mistake to saw all 4 sides first and then tried them on my frame. If it had been to long I could have cut them, but no, they were to short 😦

If the sizes of all 4 laths fits, glue them on your frame. As on the picture above.

Door 3

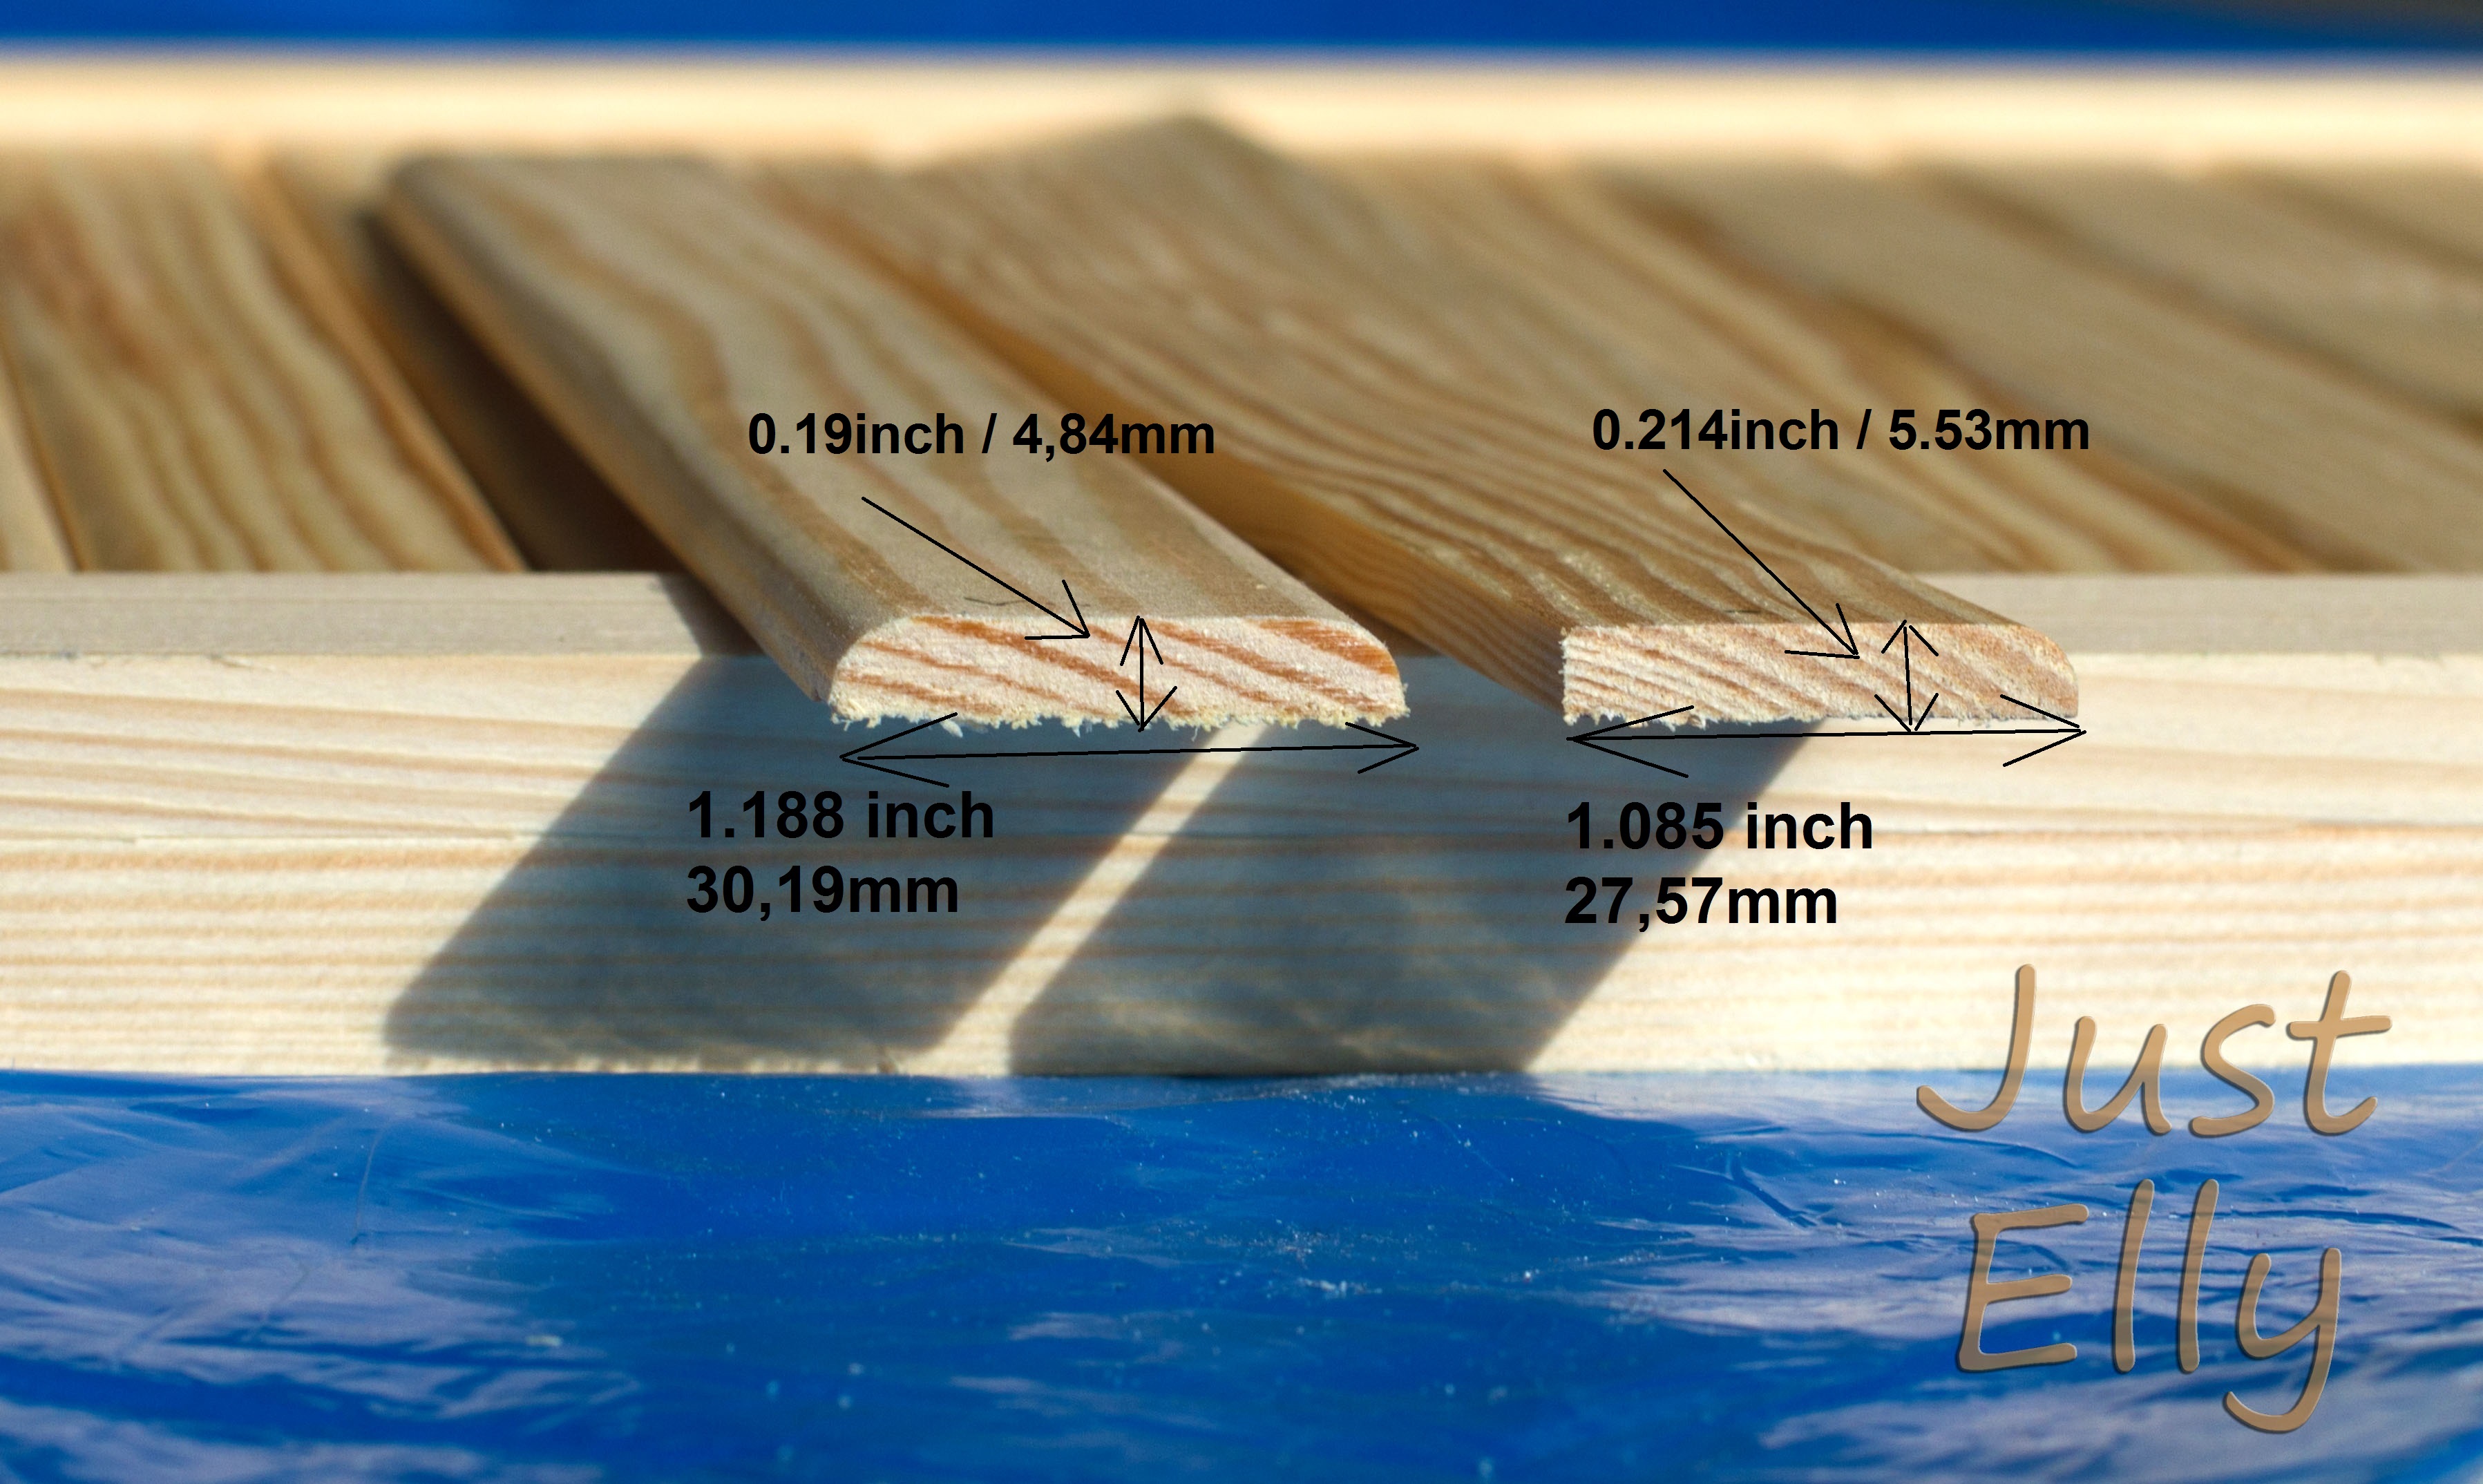
I dont know what names these laths have or what they are for, but they were exactly what I needed.

I choosed the right one on both ends of my frame. The other one for filling the frame.

Door 8

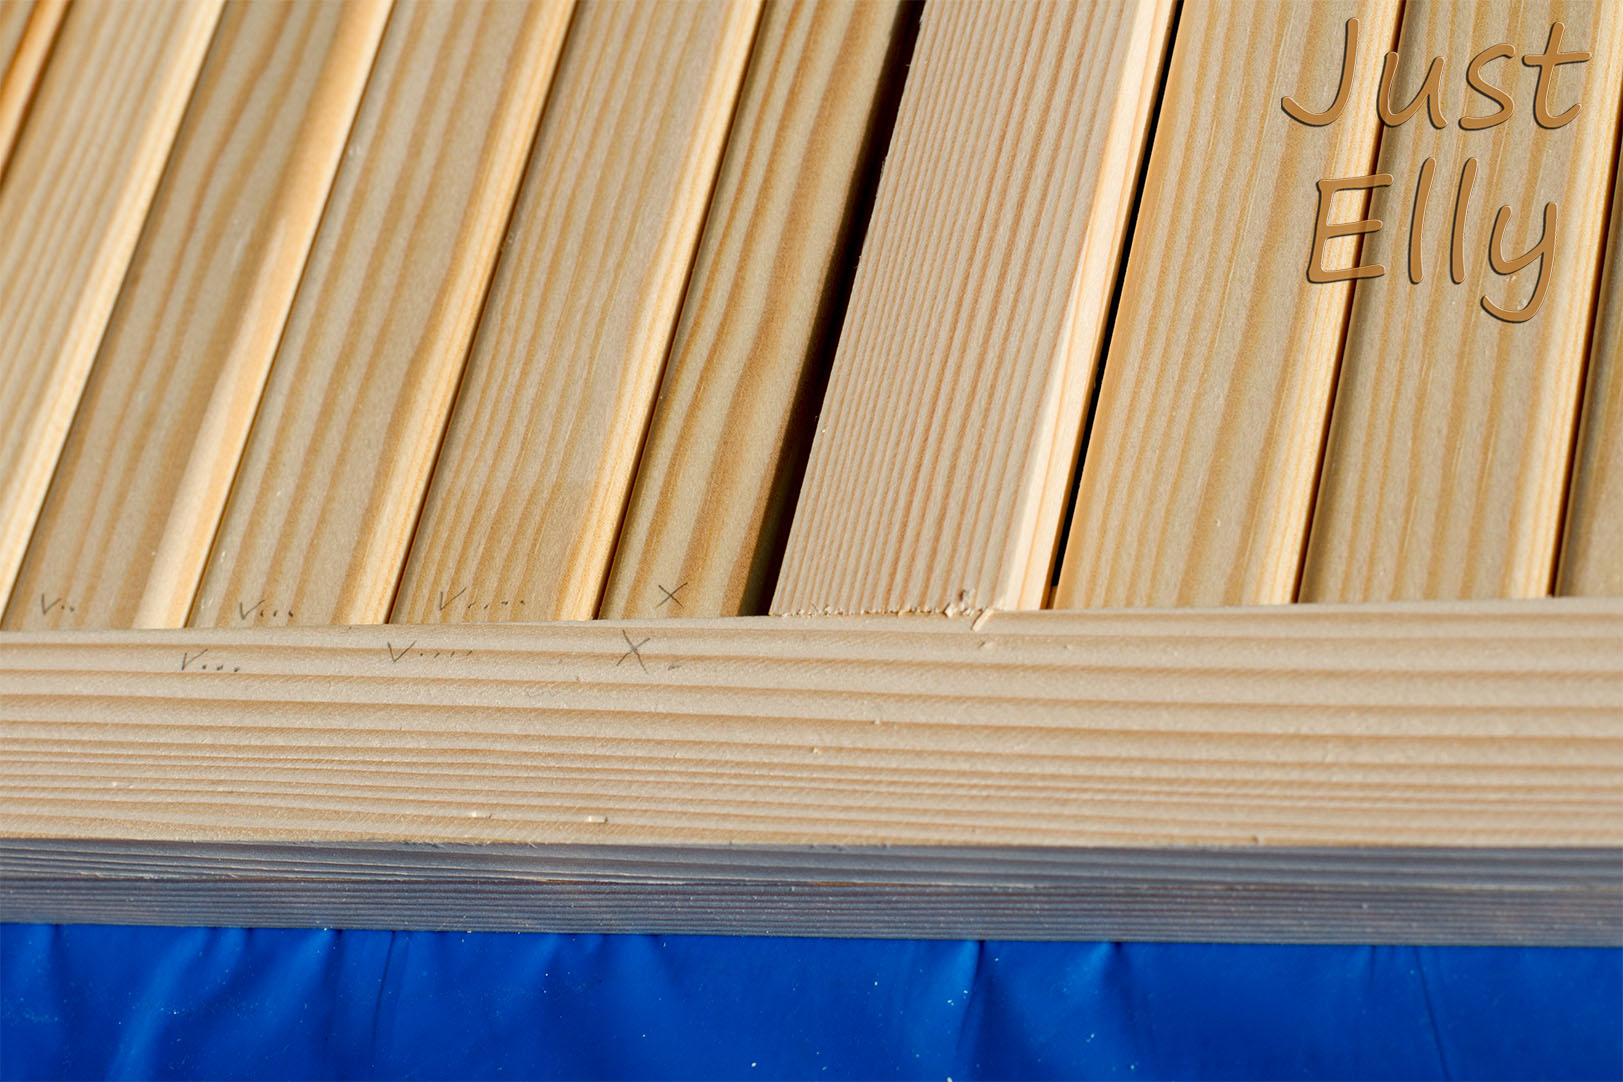
dont saw them all at once !!!! Yes, made this mistake too hehehehe

My lath 2 frame has narrow differences in width over the 28inch. We talk about 0.004inch / 0,1mm. It isnt much, but I wanted it perfect.

So I measured for every piece what lenghts its needed. I needed some in 11.81inch / 30cm and some in 11.7inch / 29,9cm

Make a mark on your frame and on your parts !!! This is when you also have differences. It will spare you time when you start to glue.

Door 9

For the middle of this door I saw a 11.81inch / 30cm piece of lath 2

I had luck that all parts filled the complete frame. Otherwise I would have change the middle lath. I tried with so many different laths, that I’m sure I could have taken one of them if it hadnt fit.

I cant believe after so many trying with this damn door I did both of them on ONE weekend LOL

And I Love My Work !!!

My learn process at working with wood

The last time I wrote about how I have to learn to work with wood my knowledges were nearly nonexistence LOL

But with “courses” on the internet I got a lot of tips how to do things, what tools are needed and so on

Today I will show you what I learned and practicided

Before and after 2

before and after 1

the grinding on the new one isnt done so far, but I just wanted to show how I learned working with wood by myself.

I’m damn proud of the result.

My sewing class will start …. Finally

Guess what !!!!

I called the fabric store the day before yesterday and asked for my course to start.

Unfortunality all members from the former course registered for the next one too. So there hasnt been a place for me anymore. But the store offered me an alternative: 3 hours on saturday. This week I dont have time for it, but I payed for the next 5 saturdays, starting on september, 27th and all saturdays in October.

If I like it, and I’m sure I will, I will go on in November with the next saturdays too. Now as a “member” I will have priority too.

Maybe saturday isnt even a bad choice for me, because some days I work to long and wont even make it right in time to the sewing course.

Saturday is my day off, or most times, so I can sleep late and  start fresh with my lessons. Everyone knows your focus is better when rested.

I’m so excited !!!! I have so many ideas what to sew. Most of it are for advanced levels, but I dont care. I will start slow till I’m good enough to realize my ideas.

This week I have been on a photo trade show. I wrote, one of my hobbies is photography. Here a few new photos I made this week

_MG_9992

01

_MG_0221

First experience about wood working

Since my last post I went 2 times to a DIY store, because I had to buy more wood laths and new tools and and and …

And I’m sure it wont be my last visit there.

Before I started this project I knew exactly what I wanted …. on paper!!! I’m a  newbie with an idea and no experience. But everyone has startet off small lol

So I went to the store not exactly knowing what I could get to implement my plan.

I found many different wood laths varying in widths and depths.

The only thing I knew for sure I’ll need, has been the highs of wood lath for the doors. Everything else was dependent on what I would find.

I chosed some wood laths in different widths and depths and went home. At home I started with the first door and what can I say? It didnt look like I wanted it to be and I found out I had bought too less wood laths You know this feeling, too? You have a precise idea how something has to be?

In the meantime I searched for tips in the internet: what tools do I need, how to work with wood and so on.

I went back to the store, this time knowing exactly what I wanted ! So I bought more wood laths, glue, small nails and so on. All things you need when working with wood.

The internet is also very helpful for ordering tools. Sure I had already a saw, hammer, a drill and other tools. Who hasnt? But I needed a tacker, large and small clamps and so on. I spent a lot of money for this tools. First I wanted to save money and buy cheaper tools. But then I have seen how much fun I have working with my hands .At work I’m sitting most of the day on analysis devices or computer. I decided to buy better quality tools for later projects (I have no ideas so far, but I’m sure I will find new ones)

Here is the picture of the wood parts for ONE door.

_MG_9475

I got my large clamps today and started to glue the first frame. Guess what!! It has been crooked because I didnt made it on a table, I put it on the carpet. I have seen it early enough to save my work. Puuuuuh

NOTICE to me: never use the carpet again

Here my frame with the clamps on the table

_MG_9510

and the next problem appears ……

 _MG_9523

see the edges or better the not anymore existing edges?

Next NOTICE to me: dont use an abrasive sponge at the cut edges anymore.

Because I prepared only this door, I can change my work with the rest of the doors.

Day 1 to learn about wood working has been very interesting.

Lets see, what will happen tomorrow 🙂

Start to my pimp my sewing shelf Part 1

As I wrote the other day I will learn how to sew. I still have a couple of weeks before my course will begin. Enough time to pimp my shelf 🙂

Foto 1

Bought this one some months ago. This shelf was ment to be a divider, but OOOOOOOOPS

Sure, the shelf fit exactly but with over 6 feet in high and wide I came into my living room and the only thing I saw has been this shelf. It was way to big as a divider for my room !!!

I changed my mind and when I bought my sewing maschine and all the other stuff I need for sewing plus the fabric, I decided I want a place only for my hobby.. So I placed the shelf to the wall.

Yes, you can buy some things like doors or baskets for this shelf, but I didnt wanted them all. After some ideas I had, I got it !!!

THE IDEA !!!

Foto 3

First I bought 5 back panels 0.118inch (3 mm) thick :

Each panel in 6ft 0.0472 inch (183cm).in heigh

3 panels are 13.7795 inch (35cm) wide

2 panels are 15.3543 inch (39cm) wide.

Above, below and at both sides right and left  I used  wood screws to make it more stable. At the thinner inner shelves I used small nails. Best way for it, you start in the middle.

Foto 4

This is how it looks at the moment. I didnt wanted to have dust or dirt on my sewing stuff plus the panels giving the shelf more stability.

Today I will start with this chaos:

_MG_9470

As you can see or not, there is lot of work to do: sawing, grinding and at the end paint all of them

If you want to know how this continues, you have to wait till this work is done.

Have a nice day

Elly