Cute little girl’s dress including tutorial

Do you remember your first day at school?

The excitement to finally going to school like your one year older brother? To know you will learn how to read, write, count? To make new friends, say good bye to some of your Kindergarten friends?

It was such a big step for me but I dont remember much. But what I remember is the new dress I got for this special day.

Now little Miss M. will have her first day at school and I choosed the pattern from my Mickey Mouse dress to sew a new dress for her “big day”

Mickey dress 3a

IMG_1974

If you like this pattern you can find it (model 126) in this magazine:

Burdastyle Link


So many blogs I read so far helped me with sewing tips and tutorials.

This is the reason to do my own tutorial for a girls dress and give back some of the help

Here is my tutorial:

Tutorial Burdastyle July 2017girls dress

A few photos from my tutorial

Tutorial dress 03

Tutorial dress 13

Tutorial dress 15

And now the dress. Isnt the fabric adorable? ❤ ❤ ❤

Tutorial dress 23

Tutorial dress 24

Tutorial dress 25

Merken

Little dress with Mickey Mouse fabric

Did you read Mickey comics, watched Mickey on TV as a child? Went more than once to Disney Land?

Yes? Me too hehe

When I saw this fabric I had to have it.

I didnt knew at first what to do with this fabric. Then I found this pattern in a sewing magazine and used this cute fabric

Mickey dress 3

the shoulders arent sewed they are closed with a knot

Mickey dress

unfortunality I couldnt found the same red fabric as in my Mickey fabric for the pockets. Instead I used blue fabric which came out quite well 🙂

Mickey dress 2

Sewing more skirts for a little girl

My longtime project is done (jacket) and I had time to make a  skirt again.

This gnome skirt I made weeks ago.

I’ve seen this fabric and knew it would be a cute skirt for Miss M. 😀

Skirt with gnomes 1

Skirt with gnomes 2

The next skirt I finished today.

I love dots, I love stripes. ❤ ❤ ❤

Why dont use one of the fabrics  for a little skirt? I embellished it with 2 pirate girls on the pockets and white lace.

Skirt with dots

Instead of one 1 I used 3 small elastics here. It looks way better then the skirt above 🙂

Skirt with dots 2

My own sewing Masterpiece – a jacket

When I started working in the laboratory I shared my office with a co-worker. Over the years she became my favorite because she always has been calm when it has been stress at work and I could always talk with her when I had problems.

We even had the same habit to be very picky in all we do hihi

Now she retired 😦

Of course she got a departing gift when she left but I wanted to make her something special.

She loves to wear jackets all the time. I asked her if she would like to have a new one made by me and she said yes 🙂

I made a lot of photos from all fabrics suitable for jackets in my fabric store.

She choosed “her” fabric and I started my first jacket in my sewing course. Lets say it straight, without help in my course I couldnt have made it!

A jacket with “her” fabric only would have been too boring. So I added some black woolen to it.

For cutting the fabric I needed 3 saturdays!!! I wanted the pattern be perfect.

Yes I’m picky hihi 😀

To make this jacket needed way more time then I expected but it was worth all this time.

I call this jacket my Masterpiece ❤ ❤ ❤

I’m still missing you at work Misses H. 🙂

Jacket 2

Jacket 1

On the next photos you can see why I needed 3 sewing courses to cut the fabric!

Jacket sleeve

Jacket back

Jacket collar

DIY Ikea Pax as cabinet with 2 extra doors (roof sloping)

I have way to much sewing stuff besides fabrics 😀

Ribbons, zippers, yarn, buttons and so on

For all this stuff I wanted to make a sewing cabinet

My apartment is under the roof. Penthouse! Hihi

I love it very much but buying furniture is nearly impossible  because most of my  walls have roof slopes.

I started to learn to make my own furniture 🙂

I bought an Ikea Pax. Its cheap and I love the interior organizers that comes with Pax.

First I measured the exact angle of my roof sloping wall and heights. The width I got from my Pax.

I dont describe how to build this cabinet. Internet is very helpful when it comes to saw angles and put all pieces together with dowels 😀

When the frame has been done I startet with the doors. Both doors are sawed at the same angle as the frame.

The right door has been done after I ironed edge bandings on the cut edge.

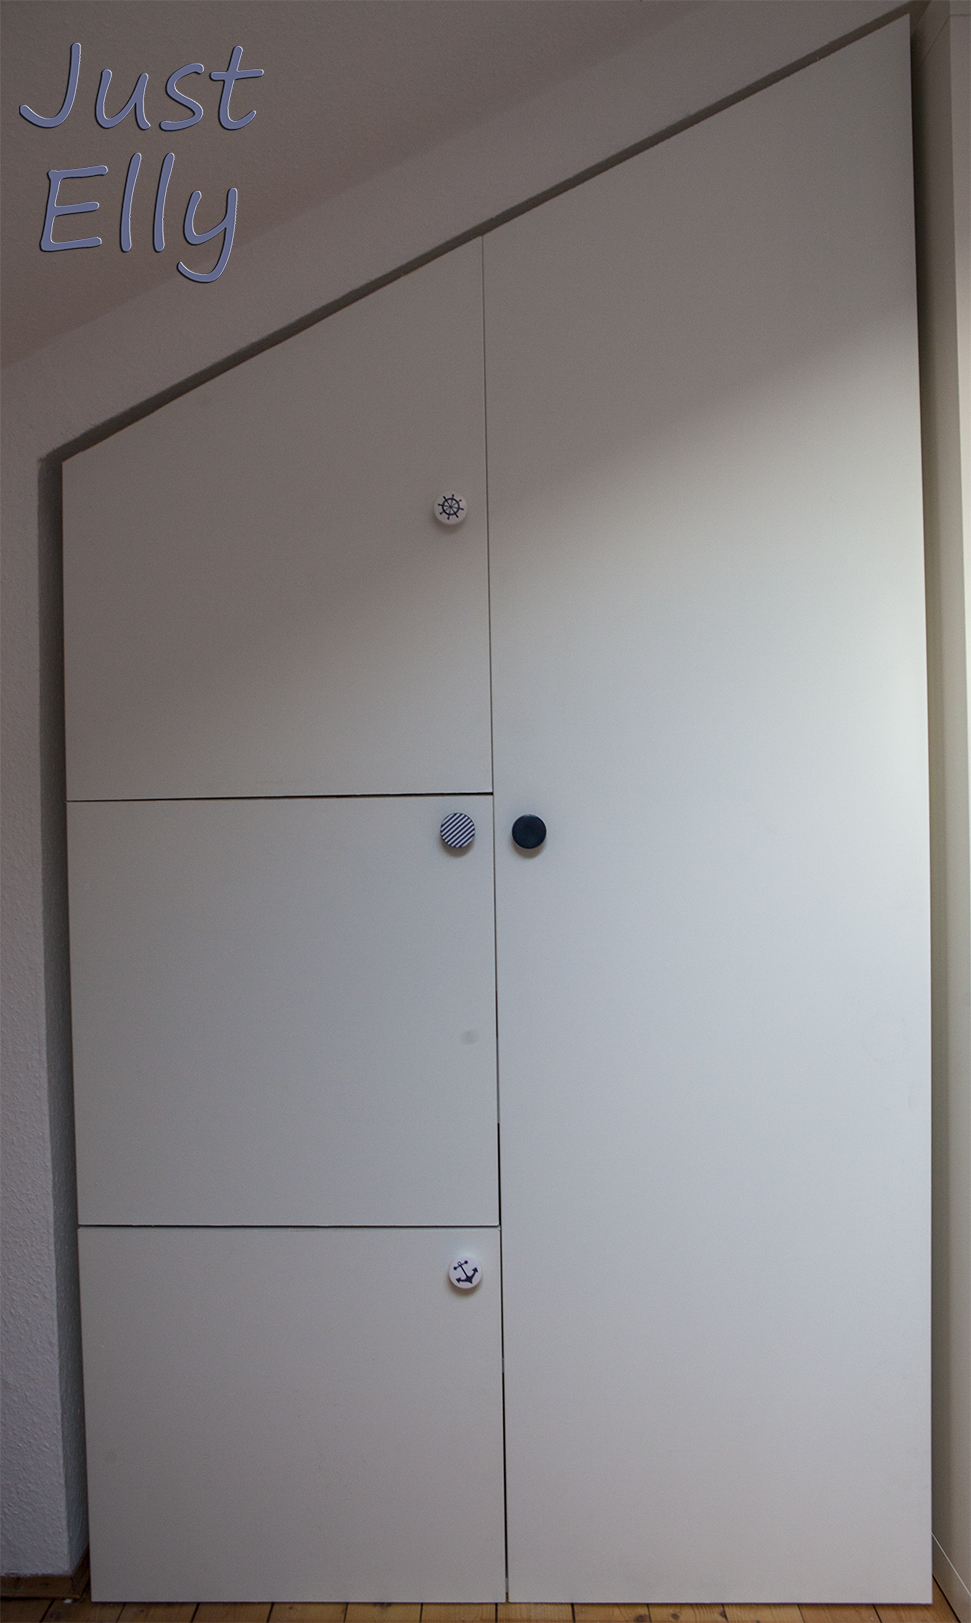
The left door I wanted as three-piece!

It isnt the first time I pimped a Pax. I knew I had problems with  doing cup holes  before 😦

The last time I had to buy a door again because the drill cup holes I made didnt worked and I made mistakes.

The 90 1/8 door comes with 4 hinges. The 2 hinges in the middle are very close together.

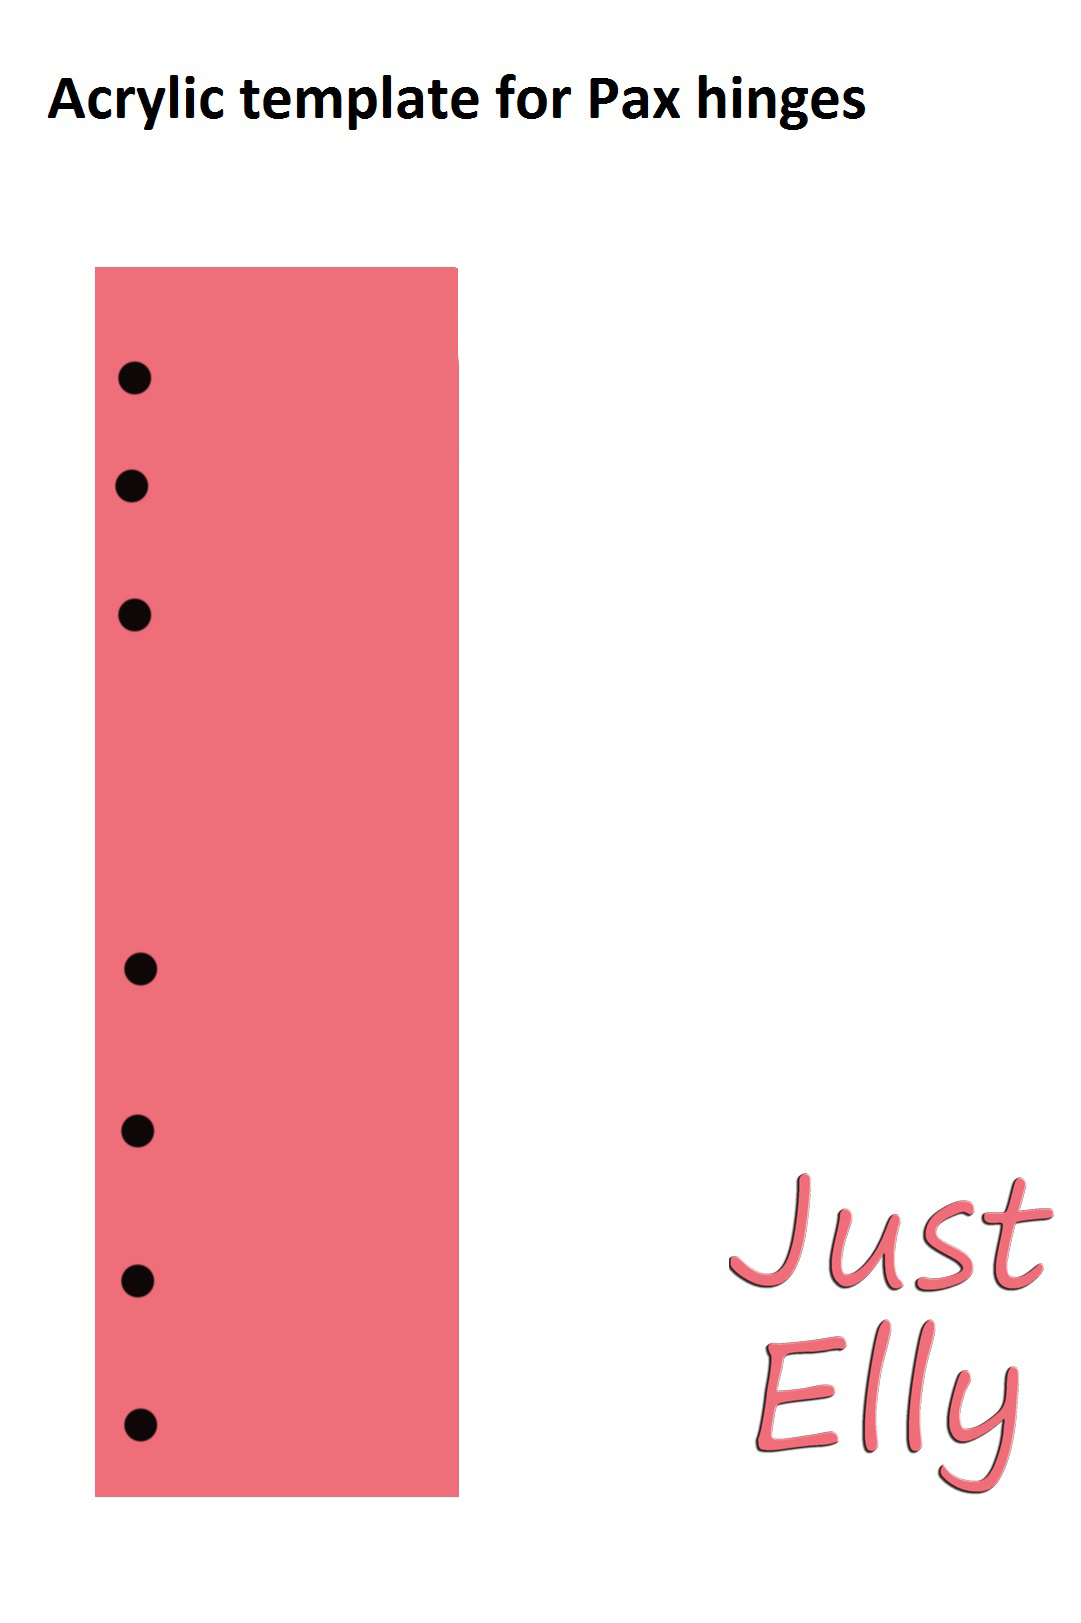
This gave me an idea to make an acrylic template

Ikea Pax hinges

I ordered with Ebay acrylic in the same width as the door and the height I needed.

I used the door as pattern!

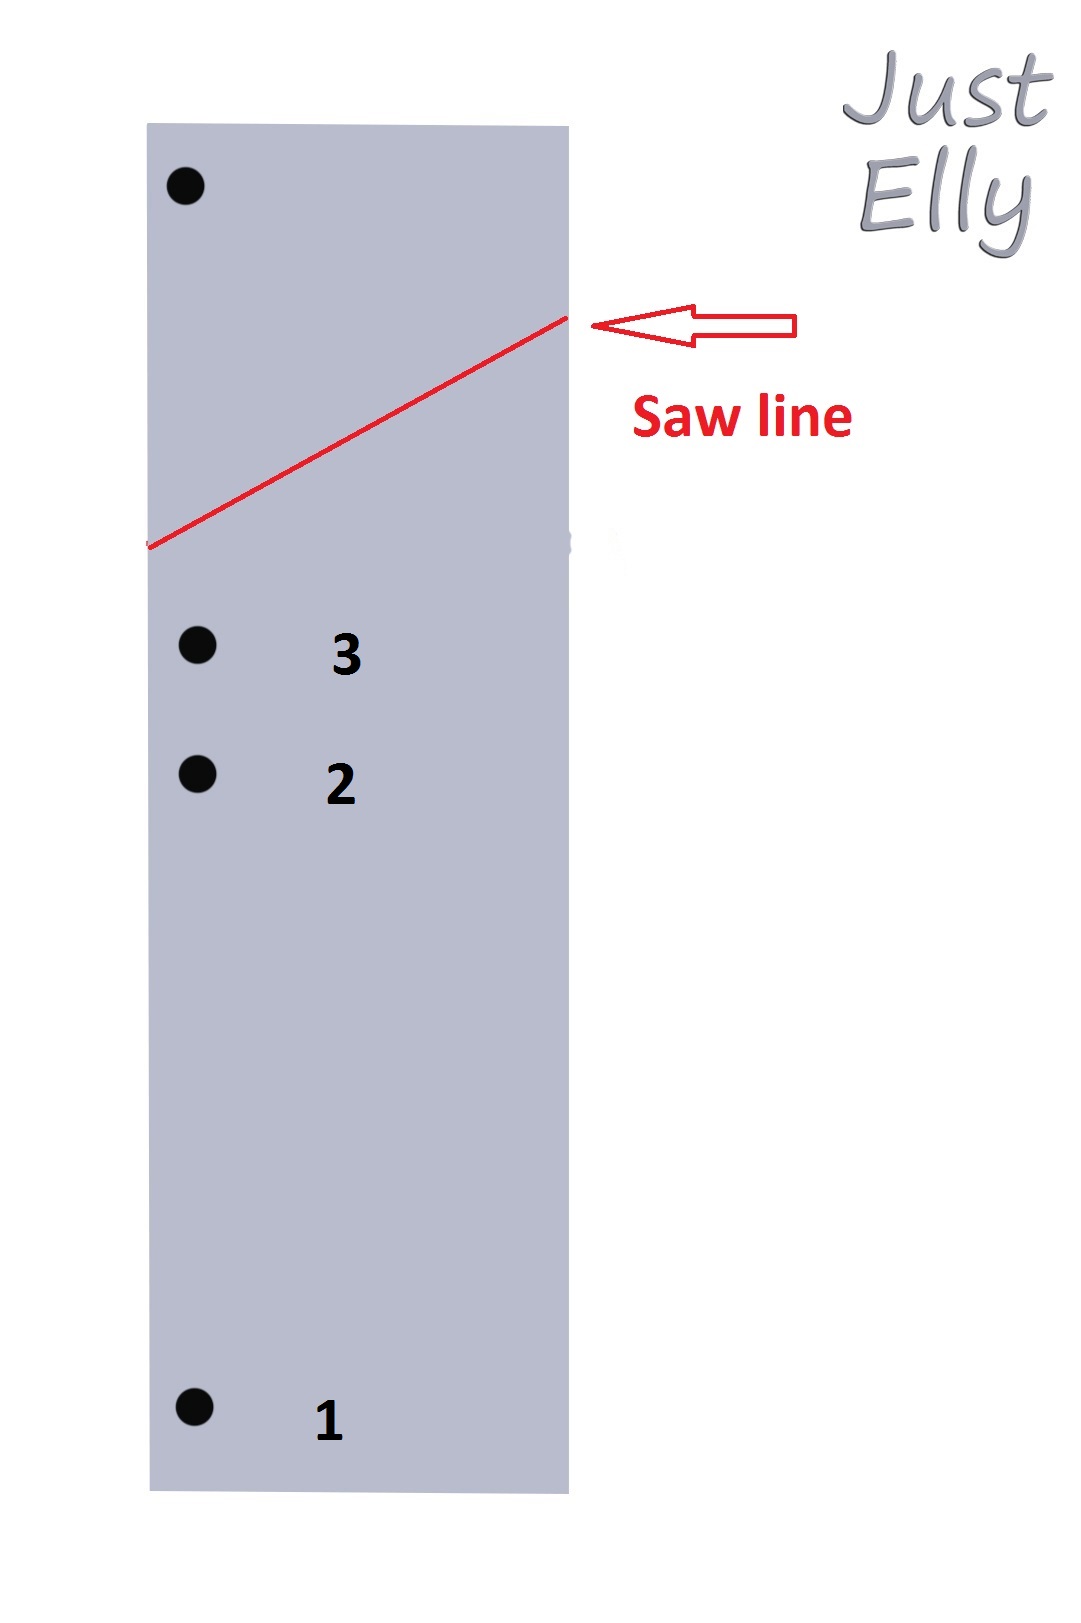
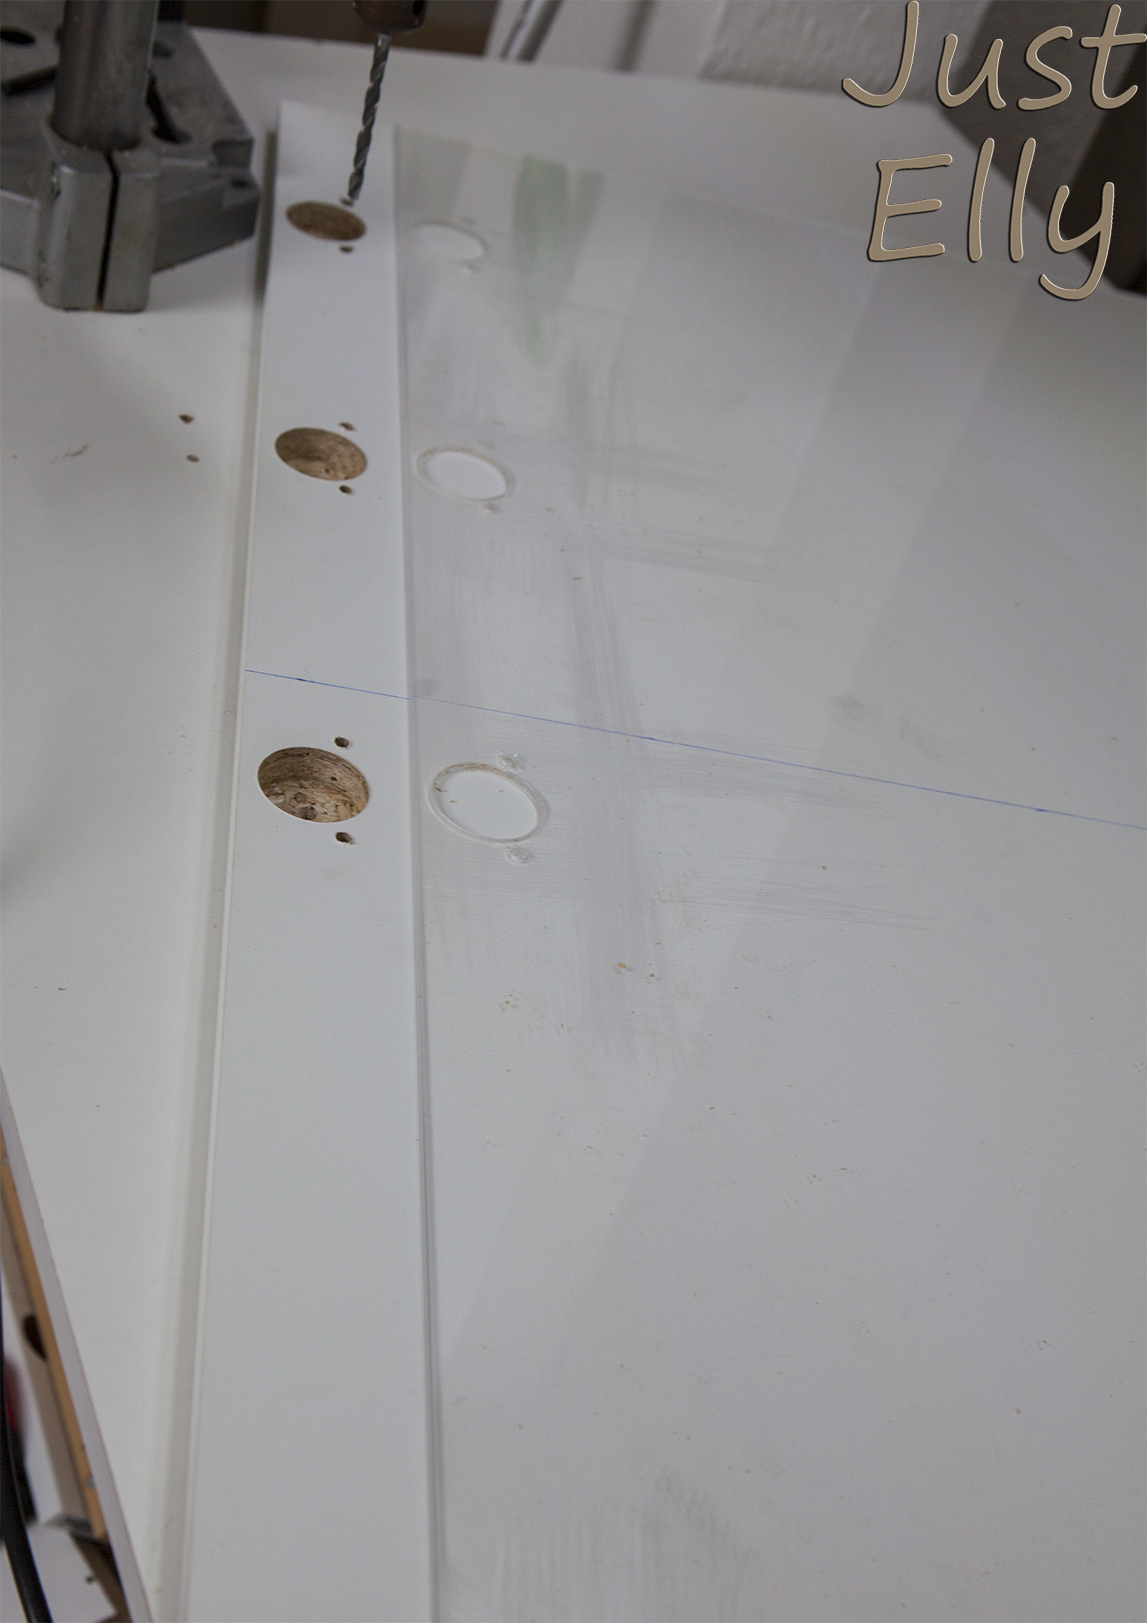
I clamped the acrylic on the door and started with the cup hole and the two drill holes on the bottom. When it was done I marked it as bottom on the acrylic. Then I made the next 2 cup holes.

As next I moved the acrylic upwards. I had to make sure the drill cup hole 2 I made before on the acrylic is exactly on the drill cup hole 3 from the door. This way I made 6 or 7 drill cup holes plus the 2 drill holes.

See pic below

Acrylic template

Then I marked on my door the sizes I wanted for the new doors. Remember? I wanted 3 doors on the left side.

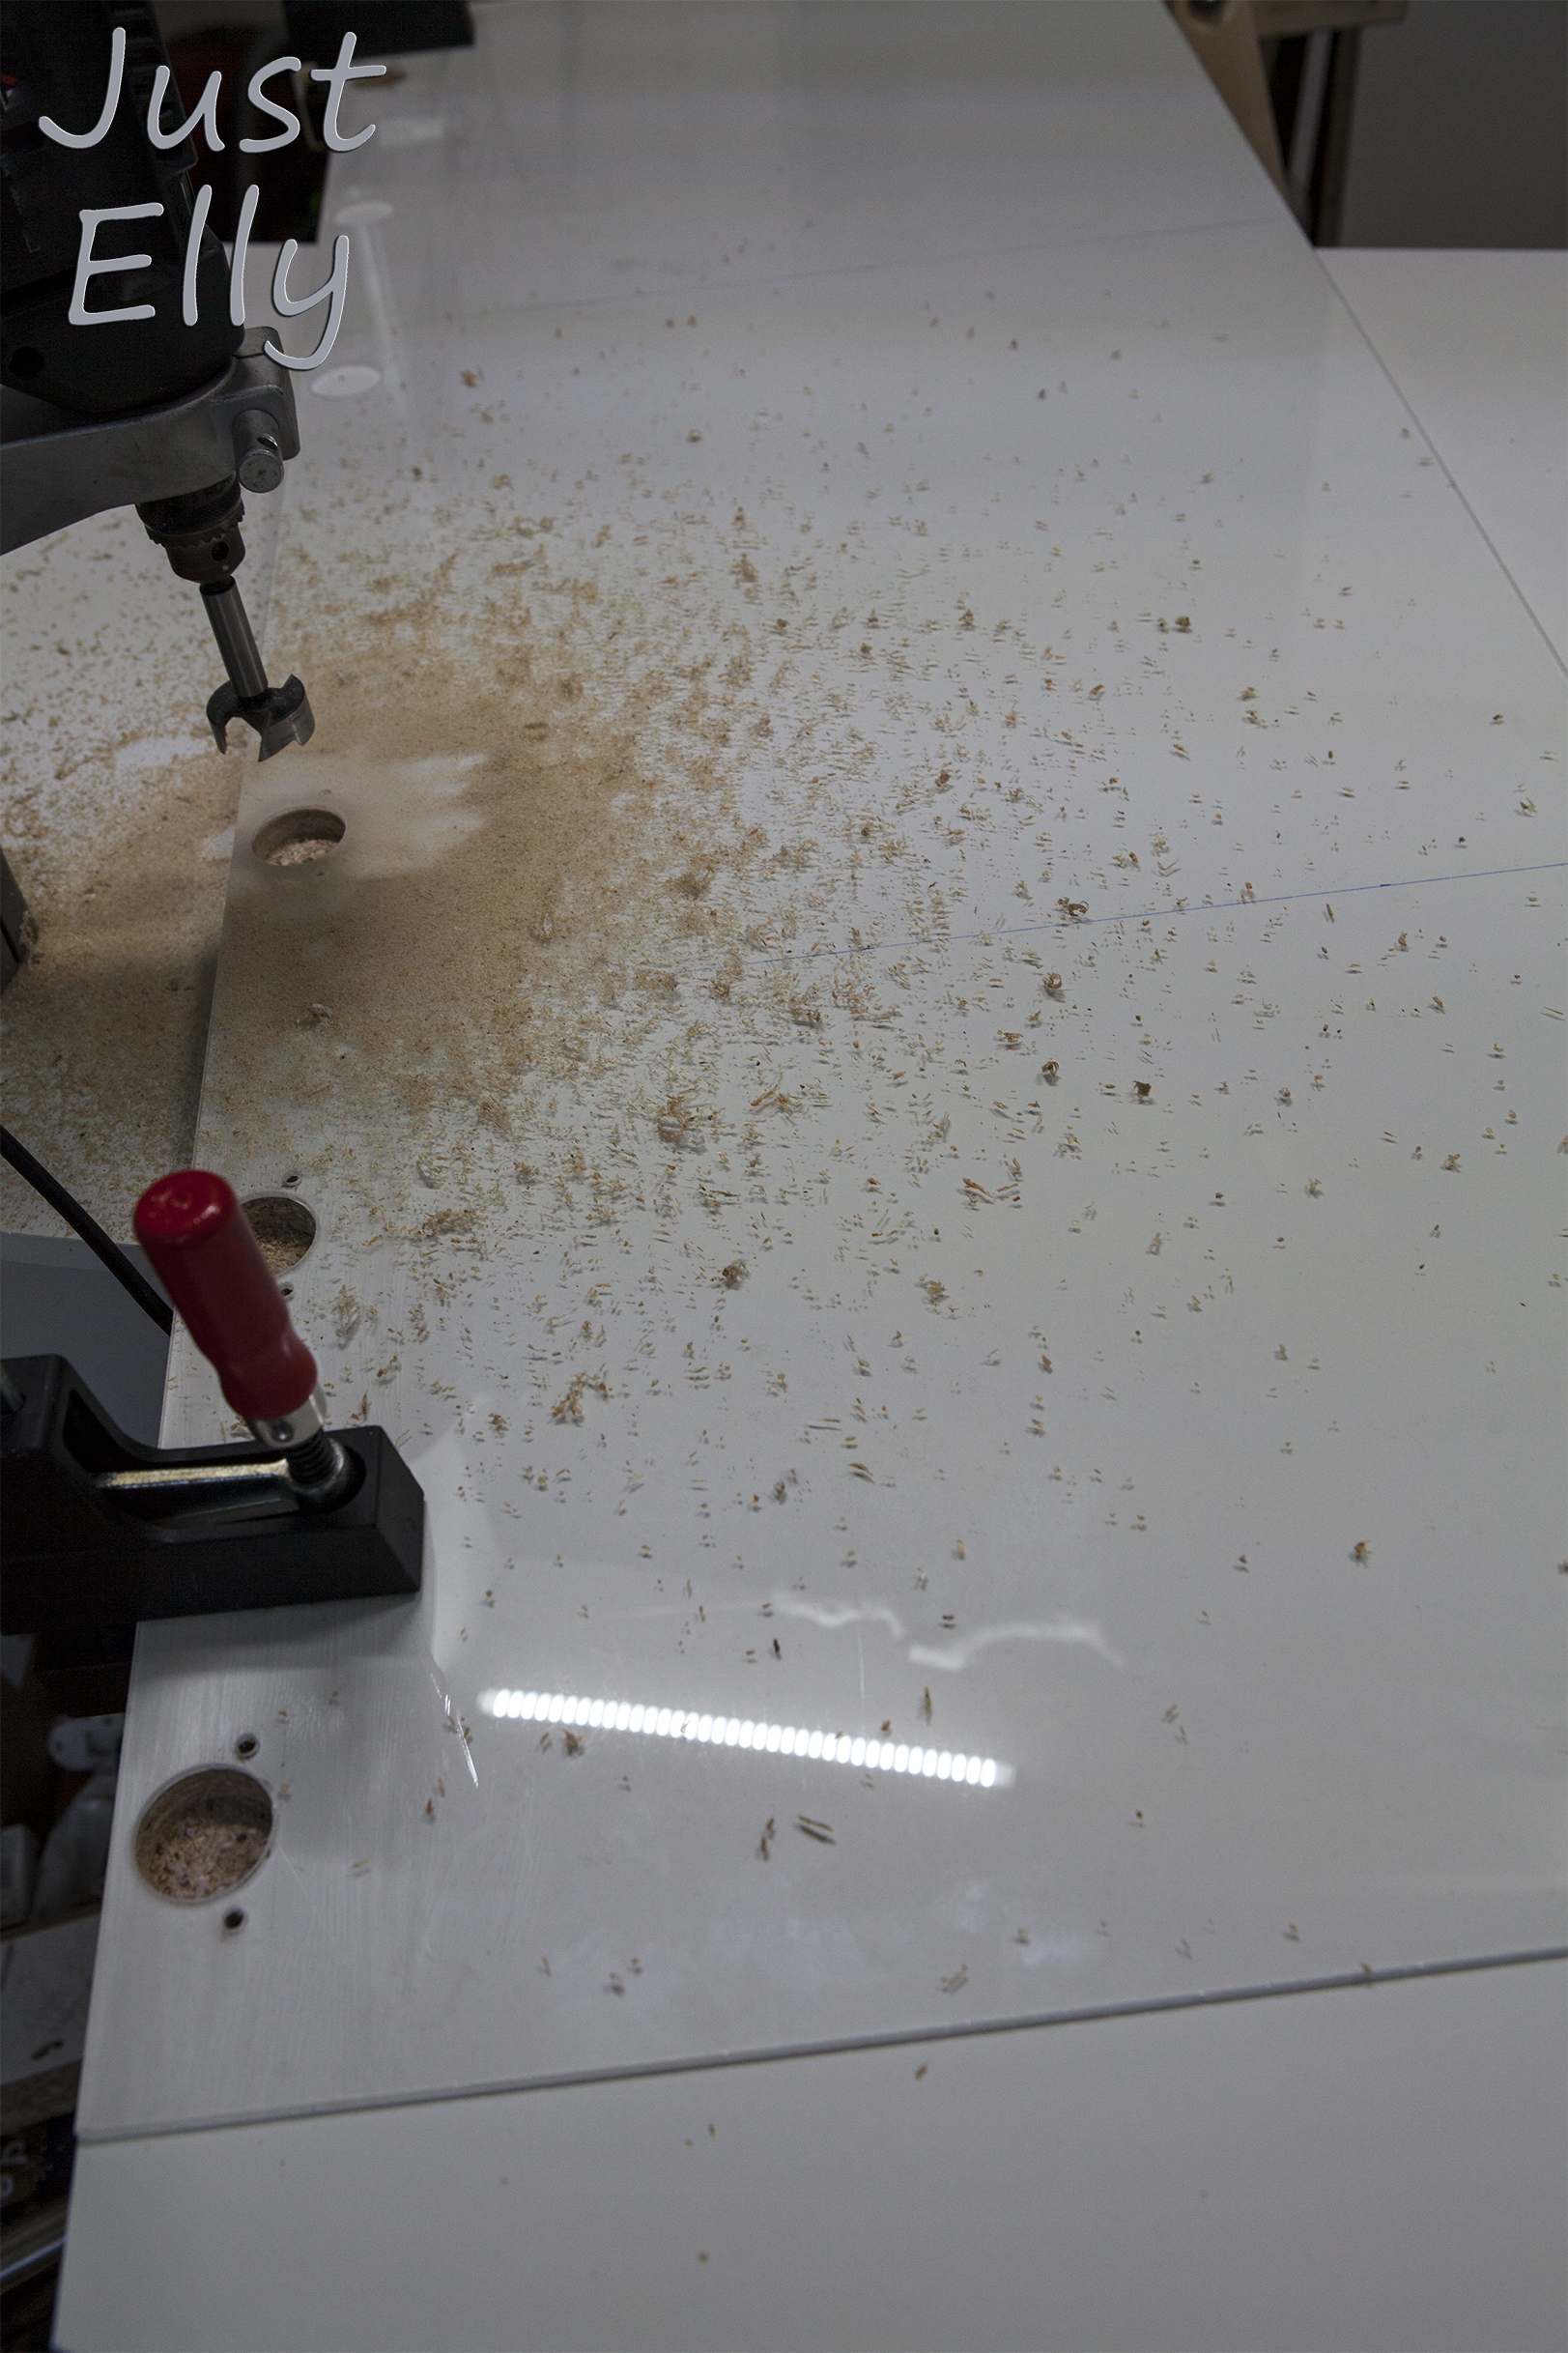
I clamped the acrylic on my door again. Do not remove the clamps till you made all cup holes!!!!

Make sure the bottom hole from the acrylic is exactly on the bottom hole from the door !!!!!

This way your doors will always fit perfect.

On my photos you can see the mark I made for the door size.

With the template you dont have to calculate where to drill your holes. Just move the door with the acrylic to your drill stand and start to drill 🙂

Drill for the hinges Ikea Pax doors

Acrylic glass template for Ikea Pax doors

When you are done with drilling remove the acrylic and saw at the markings you made before.

You have now 3 doors. Iron on every cut edge banding, screw your hinges in the door and the cabinet and the doors are done 🙂

Ikea Pax for roof sloping 2

I’m damn proud of my work 😀

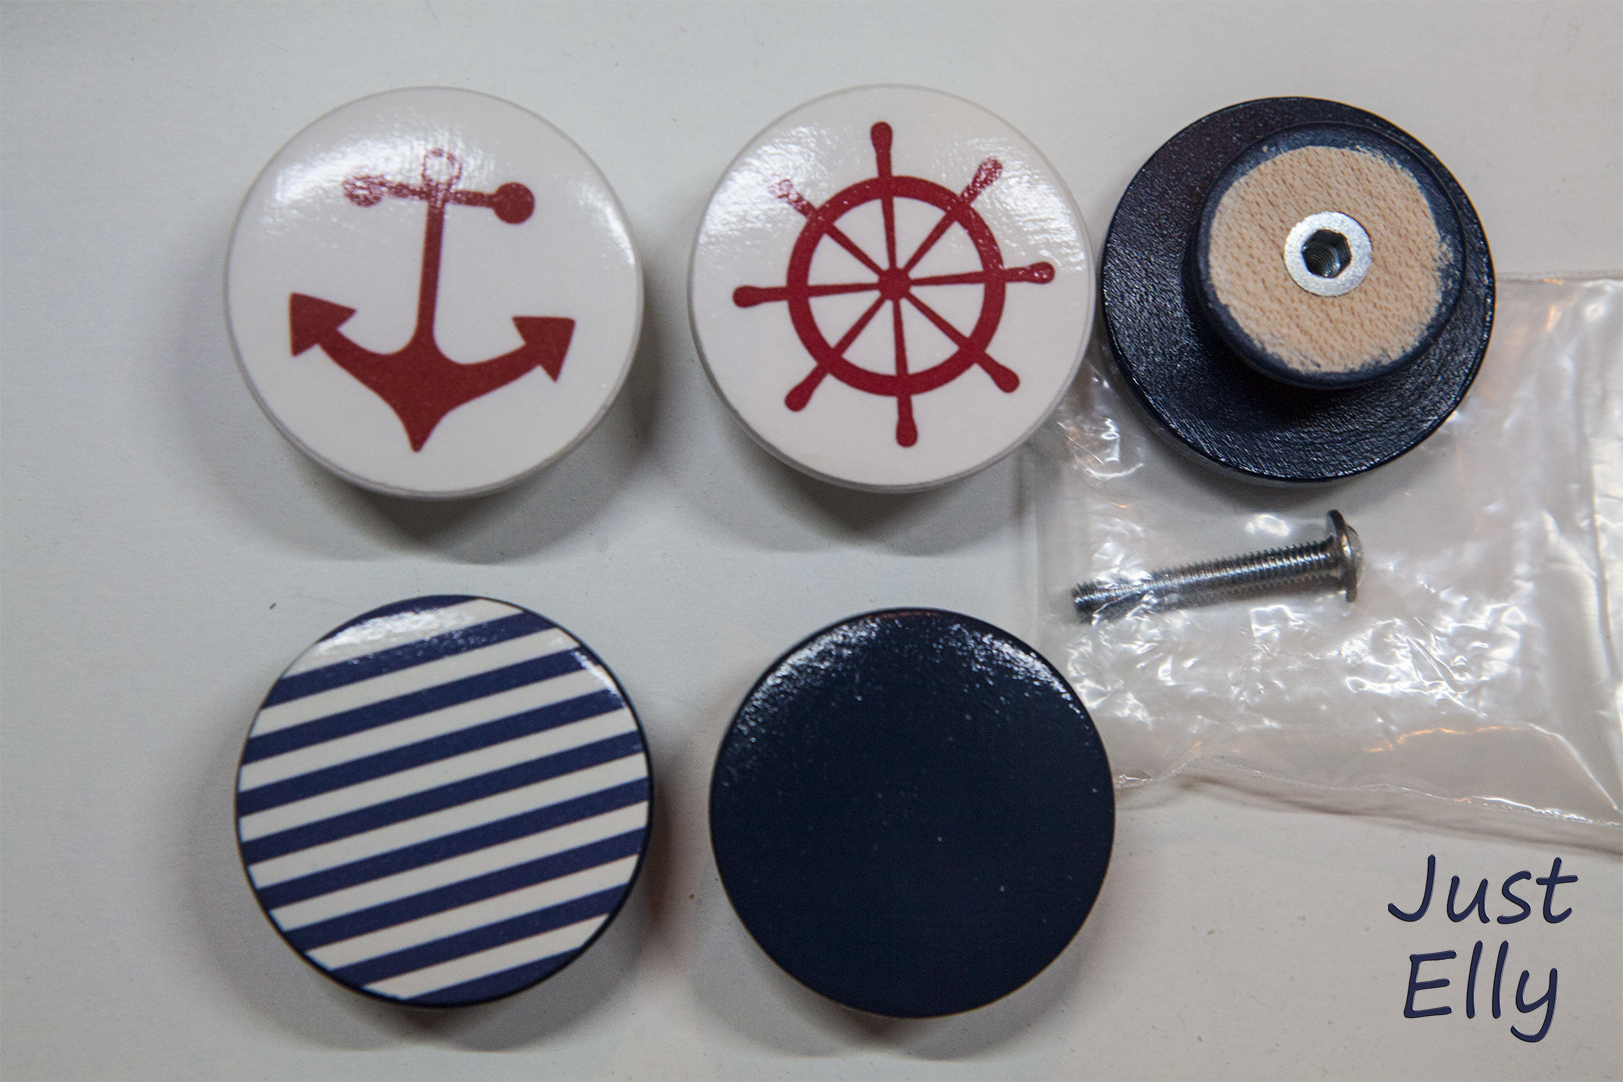
Do you see this adorable knobs?

Here a closer look even if my cabinet only got blue knobs. The red ones are for another idea I have.

Hand painted knobs

The knobs are hand painted and I found them here: Sweet petites boutique

Because of the SIX !!! hinges I used for the doors I had had a huge problem with putting in 2 drawers 😦

There has been not enough space for them close together. The first thought I had I cant write in here hihi

Second thought: I dont need over 6″ in height for my sewing stuff.

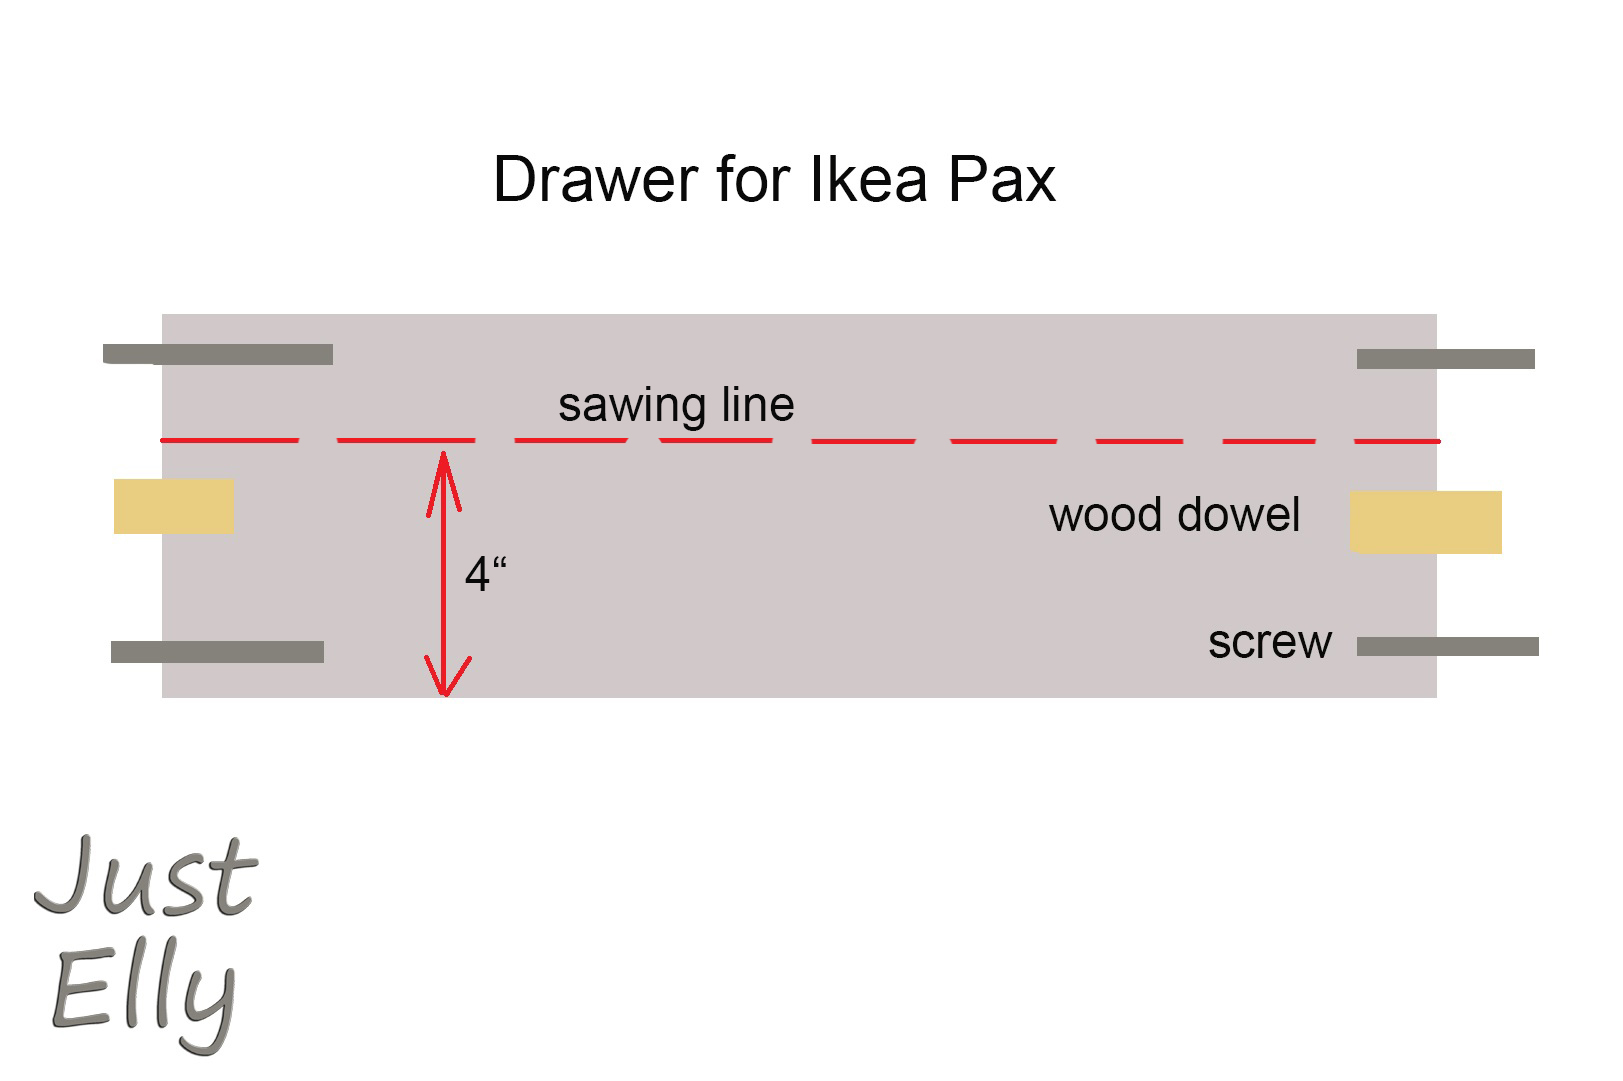
 I put both drawers apart and shorten all sides down to 4″

The front of the drawer will be put together with 2 screws and one wood dowel. Here a pic how I shorten the sides:

Drawer Ikea Pax

At the end I ironed bandings on the edges. To stabilize my drawer I screwed metal brackets on both back sides.

This way both shorten drawers fitted perfectly in my cabinet

Ikea Pax for roof sloping

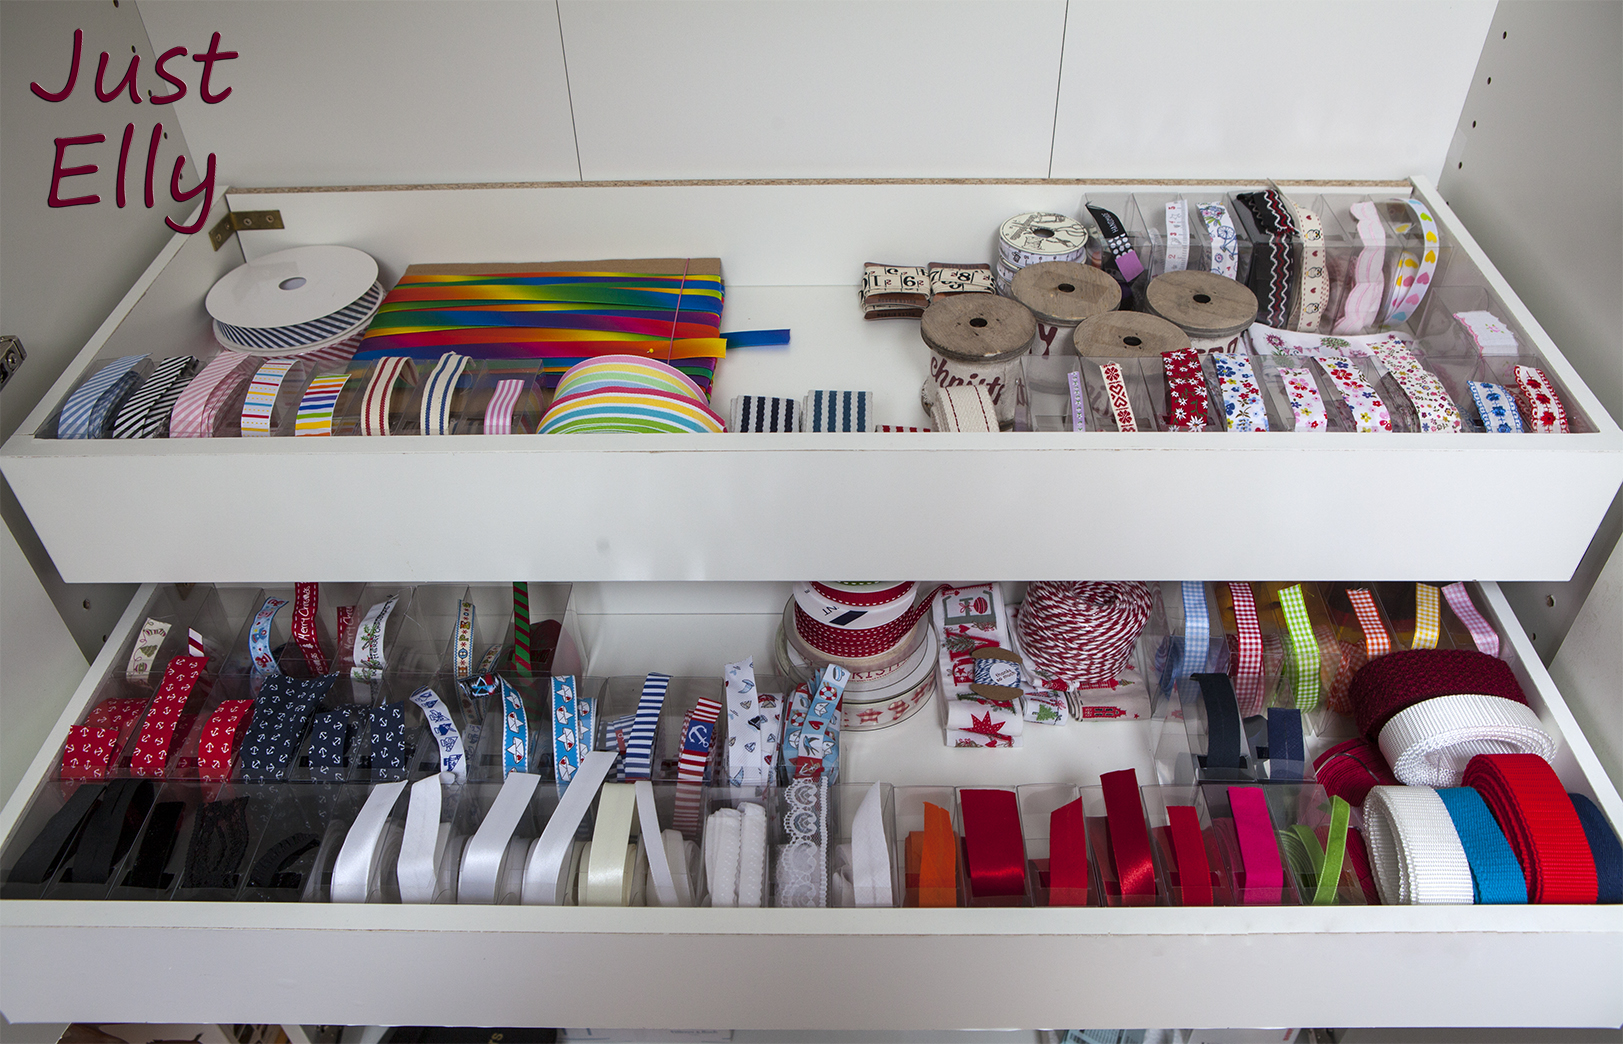
As soon as I has been done with the cabinet I started to put my ribbons in the drawers. I’m not done yet I have a few more

Ribbons

Ribbons 1

Ribbons 2

See this wonderful boxes where I put my ribbons? I found this tip on the internet and I liked it very much ❤

If you are looking for something like this just google for –wedding gift box– and you will find it 🙂

I just cut a slot in the gift box to make it easier to pull the ribbon out

Gift box for ribbon

I hope you like my tutorial. Maybe you can use one of my tips 🙂

Merken

Merken

Skirts, skirts, skirts for a little girl

A co-worker has a cute little 6 year old daughter who ❤ ❤ ❤ skirts.

Good luck for her I have a lot of fabric for children 😀

So I startet to sew skirts for her. It doesnt need this much time like it does with my stuff. And its the first time I have sewn something for a child.

Its very funny but you can see which skirt I made first. The seam for the pockets is way to far from the edge

Skirt 1

the 2nd skirt. I added a white velvet ribbon

Skirt 2a

This skirt needed more time to sew than all skirts I did so far. I wanted the pockets perfect with the fabric pattern and I did it 🙂

Skirt 2b

The next  one 🙂

Skirt 3a

and skirt number 4. This skirt is the best I did so far

Skirt 4a

Here you can see Miss M. with her new skirts ❤

Skirt 1 + 2

I just “designed” the next skirt on paper. Now I have to sew it.Maybe this weekend I will have the time to do it.

Mini dress with ruffles

Yeah Its really me. I’m still alive hehe

I used my favorite pattern again ! This time I made my mini dress with ruffles

Take a look 🙂

_MG_9860

_MG_9980

_MG_0011

_MG_0024

Here a closer look with the ruffles

_MG_9865

This old-fashioned looking brooch I found on the internet and wanted it for my dress 🙂

Yes I know I should have ironed my dress before doing the photos but I just wanted to save time 😀

Merken

My new sewing baby :D

Since my first day at the sewing course I wanted an overlock maschine !

There are so many manufacturers for overlocks. I needed some time and experience with overlocks and read a lot about it to decide what make of overlock I want.

Then I had to wait. The overlocks I put on my wish list has been way to expensive.

Once or twice a month I searched for used overlocks with a price I’m willing to pay.

Last week I got lucky. I found one of the overlocks from my wish list. And the price was fine with me.

Here is my new “used” baby

_MG_9454

I got so excited to get my own overlock I ordered at the same day a lot of yarn hihi

Yes, there  are a lot of colors, but I saw in the past with fabrics of every color you can see and will in the future. .

_MG_9428

Here is my first sewing with my new baby

IMG_9470

Here my new shirt. I love this pattern. Not sure how many shirts like this I had made so far. Maybe 10 or more 😀

IMG_9463

DIY Bags with Retro fabric

This bag tutorial I found on the internet here: Summer fling bag tutorial

I liked this bag very much because you can sew them with 2 different pattern.

2 of my colleagues had birthdays a few weeks ago.

Yes, I’m a little late. 😦

First I had the flu and had to cancel my sewing course and second those bags needed way more time to sew then I expected.

To save time I made both bags together. Means if I sew the zipper in one bag, my next step has been the zipper to the second one.

Maybe I will sew this bag for me too 🙂

Isnt the fabric amazing? Unfortunality I can’t sew a bag with the Splittie anymore because I used all fabric I had for this bag.

But hey, a gift is more  valuable when you would like to keep it yourself hihi

bag1

I changed the pattern from the tutorial a little

The original bag is closed with a magnet. I added a zipper.

And here I made a mistake by sewing both bags at the same time and made my error twice.

The fabric stripe for the zipper is too wide. Half of it would have been better.

But I have been too far with sewing this bags and didnt wanted to change it not ones but twice.

Take a look

bag4

Here my next mistake.

The original bag has a wonderful inner pocket with another fabric than the lining.

IF I sew a bag for myself I will add the zipper as I did but will make it look like the original inner pocket from the tutorial.

When I saw the zipper for the inner pocket it was red on red.

Did you once needed something in your bag and couldnt find it because it has been to dark?

This is the reason I added a stripe next to my zipper. Its easier to find the zipper now.

bag5

I also added 2 slip pockets for a mobile or whatever it will be used to.

I took the lining fabric twice to make it more stable.

bag3

At the end not to forget to use my new “toy” on leather hihi

bag2

Lets hope both colleagues will like their bags 🙂

My own design: sewing a Kilt as minidress

ot

last year I sewed this mini dress.

_MG_8342

I like this dress very much.

I dont know how I got the idea to combine this dress and a kilt. LOL

Maybe I’ve seen a kilt or a pleated skirt on the internet. I dont remember hehe

I searched the net for tutorials and pics of how to make a kilt.

The fantastic woolen and the leather straps I found at Ebay UK. For the Kilt only I needed nearly 3 yards 😮

At first I shorten my pattern.

I sewed it the same way like my “old” mini dress. Then I sewed the kilt and put both together.

.

kilt 2a

kilt 5

kilt1

to make my Kilt more realistic I added leather straps. They are just decoration because the fabric “under” this front is 10 inches longer. So no reason to “fear” storm and wind when wearing it without trousers hehe

kilt 6

For sewing special projects like bags or this dress I ordered a brass stamp with my logo to put on leather.

Yes, it has been expensive but I love it

I still have to find a way to sew these small leather pieces. It isnt perfect with hand sewing 😦 and it hurts because the leather stripes has been thick

kilt 4

I made another Kilt minidress with this blue/green colors. But I still have to put the straps and the logo on it

kilt 7

What do you think about my design? I so love it and will wear it very often hihi

Merken