Tutorial for my Christmas tree skirt

Yes, yes, I know. Christmas is long gone πŸ˜€
But if you have to stay at home almost all the time, you get the idea to sort out the photos from your mobile phone. And then you can also see the photos of things you sewed for Christmas presents.
Maybe some of you like my idea for the next christmas πŸ™‚

I am writing my tutorial for a Christmas present while I am already sewing Easter presents.
Even though I don’t think I can meet my friends before Easter to give them the presents.

I love the colours red, green and gold for Christmas decorations. So often I have decided to decorate differently, but I always come back to this colour combination πŸ˜€

That’s why I have chosen these colours for this present. I have found a similar Christmas tree skirt on the Internet. But it looked so cheap that it would have been guaranteed to last only one Christmas.

In my fabric shop I found this very special fabric. On top it looks like satin, but it is thicker and has a black “coating” on the back. No idea what this kind of fabric is called.

But the colors looked so great that I had to buy it even though the price was so high.

Here my tutorial:

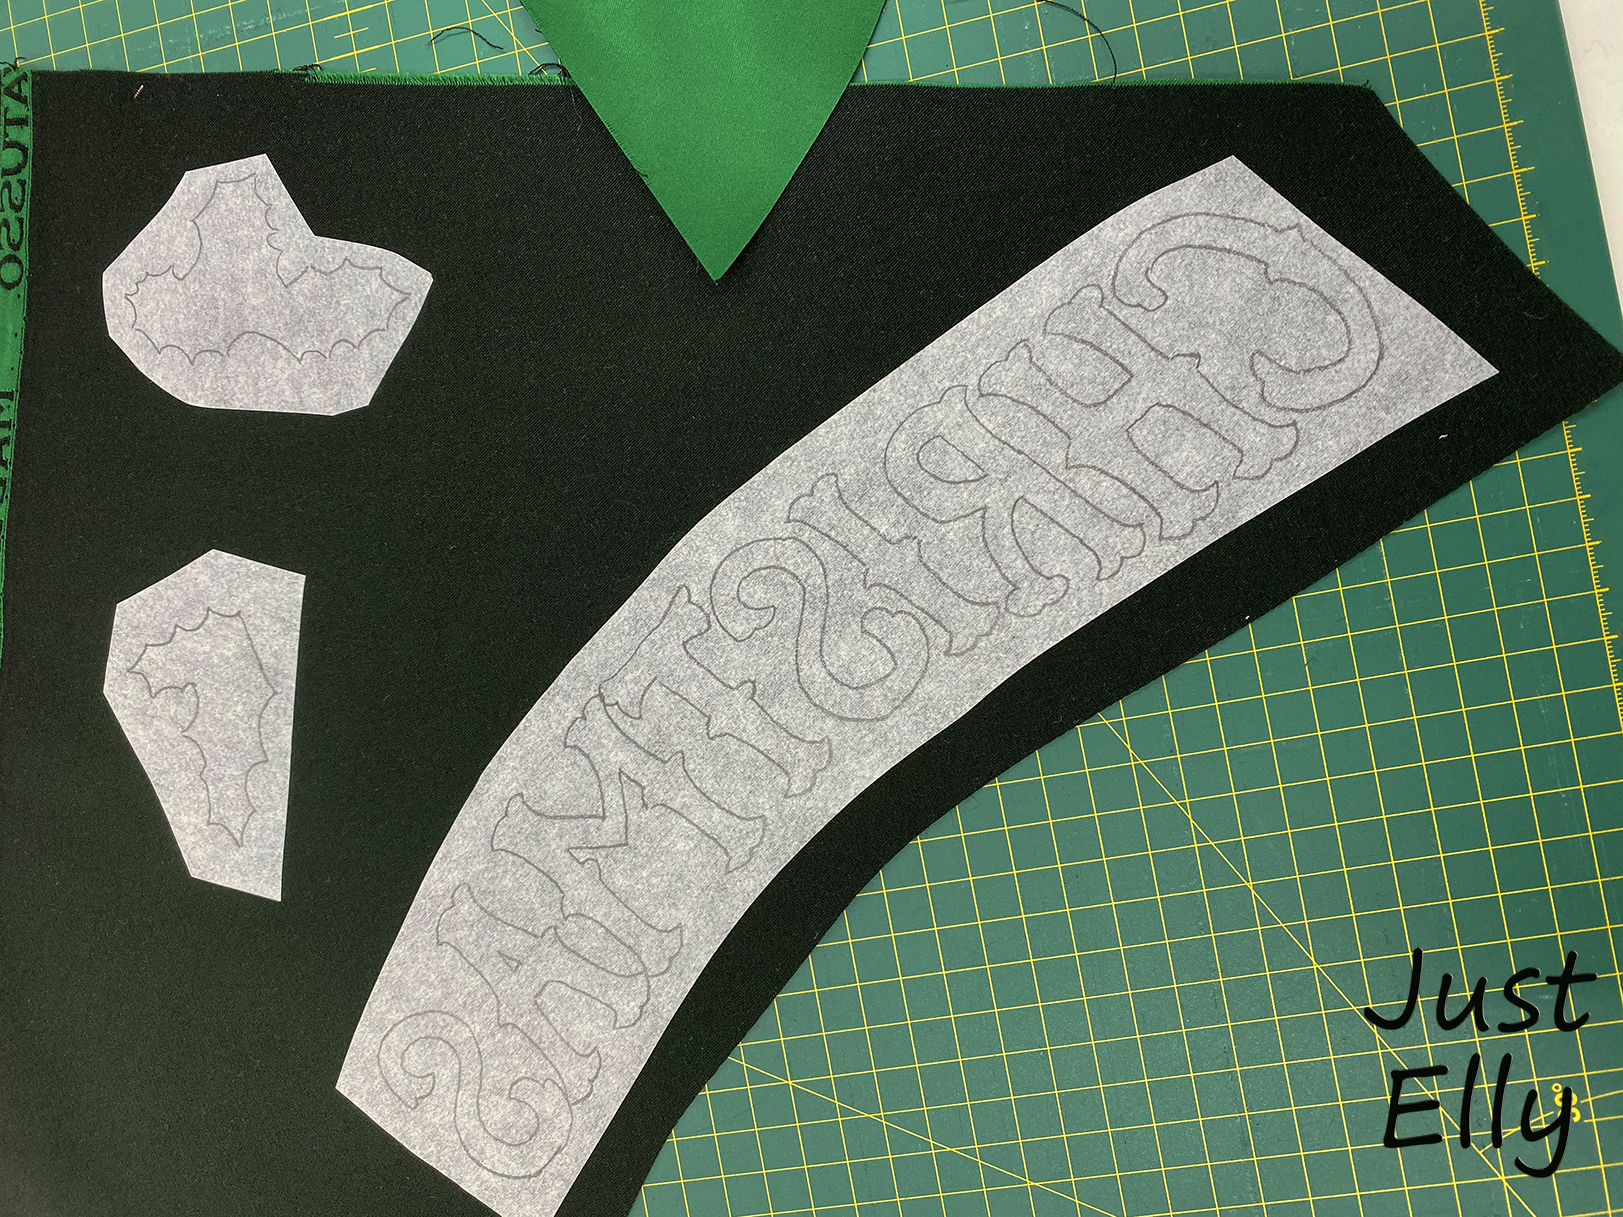
First I downloaded a beautiful free Christmas font from the internet.
Then I wrote Merry Christmas in very big letters, mirrored and printed it.

Now paint the whole thing on Bondaweb and iron it on the fabric. Here I had to be very careful with the iron, because I didn’t want to risk the fabric. Then cut out your motifs.

DIY XMAS gift 01

DIY XMAS gift 02

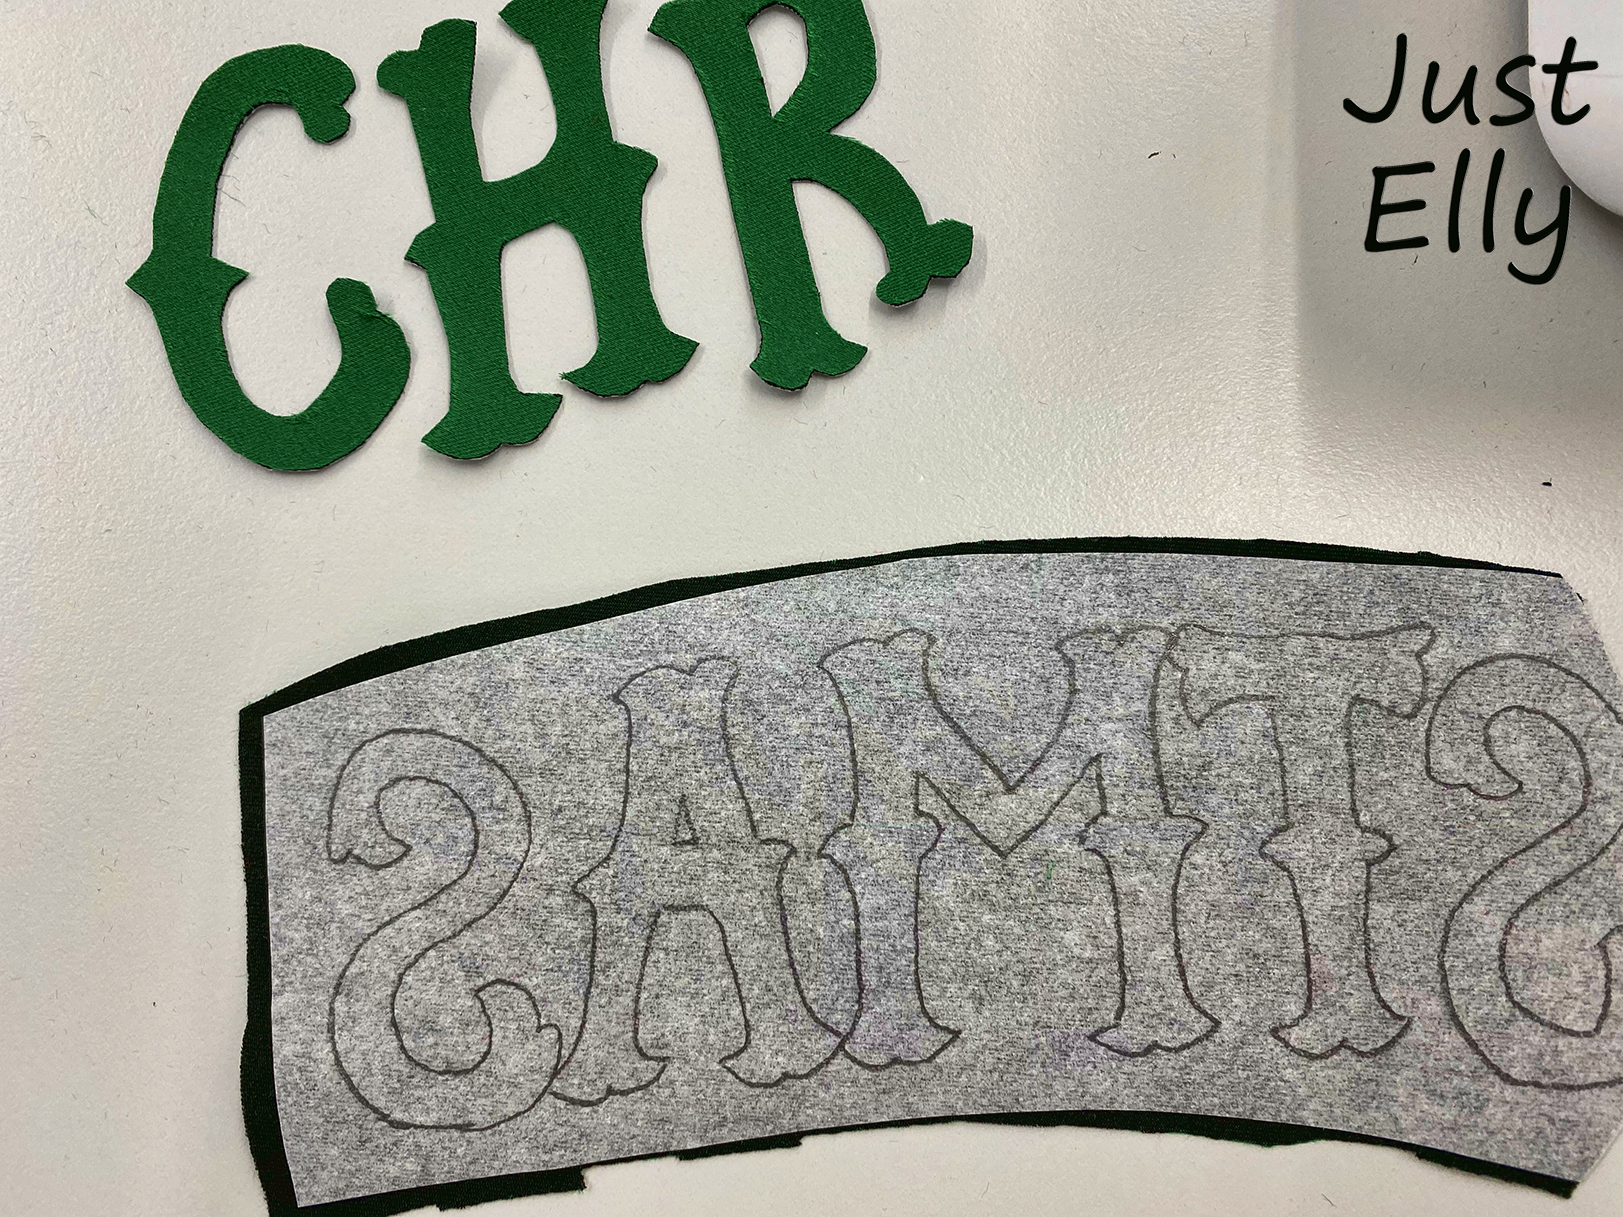
Actually I had planned to sew the letters directly onto the red fabric. But after I put them on the fabric and walked a little further away, I could hardly see what was written there.
So I decided to buy the same fabric in white for a better contrast.

Here you can easily see how much the fabric shines.

DIY XMAS gift 03

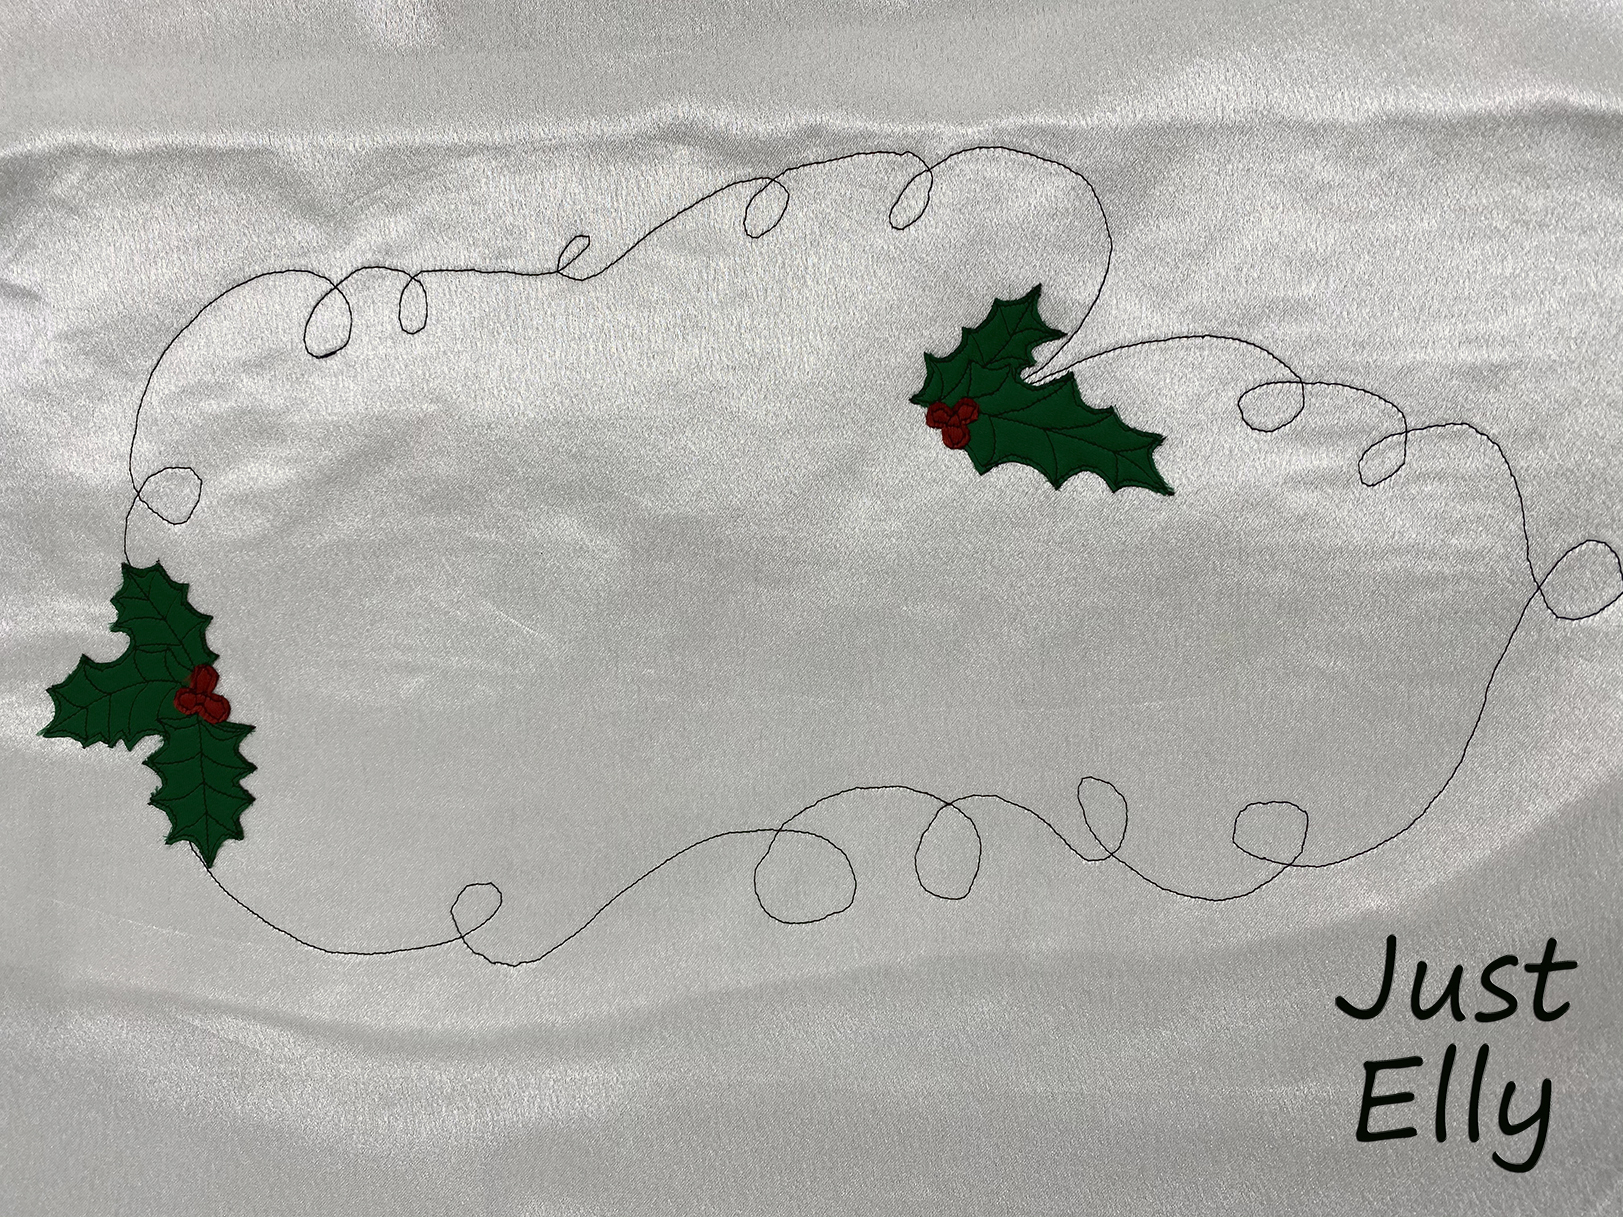
I don’t think I’ve ever cursed as much when sewing as I have with this fabric. I had so much trouble applying it because the fabric was so slippery.

You can see it especially on the red berries. With any other fabric the circle or the outlines would have been perfect.

DIY XMAS gift 04

DIY XMAS gift 05

DIY XMAS gift 06

As always when I apply, I do not rely on the bondaweb, but always sew on each piece for safety. Otherwise it would be annoying if a piece got lost in the washing machine later.

It has taken ages to remove the Bondaweb on the back of the white fabric so that I can iron it onto the red

DIY XMAS gift 07

Now the motif can be ironed onto the red fabric. Then sew the outline again as usual

DIY XMAS gift 08

DIY XMAS gift 09

My Christmas tree skirt has a diameter of 35 inches.
So you can calculate how long the ribbon for the edging must be. I used the same fabric for the backside.
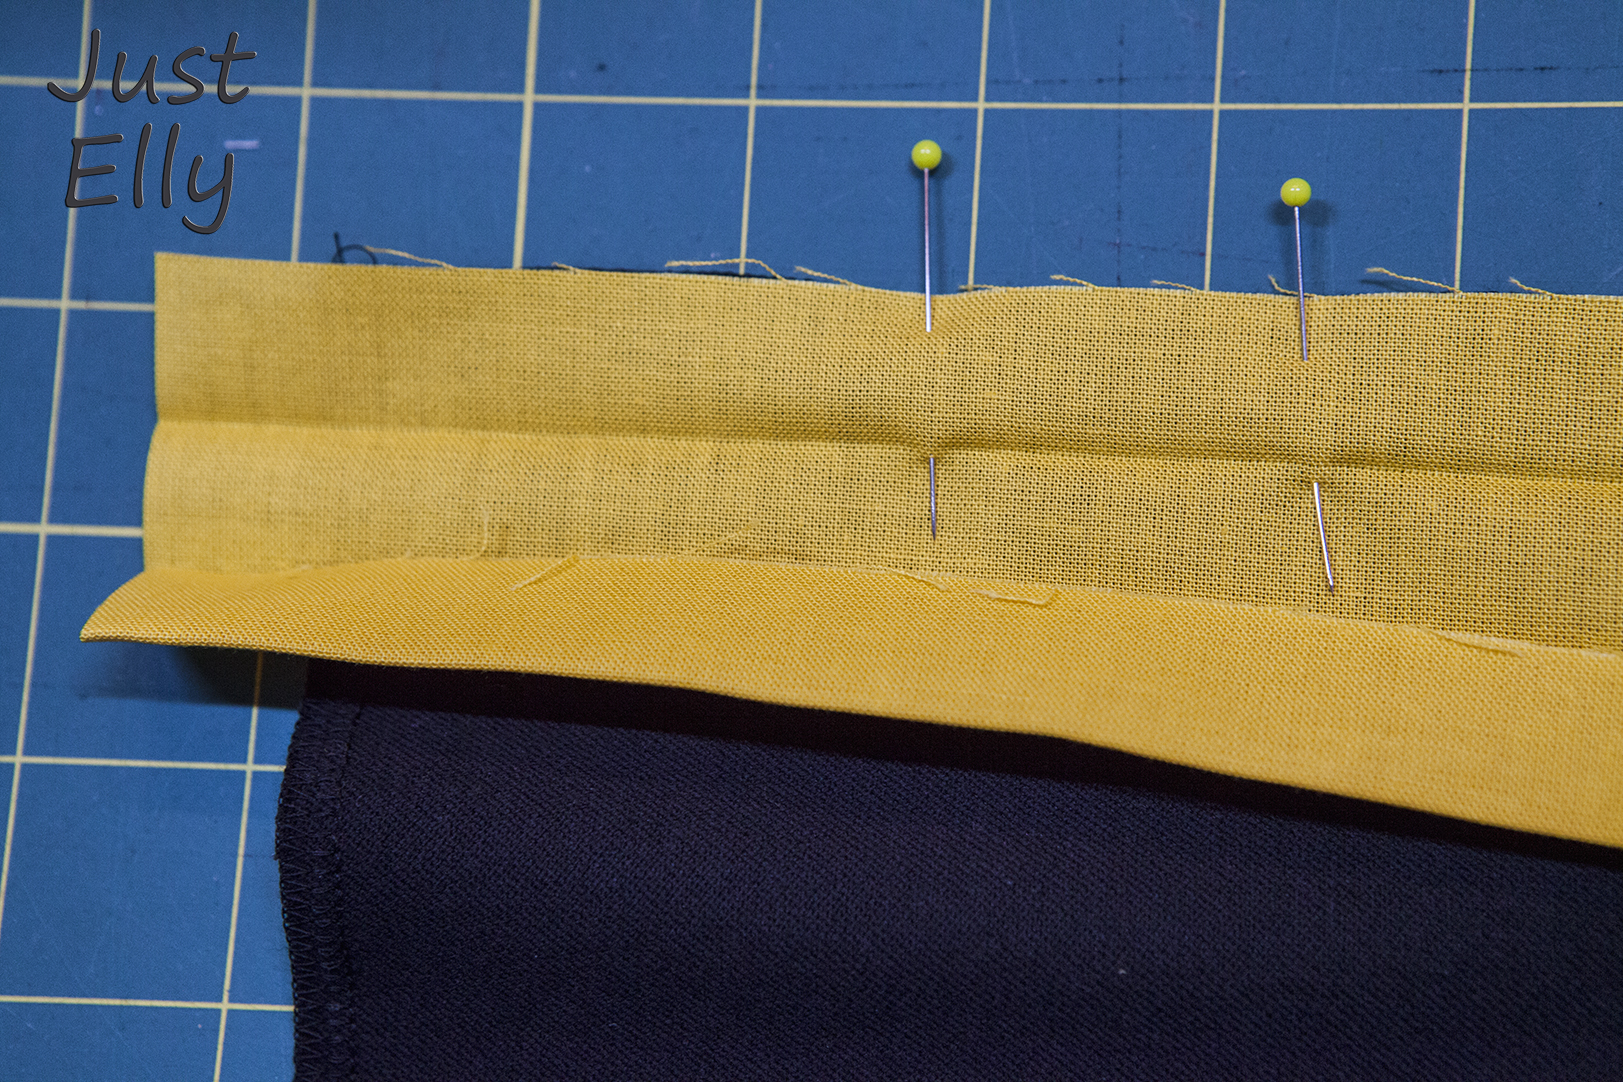
Here are photos how to extend such a ribbon! Lay the ribbon like on the photo and sew as you can see the pin.

DIY XMAS gift 10

DIY XMAS gift 11

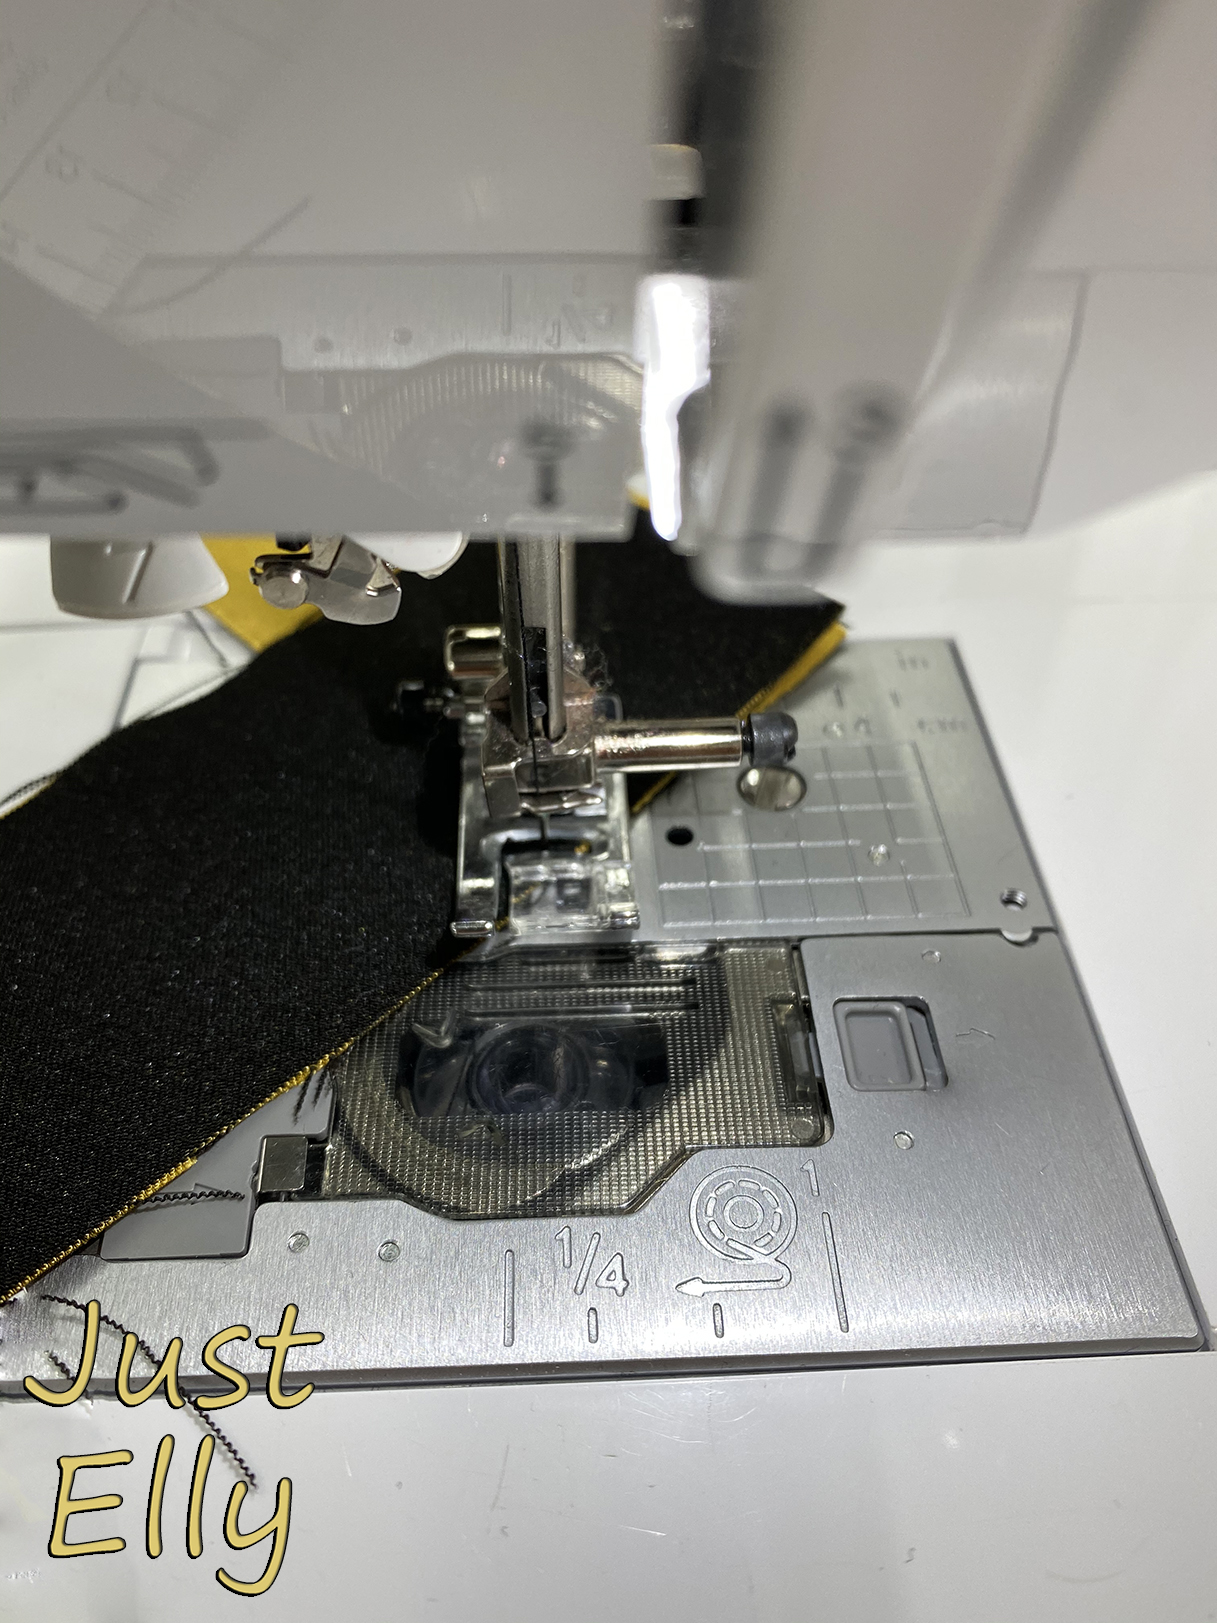
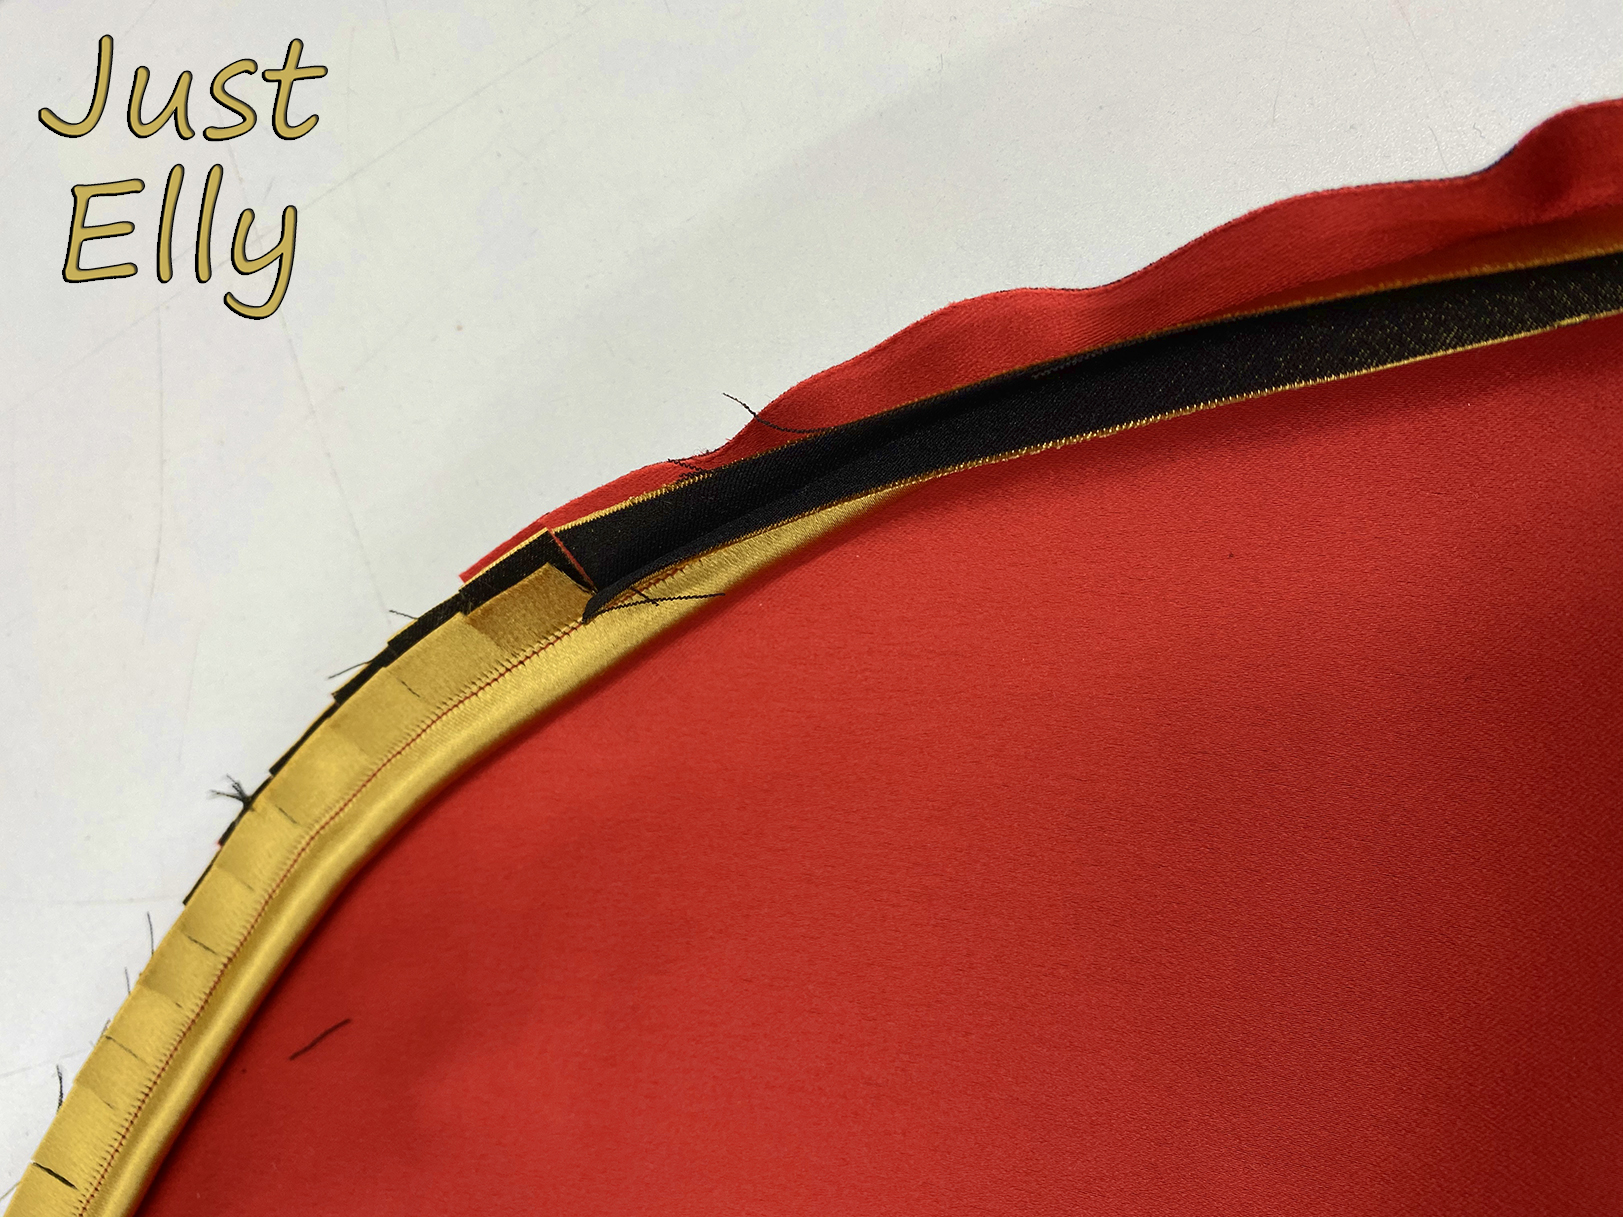
I wanted the border more three-dimensional. Therefore I have a cord (it is a coincidence that this is gold. It just had the thickness I wanted) and sewed it into the ribbon.

I sewed it with red thread so that I could see better later where to sew it on my Christmas tree skirt.

DIY XMAS gift 12

DIY XMAS gift 13

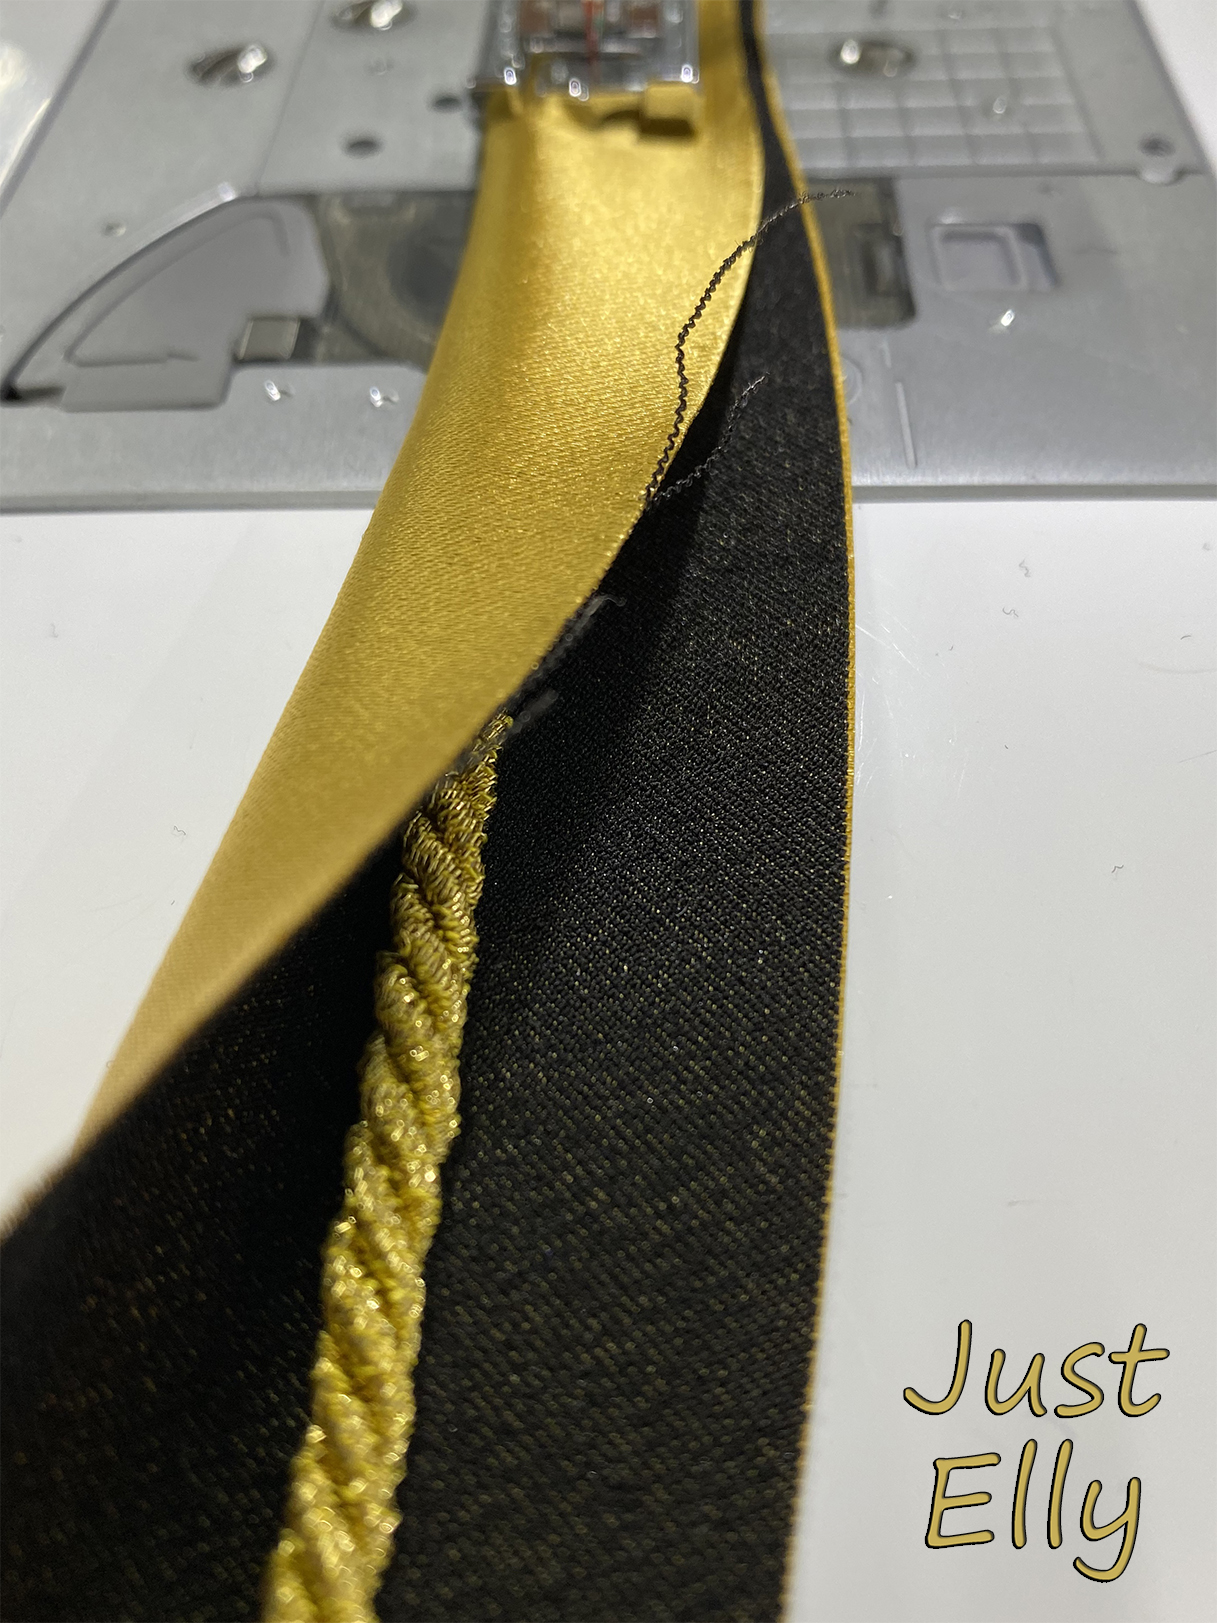
Now sew the ribbon onto the red fabric. Then cut around the edges. IMPORTANT: only cut the golden ribbon, not the red fabric

DIY XMAS gift 14

DIY XMAS gift 15

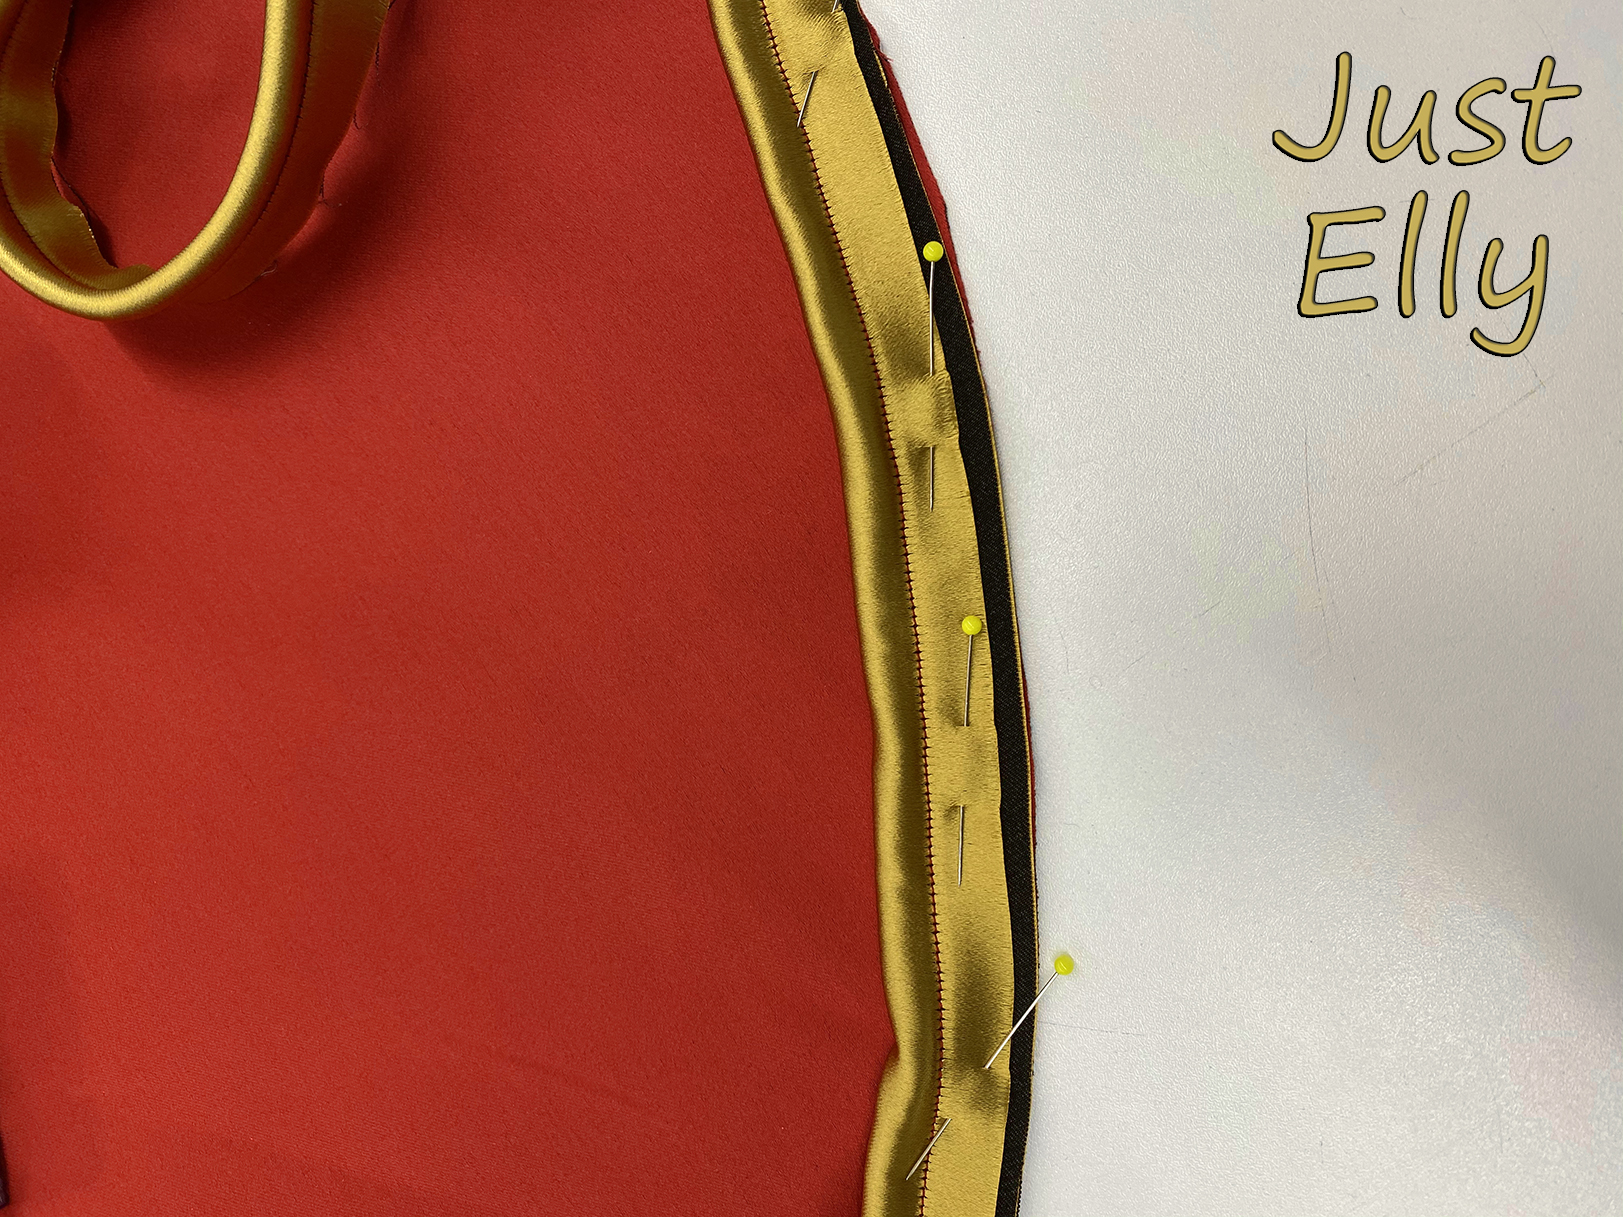
Now pin the back of the Christmas tree skirt with pins. But sew on the red side, because you can see the seam where I sewed the ribbon on. You have to leave a piece open, so that you can turn the whole thing around afterwards!

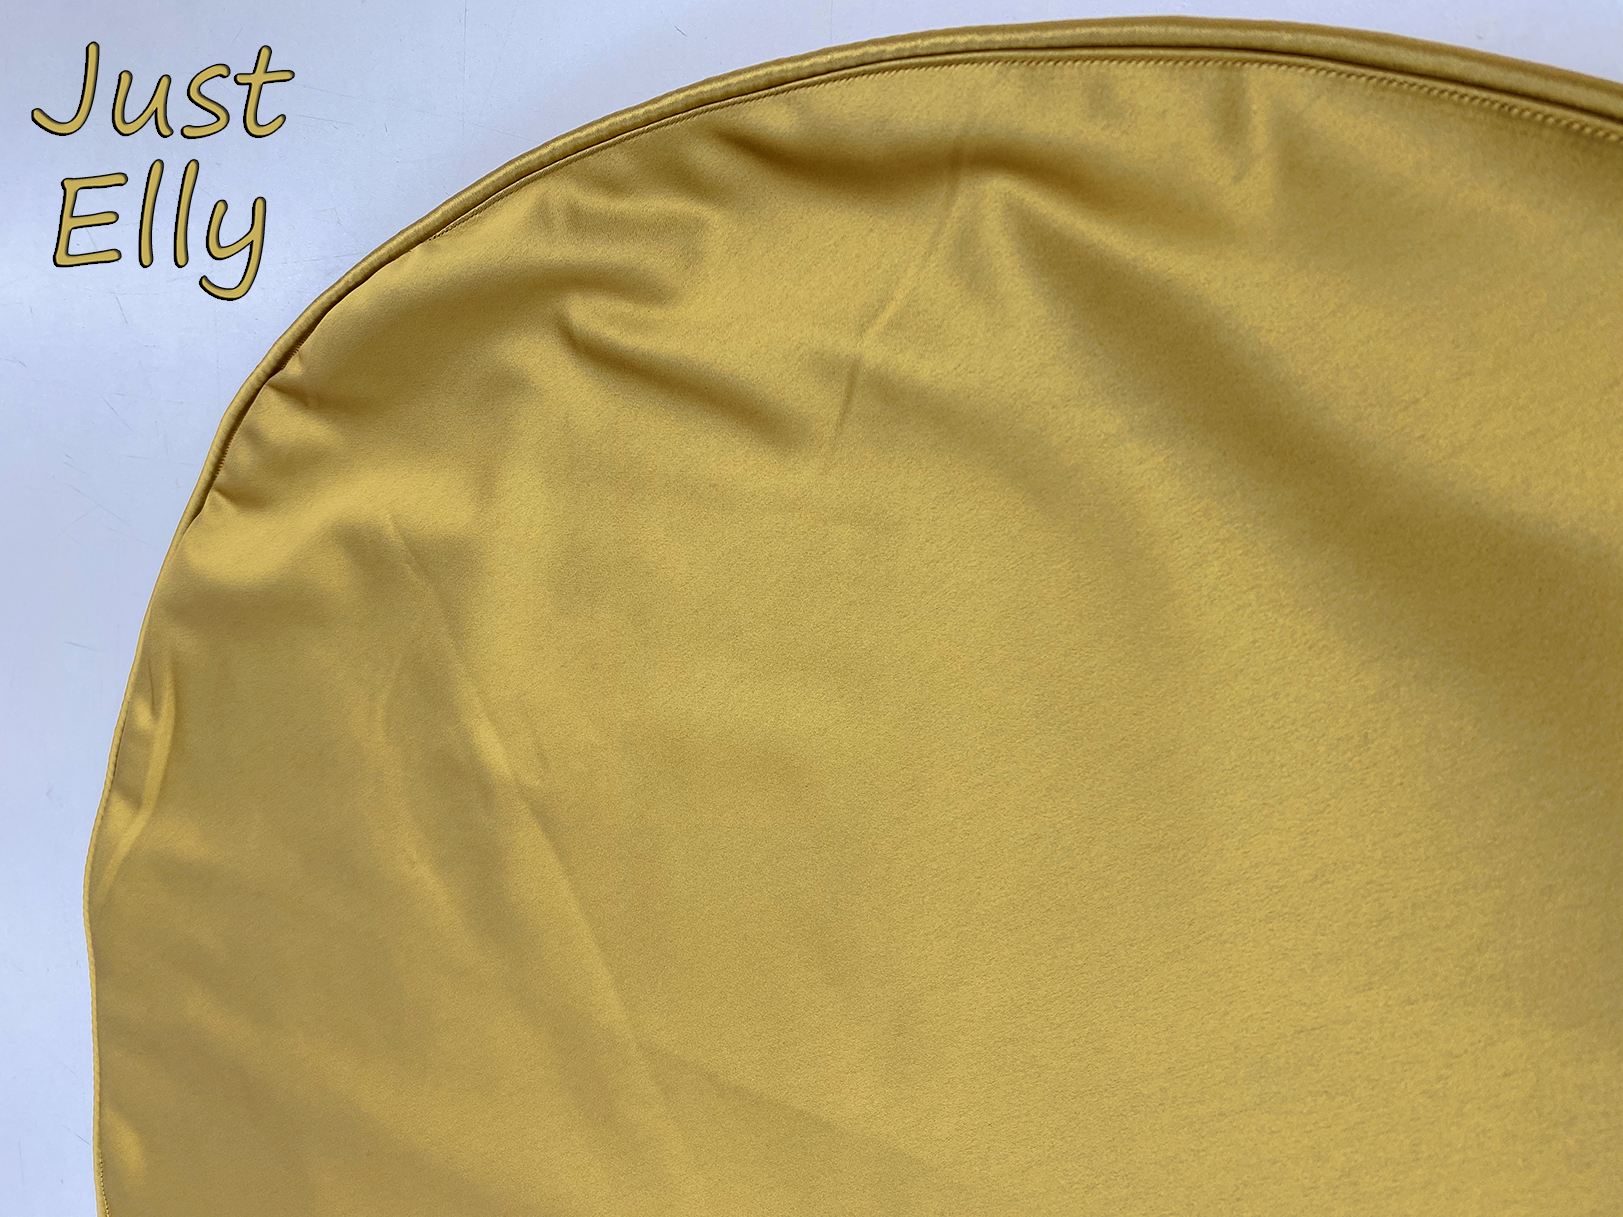
Close there after turning. It doesn’t look so good here, because I wanted to have the skirt ready that day and it’s just faster with a sewing machine than doing invisible stitches with my hand.

DIY XMAS gift 16

Here you can see how the ribbon looks like at the end. I definitely like it better as if it was flat

DIY XMAS gift 17

And now the finished Christmas tree skirt. I like it. Maybe that would be an idea for myself, too. But I still don’t have very good memories of it because of the slippery fabric. Although the result is worth it hihi

DIY XMAS gift 18

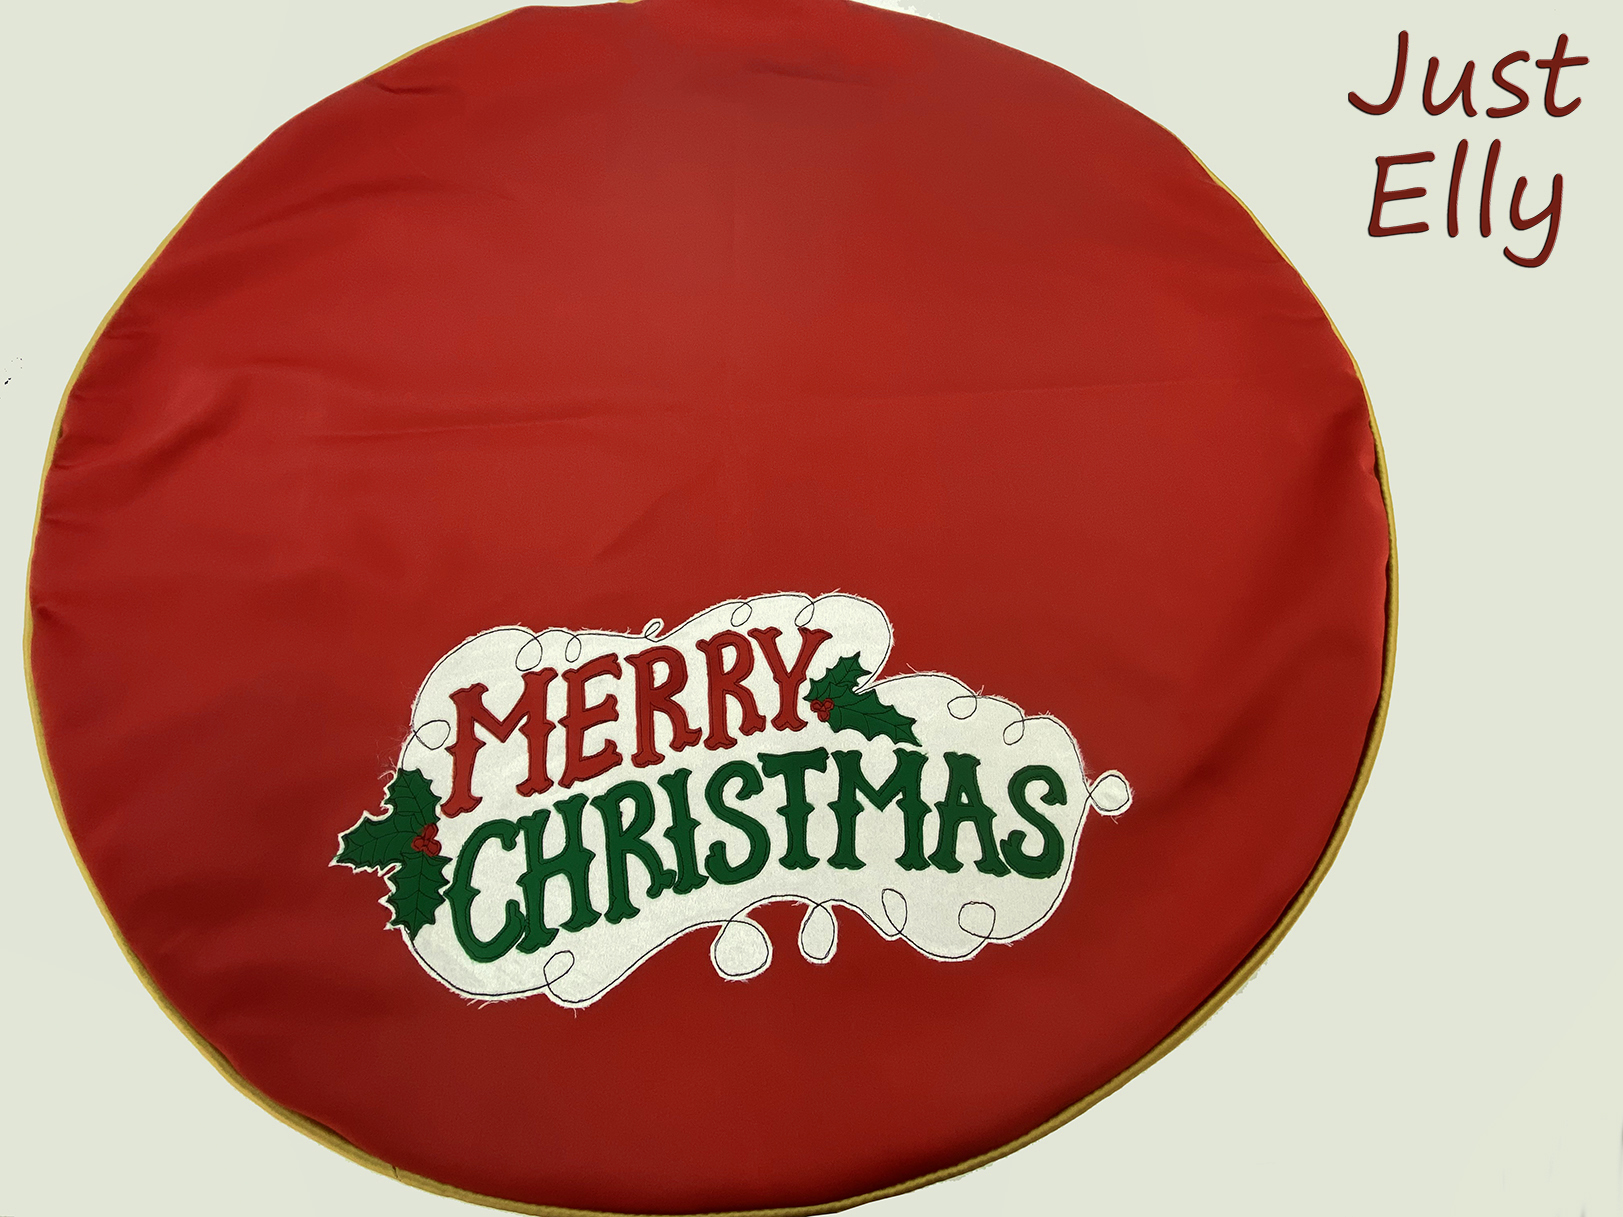
In retrospect, I would set the motif a little further towards the edge.
But whatever. Mrs. H. can decide which side she wants, the one with the motif or the plain gold side.

❀ ❀ ❀


DIY Cosplay Natsu from Fairytale – Tutorial

My god child Sonja asked me once to make a Fairytale costume for a friend of hers. They wanted to go to a Games Con. Sonja had bought a Lucy costume for herself but her friend still needed his cosplay.

She asked me if I could sew a Natsu costume. I must say I had to google for this name hihi

I knew the name Fairytale coz I had bought some of her mangas as a gift but never ever read one of these.

After looking for pics of Natsu I asked Sonja to give me some measurements from Alex like hip, waist, bust, shoulder length ….

Guess what I got in the end?????? “Elly, he is 6ft in height”. Thats all the information I got LOL

Lucky for me I’ve seen Alex a few times before. Otherwise I wouldnt have known is he a skinny 6ft or a muscle one or a little over weighted! There are way to many different physiques out there to sew without any information

To make this cosplay suitable I had to make compromises!

I bought black, white and yellow cotton + velcro

First I made the skirt. Because I hadnt had his size I decided to make the skirt variable for different sizes. To do so I used velcro as seen in this sketch.

If you want to sew it the way I did, dont use a too small piece of velcro! The velcro will hold the skirt together!!!

For the size of the skirt I measured myself and added a few inches in length and width. The front I cut 2 1/2 inches broader than the back because the 2 front pieces will overlap a little.

Cosplay Natsu Fairytale 14

First sew the 2 skirt pieces together. Check how the skirts fits you and where to make the cut to get the 2 pieces for your front. See pic above. Cut your front. Add the yellow bias binding .

I wanted the bias binding in 5/8″ so I cut 2 3/8″ strips

Cosplay Natsu Fairytale 11a

Now measure all three pieces together, add 2″ and cut a 4″ wide stripe. Iron it to the half. Sew the waistband to your skirt. Start at the small front piece. If done the waistbandΒ  should have been longer when you finished at the larger front piece.

Sew the velcro on it. 2 stripes on the small front of your waistband, the other 2 on the back of the larger side. Make sure you wont see the velcro when you close your skirt.

Your skirt is done and should look like mine

Cosplay Natsu Fairytale 10

Here you can see Sonja with the cosplay. Even she is way smaller than Alex she can wear the skirt!

Cosplay Natsu Fairytale 17

The next has been the vest

I used a pattern from a shirt. I made it larger than my size and added 3 inches in length.

You only need the back pattern. Cut it twice. Take one of them and cut it in the middle. Now lay them right side on right side. Cut a sleight curve from the neck down. Add bias binding on front, arms …

I put a lining to the front , but it isnt necessary. I thought it would look better if the front fabric isnt too “soft”

Cosplay Natsu Fairytale 12

For Natsus pants I used the “Burda Young Mens Pants pattern 7306”.

It looked close to the one Natsu wears if I’ve seen it right on the Natsu pics. I needed something very wide and comfy. I only had to shorten the pant legs to make it look moreΒ  like Natsu’s pants.

I cut a size way bigger than Alex would wear usually.

Because I wanted to make an elastic waistband I added 3 inches for it.

Sew the sides and the pant legs.

Follow the pic below. If you have an overlock you can skip the first point

Cosplay Natsu Fairytale 15

Now put elastic bands in your waistband

Cosplay Natsu Fairytale 04

Because I hadnt been sure this pants will fit Alex I put a band in the waistband too!

Cosplay Natsu Fairytale 03

Your pants is almost done

Cosplay Natsu Fairytale 02

Put in both pant legs an elastic band too and addΒ  a 2″ black stripe. Make sure the black stripe is on both sides of the leg at least 3 to 4″ longer!

Cosplay Natsu Fairytale 05

Cosplay Natsu Fairytale 16

Last but not least the scarf. I used a 1 !/2 yard long, 9 inches wide white cotton

First sew with your overlock all around your scarf. Choose a long stitch on your sewing maschine and sew lines, lines, lines

Cosplay Natsu Fairytale 06

Cosplay Natsu Fairytale 07

Here you can see why I said using a long stitch. The fabric crinkles a little and the scarf looks better

Cosplay Natsu Fairytale 08

I bought this foot last year and its more then helpful when sewing 1″ lines πŸ™‚

Now cut 4″ stripes on both sides of your scarf

Cosplay Natsu Fairytale 18

Say hello to Lucy and Natsu πŸ˜€

Cosplay Natsu Fairytale 01

Thank you sweetie for playing my model ❀

Sewing more skirts for a little girl

My longtime project is done (jacket) and I had time to make aΒ  skirt again.

This gnome skirt I made weeks ago.

I’ve seen this fabric and knew it would be a cute skirt for Miss M. πŸ˜€

Skirt with gnomes 1

Skirt with gnomes 2

The next skirt I finished today.

I love dots, I love stripes. ❀ ❀ ❀

Why dont use one of the fabricsΒ  for a little skirt? I embellished it with 2 pirate girls on the pockets and white lace.

Skirt with dots

Instead of one 1 I used 3 small elastics here. It looks way better then the skirt above πŸ™‚

Skirt with dots 2

Skirts, skirts, skirts for a little girl

A co-worker has a cute little 6 year old daughter who ❀ ❀ ❀ skirts.

Good luck for her I have a lot of fabric for children πŸ˜€

So I startet to sew skirts for her. It doesnt need this much time like it does with my stuff. And its the first time I have sewn something for a child.

Its very funny but you can see which skirt I made first. The seam for the pockets is way to far from the edge

Skirt 1

the 2nd skirt. I added a white velvet ribbon

Skirt 2a

This skirt needed more time to sew than all skirts I did so far. I wanted the pockets perfect with the fabric pattern and I did it πŸ™‚

Skirt 2b

The nextΒ  one πŸ™‚

Skirt 3a

and skirt number 4. This skirt is the best I did so far

Skirt 4a

Here you can see Miss M. with her new skirts ❀

Skirt 1 + 2

I just “designed” the next skirt on paper. Now I have to sew it.Maybe this weekend I will have the time to do it.