DIY Bags with Retro fabric

This bag tutorial I found on the internet here: Summer fling bag tutorial

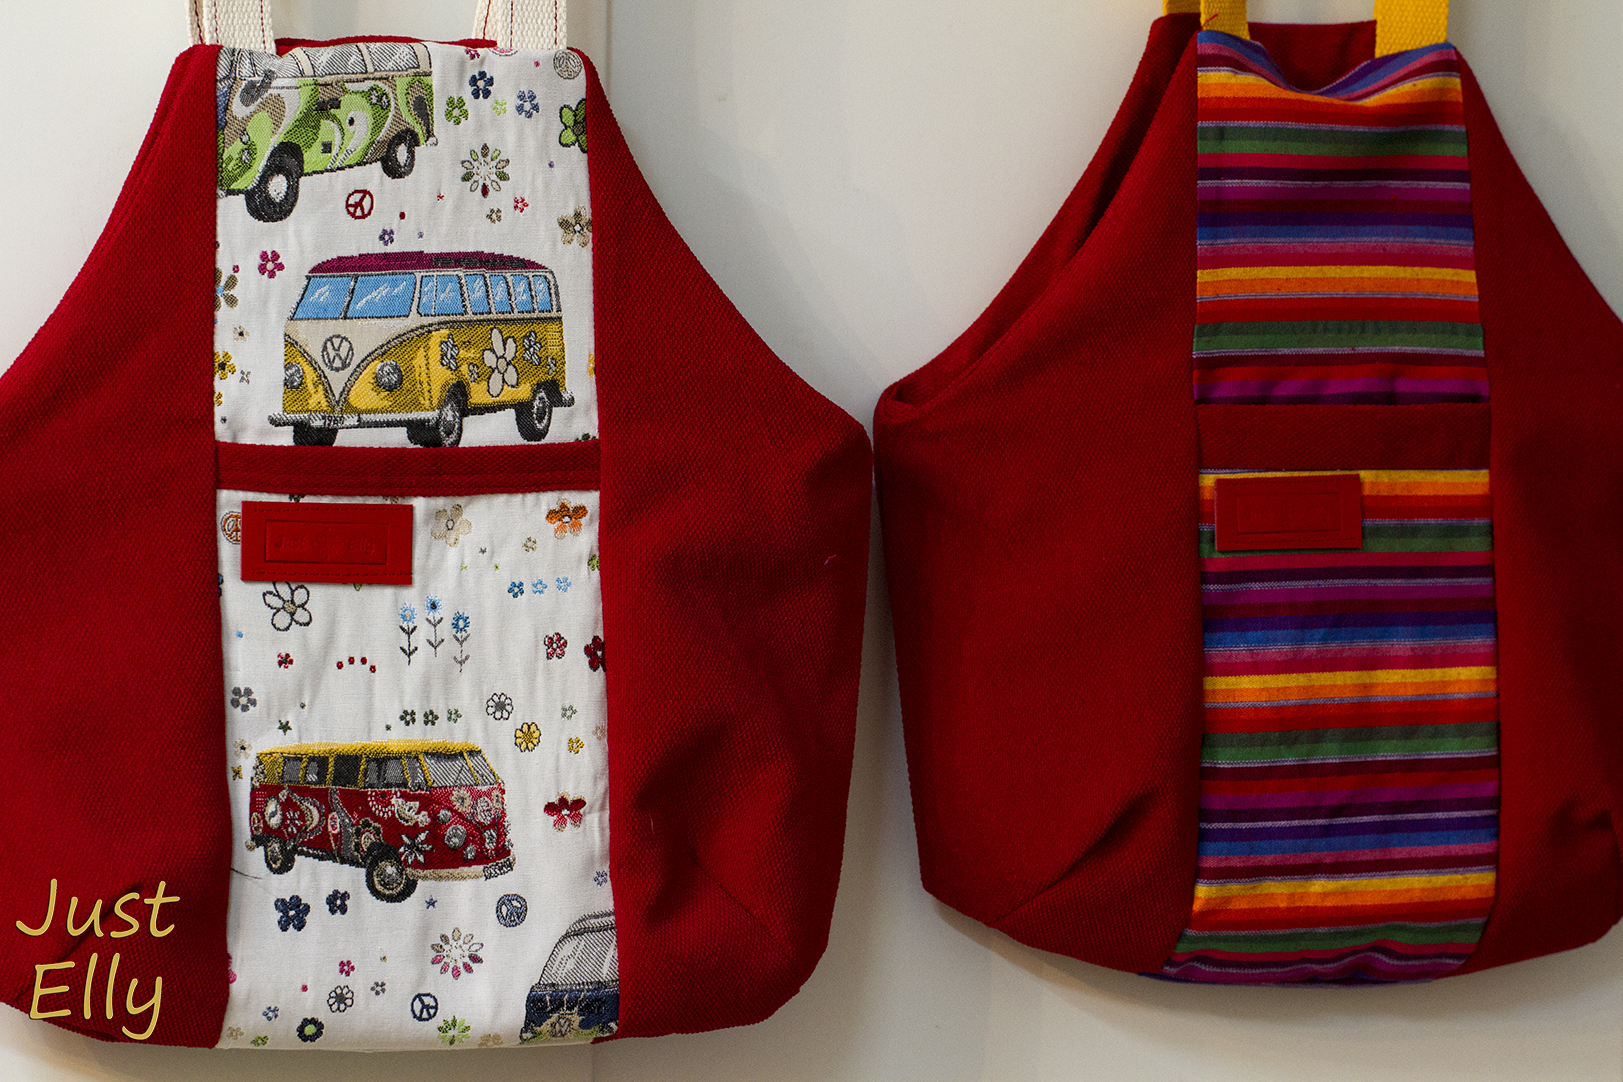
I liked this bag very much because you can sew them with 2 different pattern.

2 of my colleagues had birthdays a few weeks ago.

Yes, I’m a little late. 😦

First I had the flu and had to cancel my sewing course and second those bags needed way more time to sew then I expected.

To save time I made both bags together. Means if I sew the zipper in one bag, my next step has been the zipper to the second one.

Maybe I will sew this bag for me too 🙂

Isnt the fabric amazing? Unfortunality I can’t sew a bag with the Splittie anymore because I used all fabric I had for this bag.

But hey, a gift is more  valuable when you would like to keep it yourself hihi

bag1

I changed the pattern from the tutorial a little

The original bag is closed with a magnet. I added a zipper.

And here I made a mistake by sewing both bags at the same time and made my error twice.

The fabric stripe for the zipper is too wide. Half of it would have been better.

But I have been too far with sewing this bags and didnt wanted to change it not ones but twice.

Take a look

bag4

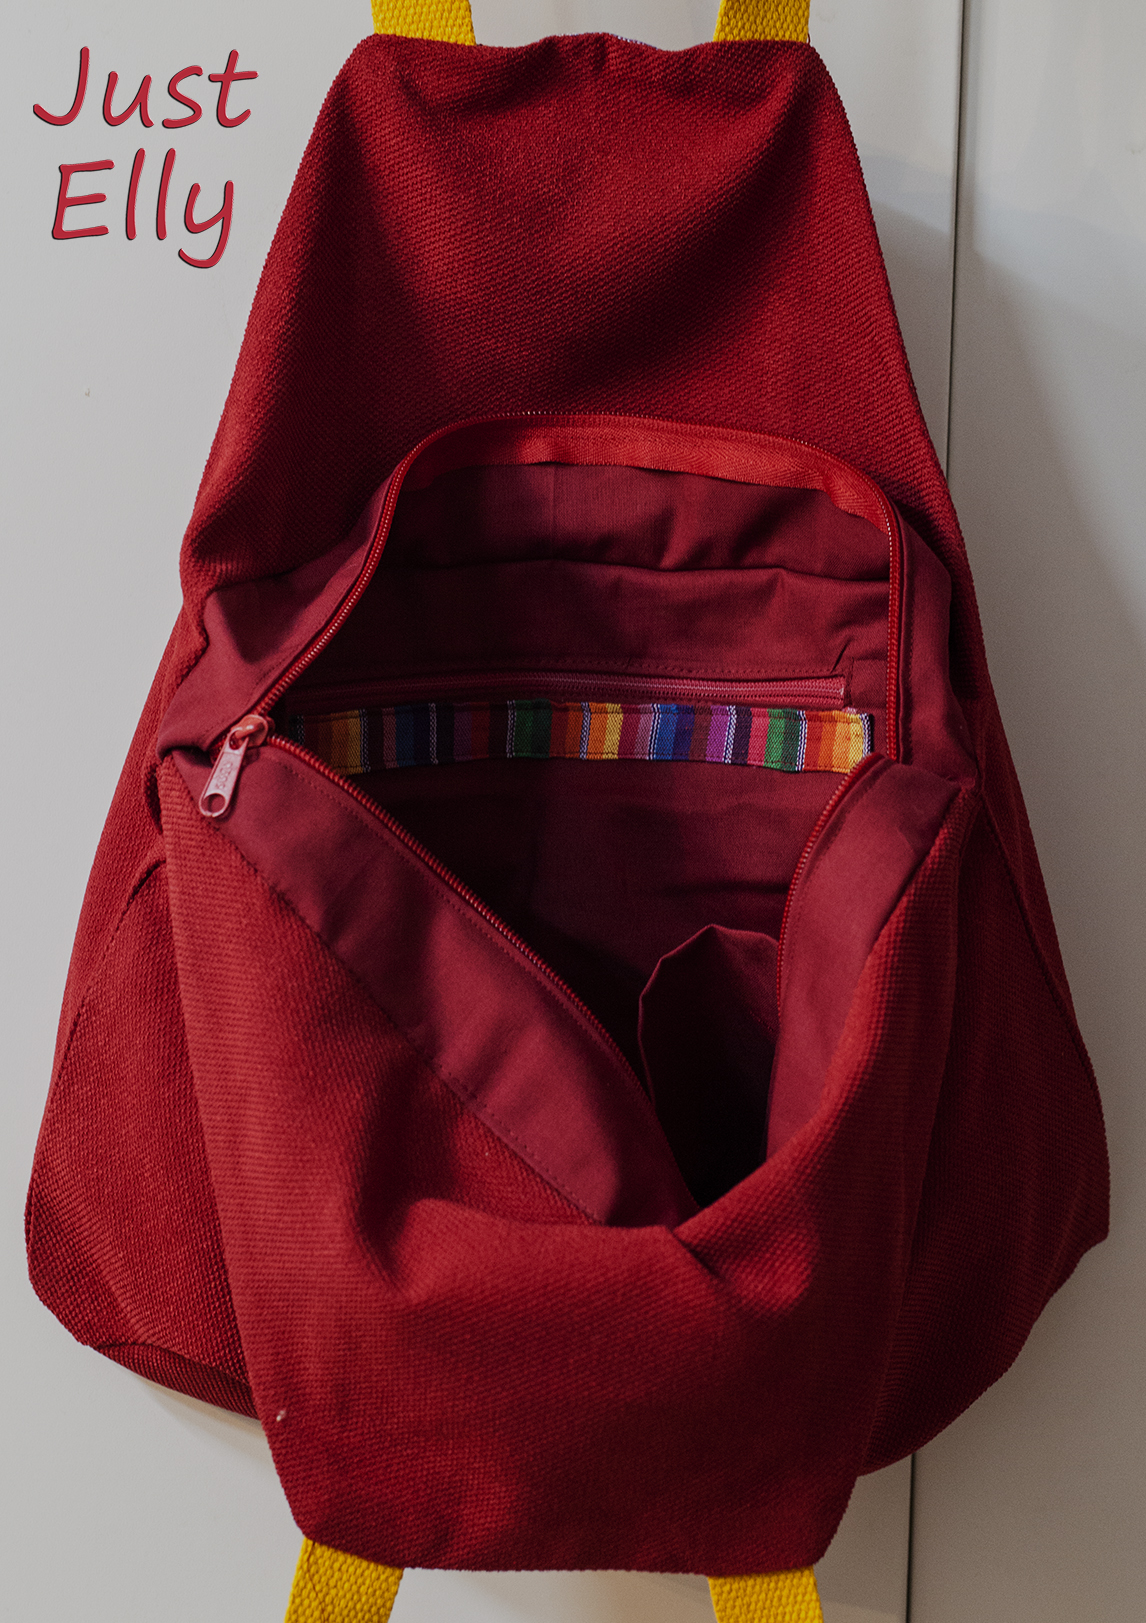
Here my next mistake.

The original bag has a wonderful inner pocket with another fabric than the lining.

IF I sew a bag for myself I will add the zipper as I did but will make it look like the original inner pocket from the tutorial.

When I saw the zipper for the inner pocket it was red on red.

Did you once needed something in your bag and couldnt find it because it has been to dark?

This is the reason I added a stripe next to my zipper. Its easier to find the zipper now.

bag5

I also added 2 slip pockets for a mobile or whatever it will be used to.

I took the lining fabric twice to make it more stable.

bag3

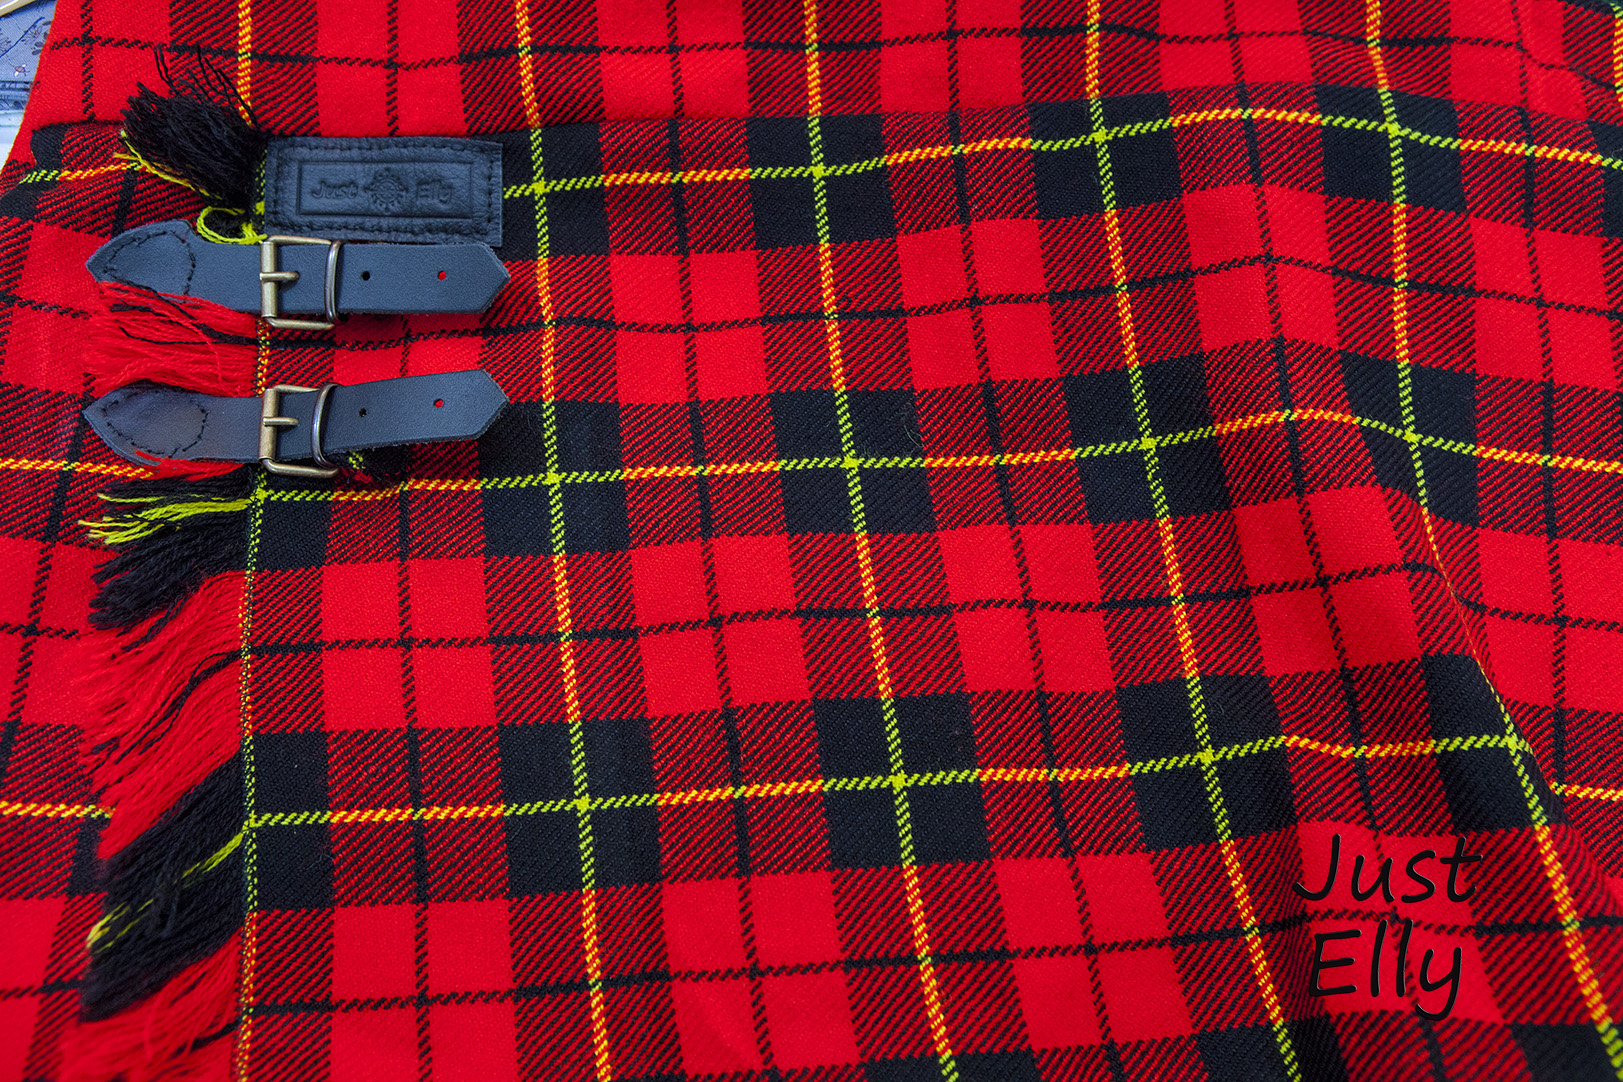
At the end not to forget to use my new “toy” on leather hihi

bag2

Lets hope both colleagues will like their bags 🙂

How a duckling found a Star – A Photo Story

Like every spring I went on  a duckling hunt with my camera. I just love these cuties ❤

But just showing the photos is a little boring.

I decided to write a little story with my photos 🙂

Besides the star I added and cutting the photos I didnt change them. The animals really made this “faces” LOL . This photos longed for a story

_MG_8817

Meet duckling Belle and her brothers

_MG_8843

One day Belle’s brothers tried to play a trick with their baby sister. They told her a star has fallen into their pool last night.

_MG_8866

A STAR? Really?” Belle asked excited and went to the pool. She wanted to see the star.

_MG_8990

Maybe the water was too dirty or it was a really small star Belle couldnt see the star and jumped in the pool.

_MG_8886 

Lets see how long she will look for the non-existing star” said one of her brothers and they went after Belle

_MG_8834

Two of her brothers loughed so hard they couldnt even stay anymore.

_MG_9049

Poor Belle swum the pool one – two – three times but couldnt find the star.

She even asked her neighbor.

A star? In our pool?” asked Duck Smitty.

_MG_8738

_MG_8766

She and her babies searched the pool too.

_MG_9058

When Belle lost all hope to find the star and startet to get out of the pool she saw something sparkled in the water.

_MG_9159

Belle dove to the bottom of the pool and there it was: her STAR

This little star has seen how sad Belle has been and went to earth to help her

_MG_9034-1

Belle was so proud to have found the star. She swum around the pool to show everyone her star

_MG_9010

Her brothers couldnt believe what they have seen and  jumped in the pool to find a star of their own.

_MG_9201

Belle never managed to get out of the pool with one try only. But now with the star she could jump high like never before.

_MG_9202

_MG_9199

Belle’s brothers were not this lucky. They didnt even had enough energy to get right out of the pool.

_MG_8898

 And Daddy’s dressing down  finished them off.

_MG_8786

Duck Smitty’s babies were so tired after searchung the star for Belle they tried to sleep in the pool.

_MG_8759

 But her Mom put them right there were sleepy babies has to be – out of the water and close to Mom and Dad.

_MG_9101

Belle  walked around with her star for all to see and was the happiest duck on earth.

End of Belle’s story!

Stunning colors of spring – photos

Yesterday I posted forest photos.

But we went to a park too. Spring has the most amazing colors.

Those colors promise you the winter is over, temperatures are getting warmer and summer isnt this far away anymore ❤

Look at this amazing colors 🙂

Two weeks ago most of this places has been earthy because of the lack of flowers or blossoms

_MG_8556

_MG_8554

It is alway amazing to see how nature takes back what men took away from her. See this old stone wall?  It was full of plants and moss.

_MG_8549

_MG_8551

_MG_8717

_MG_8470

_MG_8616

_MG_8609

_MG_8538

do you see this weird tree? Every tree in this road has been this strange

_MG_8589

and not to forget when talking about spring are the loud parakeets and my loved ducklings hehe

_MG_8620

_MG_8685

Summer will always be my favorite season but I love spring ❤

A walk through a forest – photos

Today was a day with lots and lots of calories hihi

My godchild Sonja invited us to a restaurant. ❤ ❤ ❤

We ate way to much because the food has been yummy yummy.

Sonja and I decided to make a walk to lose some of the calories 😀

We took our cameras and went to the next forest to make a few photos.

You wont believe what I’ve seen first on my way. An old rusty barrel!

How could someone throw away something like this in a forest? You cant even drive on this dirt road because its to narrow

_MG_8499

The next photos are more of what to expect to see in a forest

nothing is wasted

_MG_8537

did the last storm killed this tree?

_MG_8529

why do you need this in a forest?

_MG_8521

a very small cascade 🙂

_MG_8601

a creek, not even 3 yards in width

_MG_8584

does this creek has a name? Dunno 😀

_MG_8574

_MG_8500

everything dies

_MG_8525

and gets part of new life

_MG_8532

or gets conquered by Sonja hihi

_MG_8524

At the beginning I wrote we had to lose some calories.

Take a look what we did after our forest tour hehe

_MG_8564

My own design: sewing a Kilt as minidress

ot

last year I sewed this mini dress.

_MG_8342

I like this dress very much.

I dont know how I got the idea to combine this dress and a kilt. LOL

Maybe I’ve seen a kilt or a pleated skirt on the internet. I dont remember hehe

I searched the net for tutorials and pics of how to make a kilt.

The fantastic woolen and the leather straps I found at Ebay UK. For the Kilt only I needed nearly 3 yards 😮

At first I shorten my pattern.

I sewed it the same way like my “old” mini dress. Then I sewed the kilt and put both together.

.

kilt 2a

kilt 5

kilt1

to make my Kilt more realistic I added leather straps. They are just decoration because the fabric “under” this front is 10 inches longer. So no reason to “fear” storm and wind when wearing it without trousers hehe

kilt 6

For sewing special projects like bags or this dress I ordered a brass stamp with my logo to put on leather.

Yes, it has been expensive but I love it

I still have to find a way to sew these small leather pieces. It isnt perfect with hand sewing 😦 and it hurts because the leather stripes has been thick

kilt 4

I made another Kilt minidress with this blue/green colors. But I still have to put the straps and the logo on it

kilt 7

What do you think about my design? I so love it and will wear it very often hihi

Merken

Spring is in the air ….. (photos)

Sunday is simply my perfect day.

You dont have to go to work, no alarm clock in the morning, you can be lazy or being creative. Its my decision hehe

Today has been a sunny day. Cold, windy, but the first sun beams tempted me to take my camera and go to my favorite park ❤

what is spring without its typical flowers?

MG_0420

MG_0404

MG_0388

mg_0831

MG_0418

Ikea Grundtal as a form dress pin cushion

Three months ago, the teacher left the sewing class. She took a job in another store. Unfortunately!

I wanted to do something very special for her as a thank you and to show her what I learned with her.

I’ve been thinking for a long time about what I could do for her.

Then I saw a Christmas cover for a wine bottle on the internet and wanted to sew something like that for her.

Unfortunately, I didn’t know if she was drinking wine at all. I never drink wine myself and if someone gave me a cover like that, I would never use it!

On my next visit to Ikea I saw the Grundtal container with the magnet on the bottom and I knew what I wanted to do:)

A FORM DRESS PINCUSHION !!!

Ikea Grundtal pin cushion 01

Ikea Grundtal

Ikea Grundtal pin cushion 44

This pincushion is the second one I’ve made. The first one had to be finished so quickly that I didn’t have time to take photos for the tutorial.

That’s how I did it.

These things I needed:

1 Ikea Grundtal container

2 different fabrics

ribbon

1 round wooden pole 3/8″

1/8″ plywood

wood plate

foam padding  1 3/4″

glue

beads 1/8″

Ikea Grundtal pin cushion 02

a collection of what I used


I used my form dress as model to make my pattern

Ikea Grundtal pin cushion 03


My pattern has 10 inches. (I’ll explain the red marking later)
Front and back are identical. Only the darts are different. I have added half an inch

Ikea Grundtal pin cushion 07

I started with my container.

A colleague sawed out the round piece of wood for the container and the oval plywood. Thanks again for this:)

The oval plywood should have the width of the container. It’s supposed to stabilize the doll.

Ikea Grundtal pin cushion 04

The round piece of wood is used to put the wooden stick in later. At the same time, the container should become heavier so that the doll does not fall over later.

I didn’t have any wooden panels of the right thickness for the container.

That’s why I took 2 wooden plates, which together had exactly the right thickness. (1/8 ” below the edge of the container)

My colleague used a hole saw to saw the 2 wooden plates. This was very helpful for me, because I had a marking exactly in the middle of the wood because of the drill in the middle of the hole saw.

To drill a 3/8″ hole through the container cover and the wooden plates, I put the cover between the two wooden plates. In this way, the plastic cover cannot break.

Then put the wooden plates in the container, put the cover on and insert the wooden stick through all 3 holes. Make sure that the wooden stick is really straight! If not, the dress doll will be crooked later on.


If you used two wooden plates like me, glue them together. Make sure that the drilled holes are exactly on top of each other.

Paint the wooden stick in the color you like.

Now glue and paint have to dry first. In this time you can start sewing.

Cut out front and back parts. Sew the darts in both parts.

Ikea Grundtal pin cushion 09

Close both sides together

Ikea Grundtal pin cushion 10

For the next step you need the oval plywood and a piece of vilene. Draw the outline and add 1/2″

Ikea Grundtal pin cushion 08

Cut out the vilene and iron it on your fabric. Add 1/2″ to your fabric, too.

Ikea Grundtal pin cushion 11

Now, you need to sew this piece of fabric on the bottom.

Ikea Grundtal pin cushion 12

Glue the plywood on the vilene

Ikea Grundtal pin cushion 13

Because the glue has to dry now we continue with the container

Cut a piece of fabric for the container. The fabric must be large enough to be placed around the sides of the wooden plates. Glue the fabric to the top of the plate.

When the glue has dried, cut the hole in the fabric from the wooden plate. The more precisely you cut, the more accurately you can fix it later in the center of the container.

Put glue in the container on the bottom and sides. Additionally on the sides of the fabric.

Now place the wooden plate exactly in the middle of the container. With a small screwdriver you can stuff the fabric in the sides.

Ikea Grundtal pin cushion 15

Before you clamp the wooden plate, be sure that the hole is exactly in the middle. Do not exert too much pressure during clamping, otherwise the container will be damaged.

Let the glue dry for a few hours

I also glued the lid on the container.

Ikea Grundtal pin cushion 21

Back to the “dress”

Cut out the hole in the fabric from the bottom of the plywood.

Take your foam and cut it out in the width of the dress.

Ikea Grundtal pin cushion 18

Put the foam into the dress and cut the length. Be sure the foam is in the bottom of the dress. Leave the foam one or two inches longer than the dress.

Ikea Grundtal pin cushion 19

Now draw the hole from the bottom onto the foam.

Ikea Grundtal pin cushion 20

Take out the foam and write on which side the front or back of the foam was.

Ikea Grundtal pin cushion 25

 Take a big screwdriver and push it carefully and slowly through the foam. Start at the marked hole. Stay in the middle!

When you look at my doll, you realize that I didn’t stay in the middle: (

Ikea Grundtal pin cushion 26

Use the screwdriver to move back and forth several times and remove the foam parts. Try to make sure that you get through the foam with the round wooden stick. If not, use the screwdriver again. Then it should be easy.

Ikea Grundtal pin cushion 27

Now put the wooden stick with the foam into the container. Attach your dress to the foam and cut the foam in the length of the dress.

Ikea Grundtal pin cushion 17

Now you have to decide where to put the dress on the wooden pole. I left enough space between the dress and the container so that I can reach there with my hand. Put a marker on the wooden pole at the top of the dress. Saw the wooden stick 1/2″ below this mark.

Ikea Grundtal pin cushion 28

Glue the wooden pole into your container and let it dry.

Cut ALL corners of the foam to give it an oval shape.

Start with the buttock.

Cut a 4″ half round piece of the foam

Ikea Grundtal pin cushion 22

Round off this piece as shown in the pictures. Don’t cut everything at once. After each cut, put this piece into the dress and check if the result is acceptable. Small steps are important.

Ikea Grundtal pin cushion 23

Ikea Grundtal pin cushion 24

In the end it will look like this

Ikea Grundtal pin cushion 29

The procedure with the chest is the same. Here too, a 4″ foam piece is needed. Don’t forget: little steps and check every cut with the dress.

Ikea Grundtal pin cushion 30

Ikea Grundtal pin cushion 31

Ikea Grundtal pin cushion 32

Now cut the shoulder and neck from the foam.

Ikea Grundtal pin cushion 35

Ikea Grundtal pin cushion 36

The next picture shows why I had the red mark on the pattern. The dress just doesn’t look so good!

Ikea Grundtal pin cushion 34

Before the next step, remove the buttocks and chest from the dress and put the wooden stick through the dressed doll.

If you don’t do that, you have trouble finding the hole in the foam for the wooden stick.

Now put your buttocks back in the doll and then the chest.

In order to “fix” my dress, I didn’t cut the fabric off but stuck it with needles and sewn it by hand.

Ikea Grundtal pin cushion 37

Fill the sides of the chest with small pieces of foamed material.

Ikea Grundtal pin cushion 38

Close the shoulders and neck also by hand.

I added a little decoration to my form dress

The ribbon is glued to the container lid

Ikea Grundtal pin cushion 39

The necklace is made of very small beads and very thin metal wire.

Ikea Grundtal pin cushion 40

Ikea Grundtal pin cushion 42

And now my form dress pin cushion 🙂

Ikea Grundtal pin cushion 41

Ikea Grundtal pin cushion 43

Ikea Grundtal pin cushion 44

I hope you like my tutorial 🙂

How to make the Ikea christmas tree fabric into a 3D wall hanging

A year ago I had so many ideas for christmas decorations. But I wasn’t good enough to sew them!
When I started this blog, I posted a photo of a certain fabric from Ikea. The Christmas tree!
Last year I wanted to make a curtain out of it but the fabric was too long for that.

This year I had another better idea and I knew how to do it!!!

Ikea christmas tree 00

I wanted to make a 3D wall hanging with the gorgeous fabric!
The tree should look like a real Christmas Eve tree decorated with toys and gifts.

First I sewed a ribbon on the side of the fabric. Not because it looks nicer, but because it says “Made for Ikea” on it.

Ikea christmas tree 02

Next I wanted to realize my 3D ideas.
I started with the Christmas packages. I didn’t wanted the packages side by side! It should look more realistic.
If you want to re-stitch my project, use fabric with small motifs for the packages. This looks better.
Then I painted the 4 packages on paper, how I wanted to sew them for the tree. I bought foam in 2 different thicknesses and cut out the packs. Each package got a zipper so I could wash the fabric without the inlet.
On the back side I sewed 2 strips of velcro. I sewed the counterpart of the velcro onto the tree fabric. Put all 4 packs on the tree cloth and mark where the counterpart has to go!!

Ikea christmas tree 04

Before I put the parcels on the fabric everyone got a nice ribbon 🙂

Ikea christmas tree 05

Here you can see the velcro on the tree fabric

Ikea christmas tree 06

My fabric got 4 parcels. Here you can see why I took 2 different thicknesses of foam! It just looks better 🙂

Ikea christmas tree 03

Sewing the “toy” was the most time-consuming!
I cut the pattern for the rocking horse out of a magazine years ago. I can’t remember which magazine, but on the internet you can certainly find patterns.
I changed the horse a little bit, changed ears, added mane and saddle and horse harness out of leather. I so love it ❤ ❤

Ikea christmas tree 01 back

Ikea christmas tree 01 front

Meet Teddy ❤ ❤ ❤

Teddy’s the only piece I didn’t make myself.
I was looking for patterns for other toys but didn’t find anything for me.
So I sewed a little velvet bag, put some cotton wool in it and tied Teddy up.

Ikea christmas tree 08

Here you can see all my decoration “under” the Christmas tree.
To make it even more realistic, I put red velvet under the Christmas tree.
For next christmas i want to make a half tree skirt out of it

Ikea christmas tree 09

A christmas tree without a star is a no go. Here is my star. I wanted to buy golden fabric, but the fabrics I found were very  thin and cheap looking. I used the yellow fabric from my horse

Ikea christmas tree 07

I have not forgotten to sew small bags for the tree.
I hung them up but I didn’t like what it looked like.
I therefore decided to leave the tree “naked”. Maybe I have a better idea for next christmas.

And now my finished christmas tree

Ikea christmas tree 10

I hope you like my Christmas tree
Maybe you had a great idea for this fabric too. I would like to see what others have done with it 🙂

Sewing a short dress for jeans or wool tights

This one I made last year in november. I found a pattern of a sleeveless dress I liked. I knew how I wanted to wear this dress – with jeans and a longsleeve shirt. The dress of this pattern ended few inches above the knee. Its a very easy to make.

I shorten my pattern, choose woolen fabric and voilà here is my new dress 🙂

The only thing I have to change is taking a belt with a smaller buckle with my jeans when wearing this dress  hehe

_MG_8342

_MG_8354