Today is St. Nicholas Day 🙂

Today is St. Nicholas Day 🙂
Day 5 🙂

Say hello to day 4 ❤
Day 3 of my advent calender 🙂

Have a great start to the week with number 2 of my advent calendar ❤

A few years ago I discovered a blog where someone had sewn a beautiful Advent calendar.
I actually wanted to sew it last year, but my sewing machine broke down.
The only store in the area that repairs my brand had so many orders that the machine couldn’t be repaired until this year.
I knew more or less what I wanted my calendar to look like and then looked for embroidery files on the Internet.
And I found them. I wanted to have a different embroidery every day.
But I misjudged the time!!!
I had expected a relaxed 3, maximum 4 days, but it took me 25-30 hours to complete the whole calendar.
It had to be finished on Saturday because I was giving it away. It was therefore very stressful.
The calendar was finished on Saturday night at 1am 😀
Here is day 1
I will post the link to the blog of the calendar on the last day.
So it will be a little surprise when you see the whole thing.
And also write a tutorial on how I sewed it.
Maybe someone will like it as much as I did and want to make this calendar too. ❤
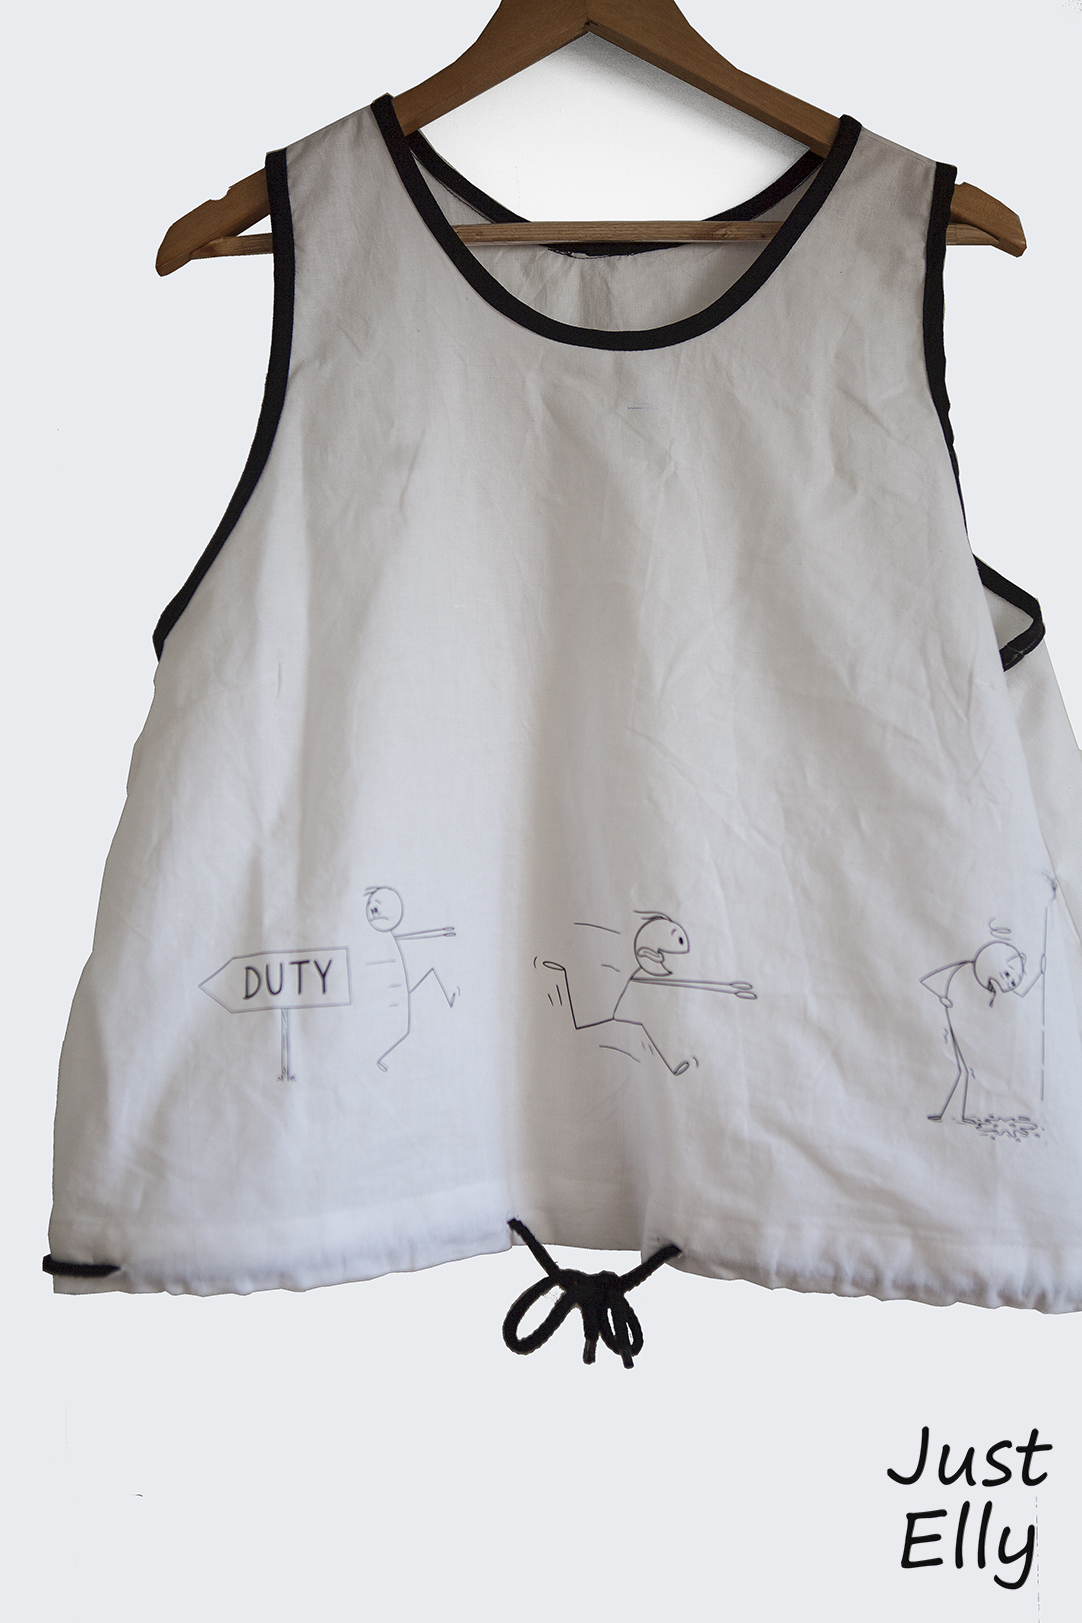
I don’t know what made me come up with the idea of stick figures, but I really wanted to make more of these shirts.
I think single-colored shirts are so boring and somehow I got the idea to make stick figures on the next shirt.
I didn’t know exactly which figures I wanted and just googled stick figures.
I came across the figure with DUTY. On its own, of course, it’s deadly boring, so I came up with the idea of combining it with at least 2 other figures.
I now knew what I wanted, but it took me a weekend to find the right pictures.
I bought the vector graphics and had them printed on the two pattern pieces.
At first I wanted to machine embroider it, but it was supposed to be a thin, light summer shirt and a print would be better.
How do you like the result? I think it’s great 😀


I think it’s been almost 2 years since I saw the most beautiful little handbag in the world on Pinterest. ❤ ❤ ❤
I won’t write who the designer is, just that you couldn’t buy the bag anymore.
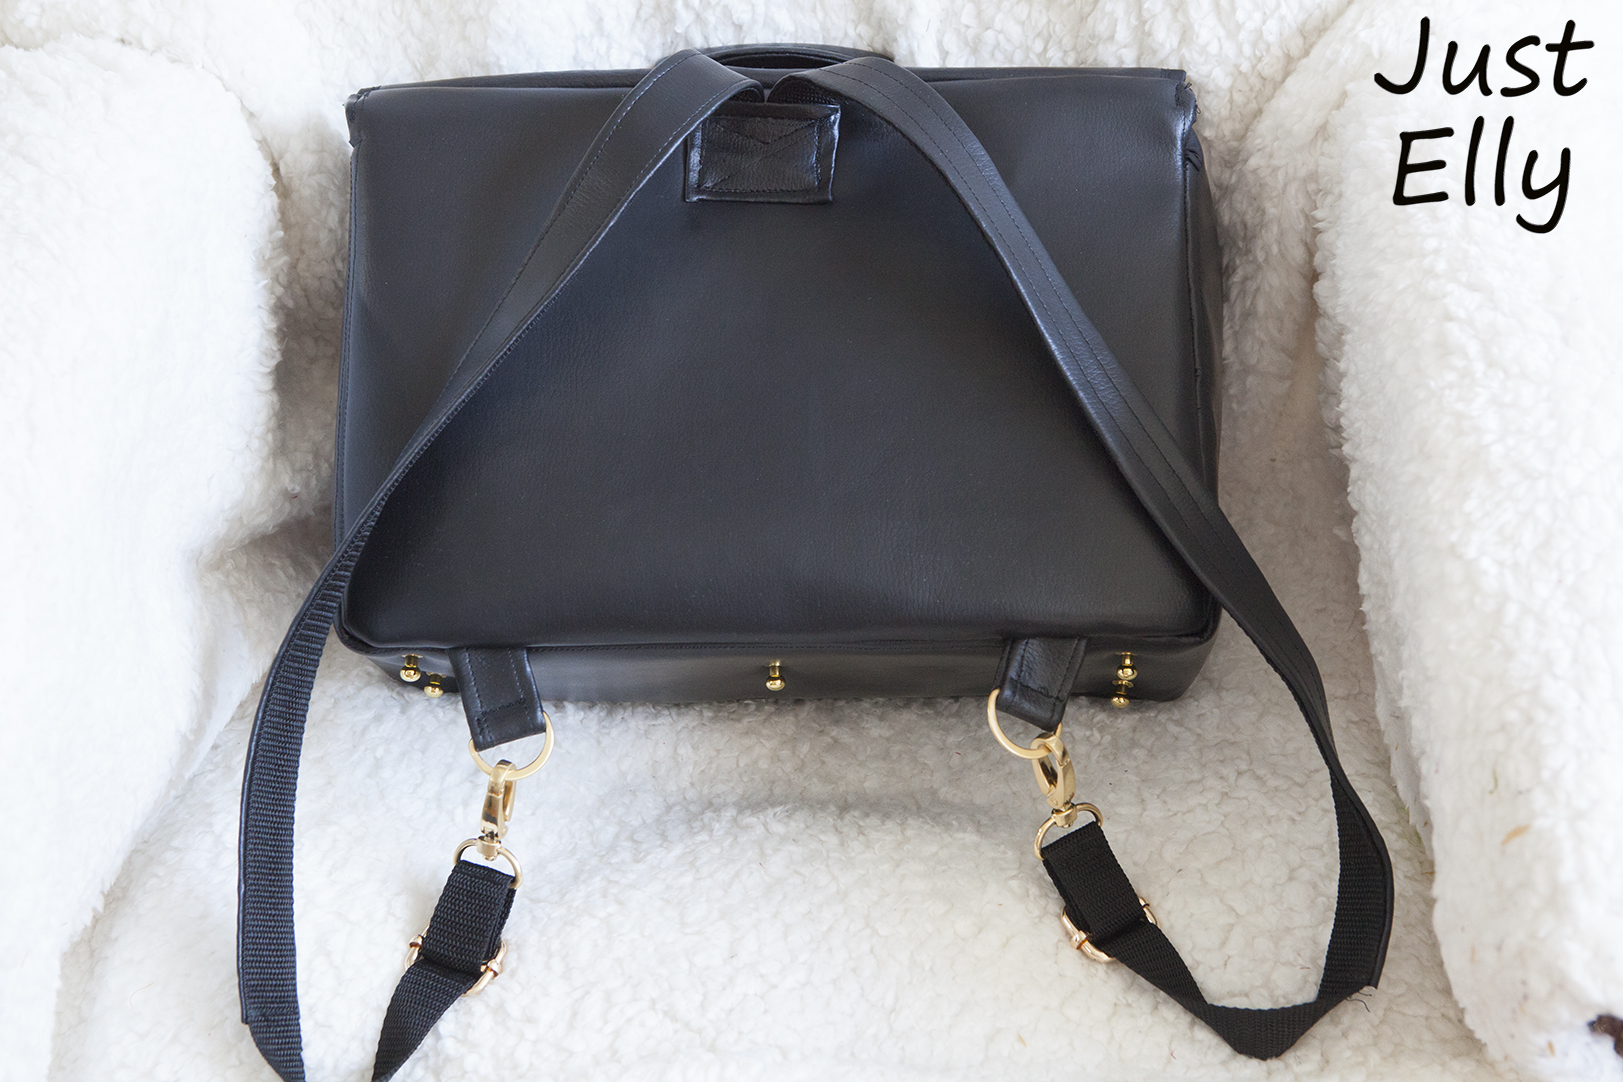
But because I really wanted to have it, preferably as a backpack, I decided to sew this bag myself.
Getting the black faux leather was easy. The original is made of real leather, but almost impossible to make with a normal sewing machine. The hardest part was finding a shiny gold-colored zipper, which had to be huge.
I also spent a long time looking for pins because I didn’t know which ones to choose for the bag. I decided on colorful, funny 😀
I bought a really cute little leather jacket for toddlers as a model for the jacket, which was very well priced. Lucky for me. 😀 A pattern has been made from it
I won’t describe in detail HOW I made this backpack, but I will show a few cell phone photos from the sewing course.
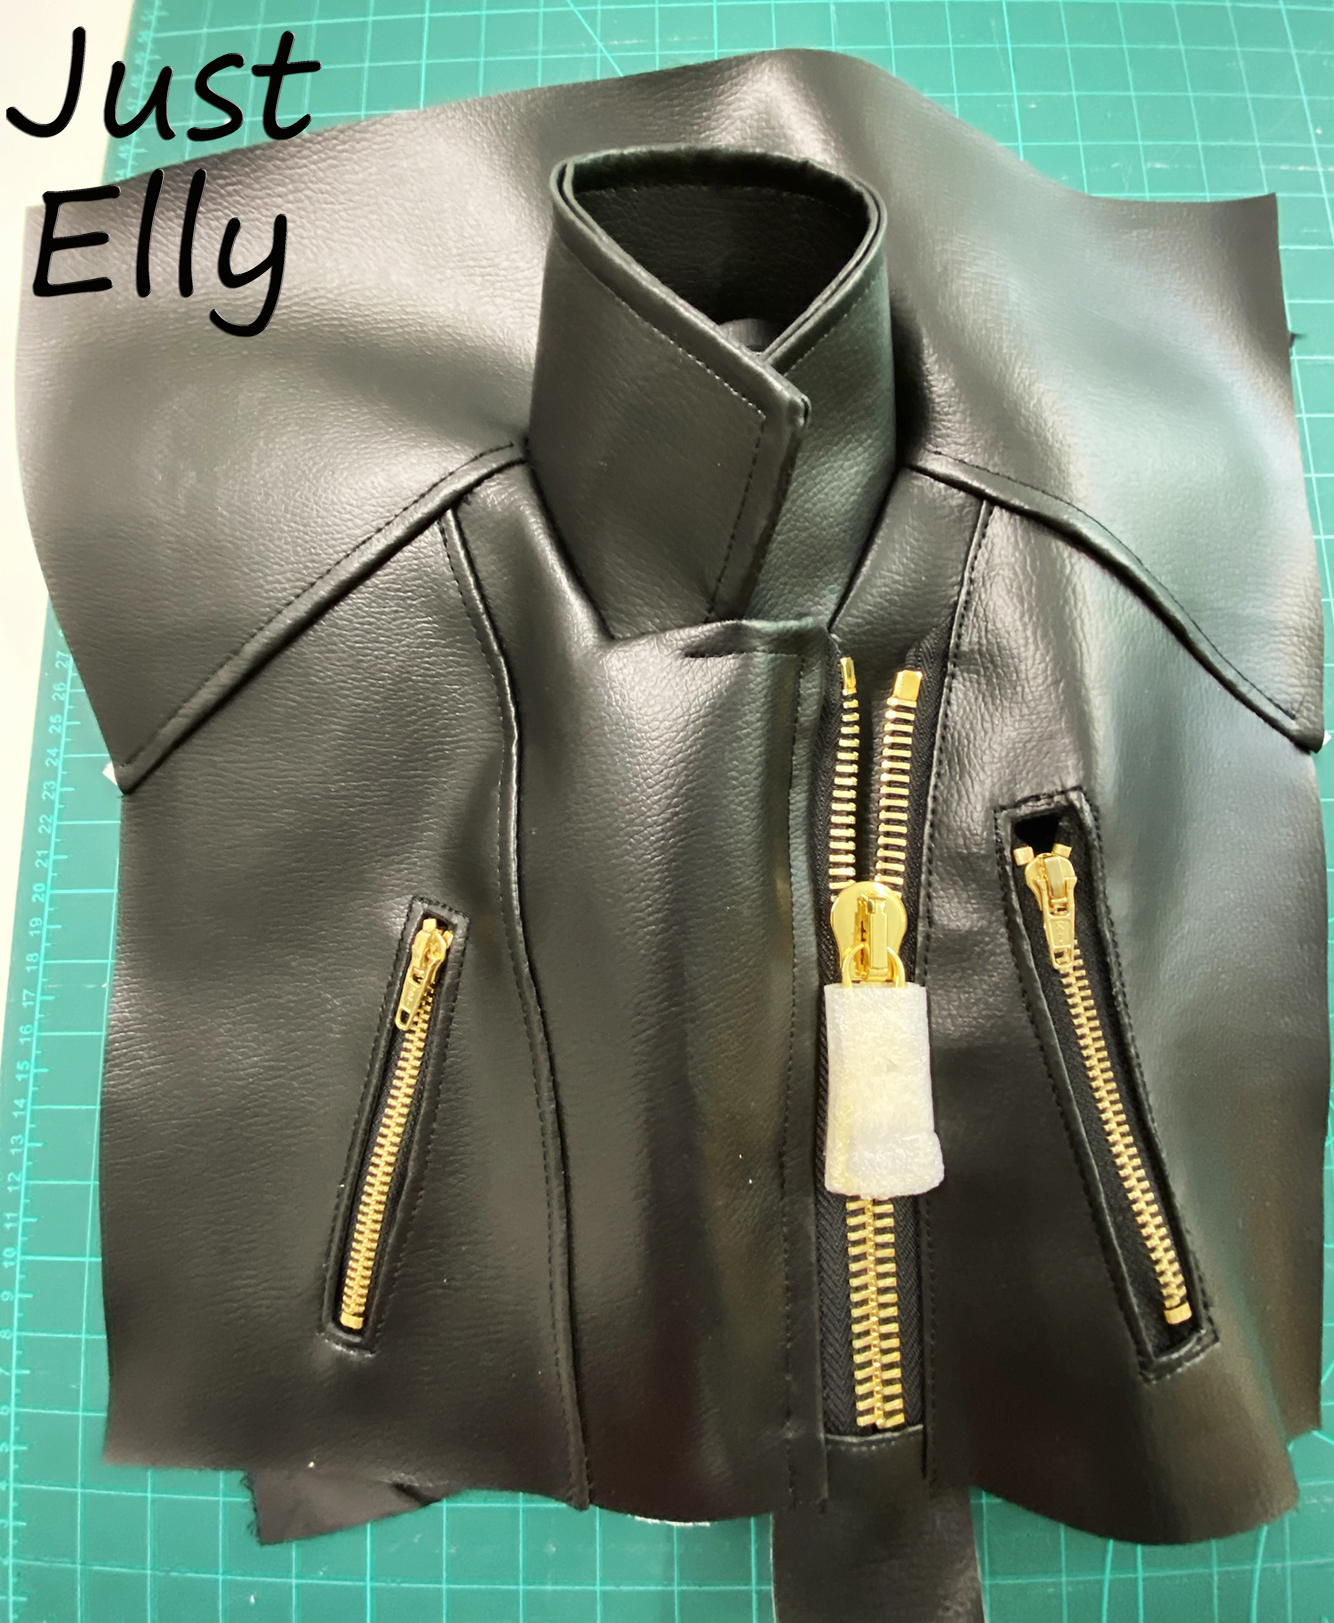
I don’t know if you can tell from the picture how huge the zipper is.

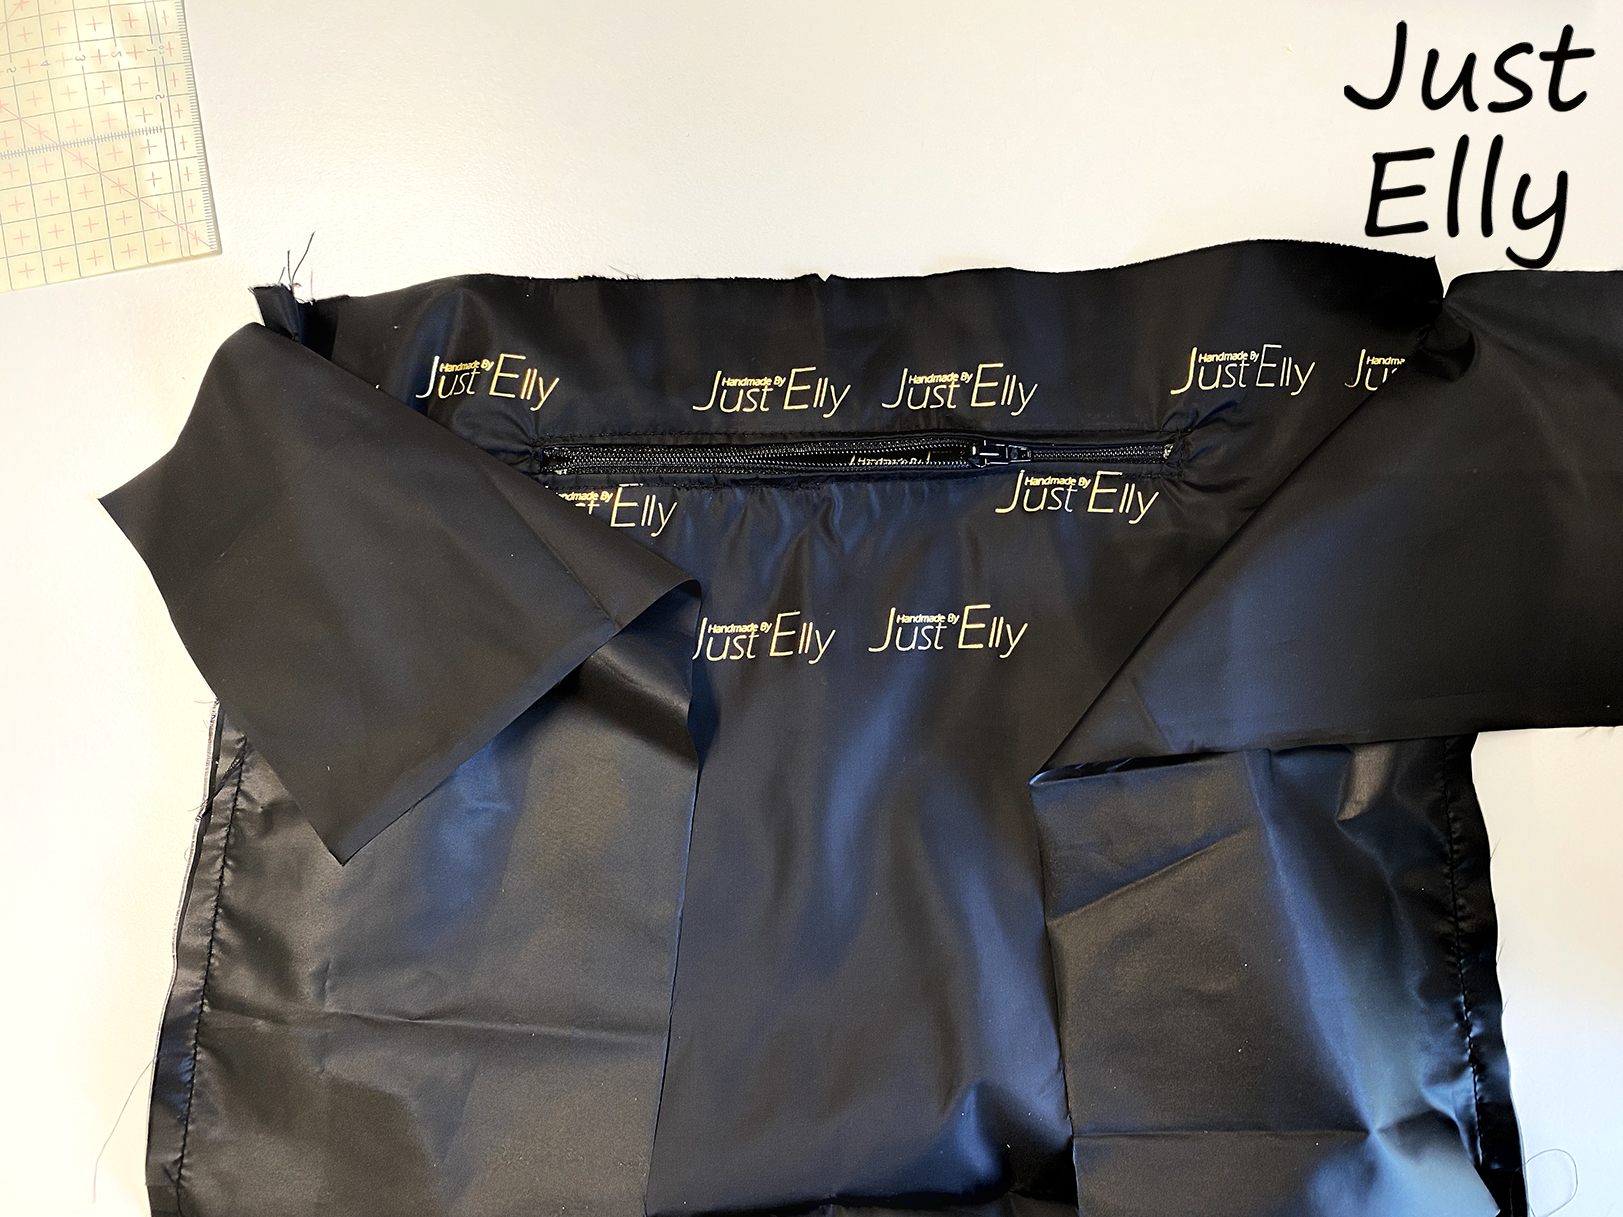
I made a new logo for the very expensive lining and the collar cut-out. My others all have something to do with nautical, which wouldn’t have fitted here.
I don’t know if you can see it in the pictures, but I had the lettering printed in gold on the black lining. It looks really classy. ❤
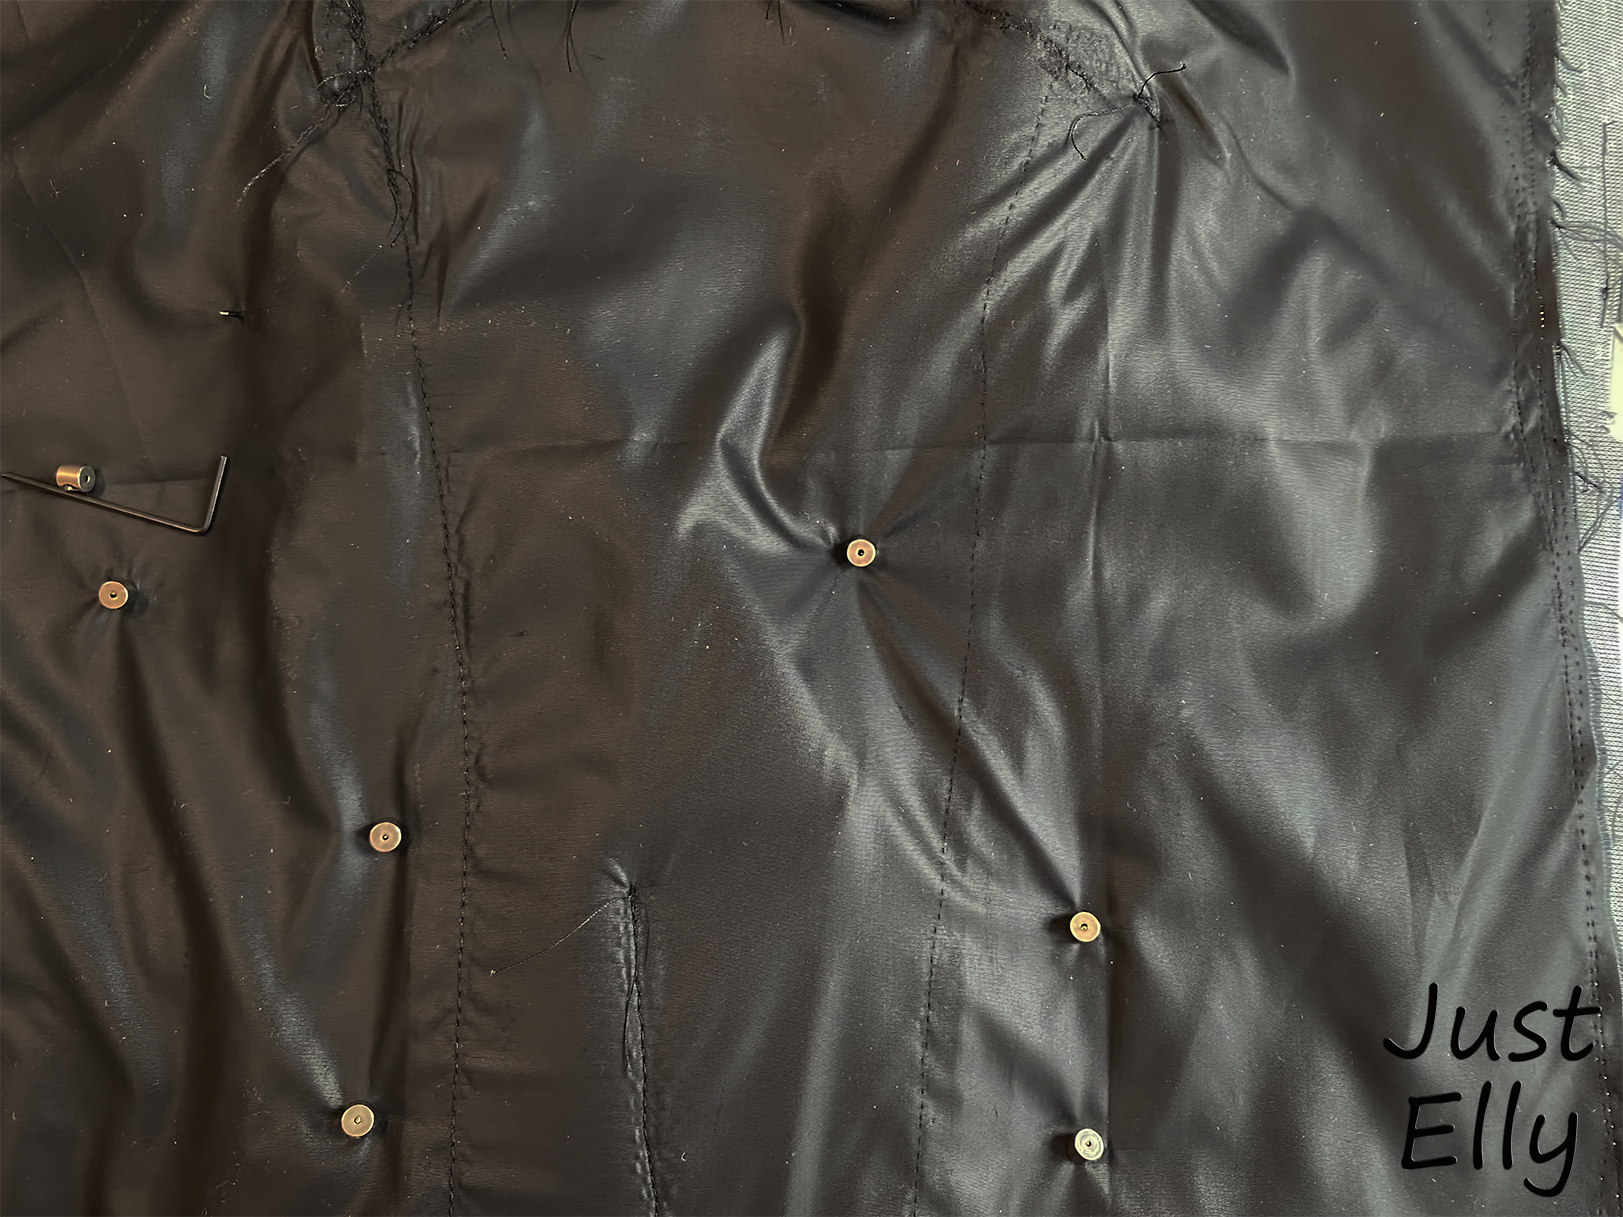
Fortunately, I came across the lockers while searching for pins!!! How else could I have attached the pins through 3 layers of faux leather without them coming off? You can see the lockers in the picture, but later on they were covered with faux leather.
Don’t be surprised that the lining is visually so badly sewn, what you see here is just the back of the lining that I used for the collar neckline. To make it look nice and smooth on the front, I had to fix the lining on the back in some places.
The pocket flap is almost finished, but not yet sewn on. How do you like the pins?
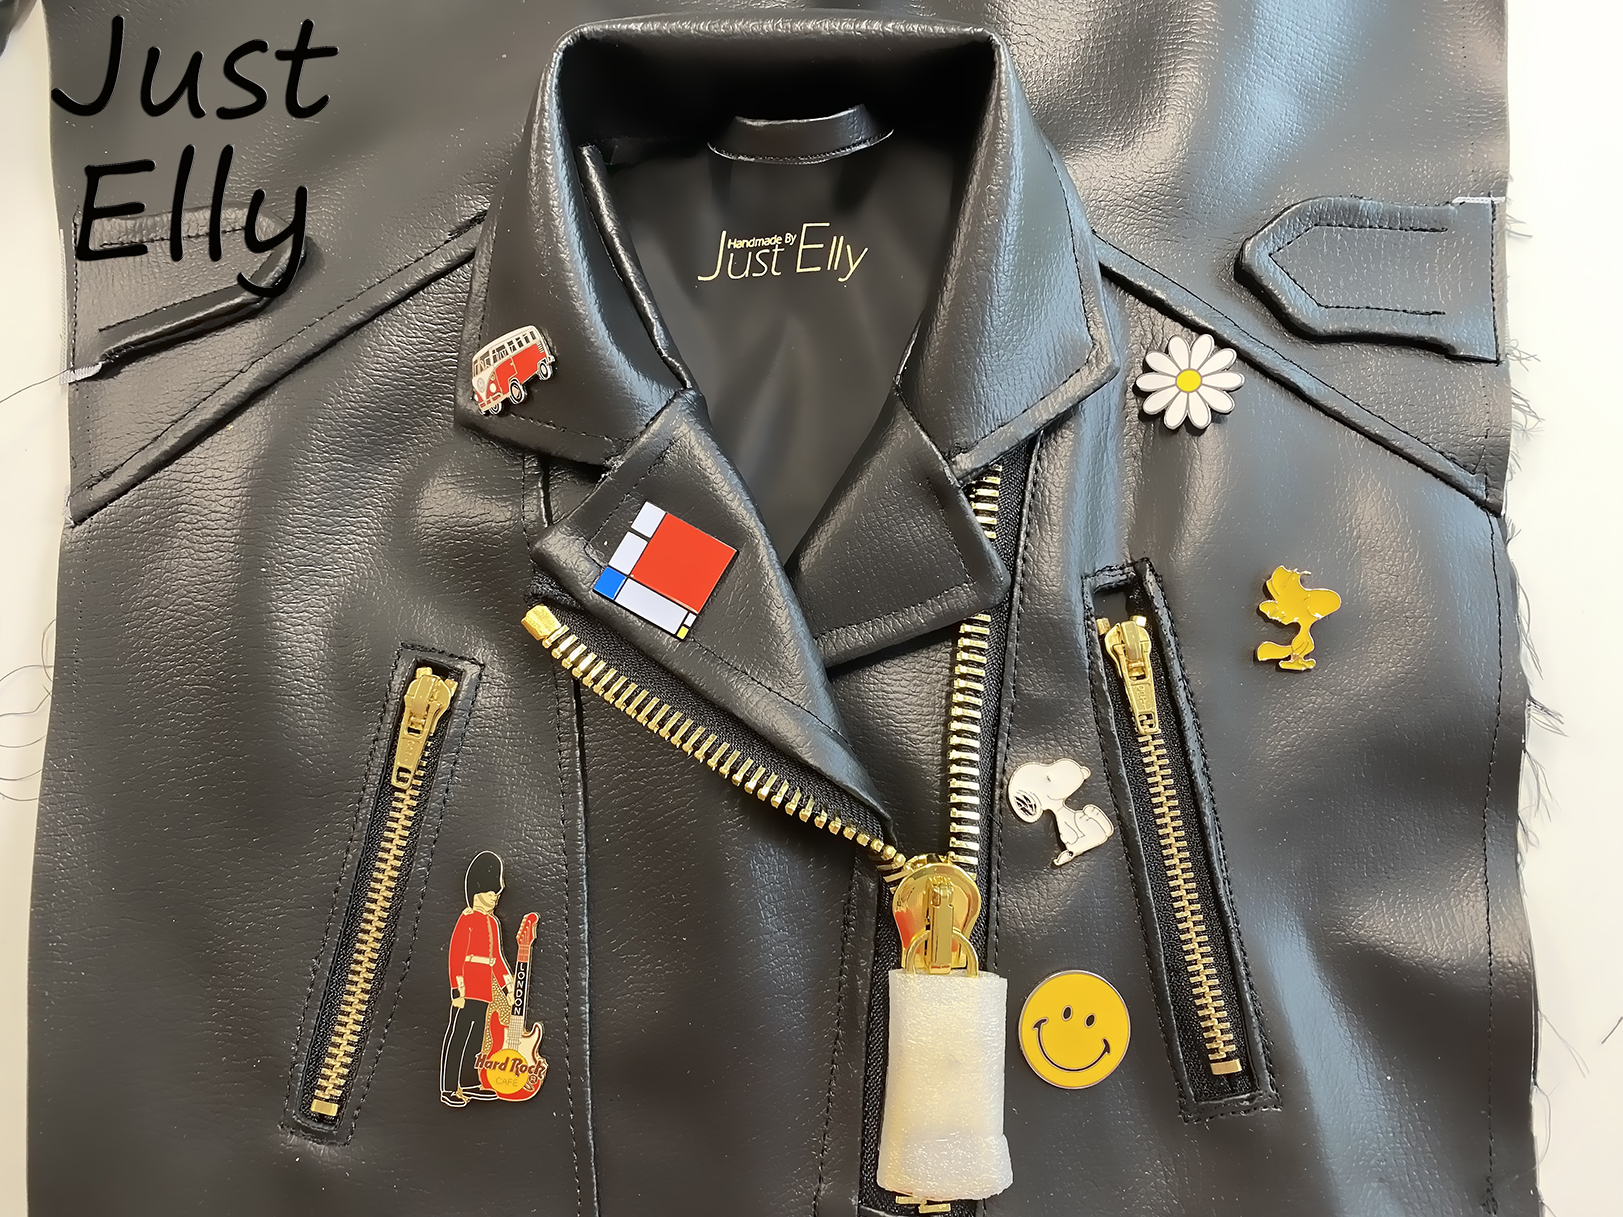
And now the finished backpack. If you look at the size of the pins, you can see how big the zipper really is.
I love this backpack ❤ ❤ ❤

I’m sure many have a grandpa who liked to wear those white undershirts, even under shirts? 😀
I am currently sorting out my fabrics. Over the years I’ve bought lots of fabrics because I thought they were so pretty, but I’ve never had a plan for what to sew with them.
Because it’s too bad to leave them in the closet any longer, and sometimes I don’t even remember why I bought them 😀 I give the fabrics away in the sewing course.
I found these two fabrics while sorting out. Only 1 yard of each. You don’t have that many options for what you can do with them.
That’s why I googled and googled and googled 😀
At some point I came across a grandpa pattern and chose it for the shirts.
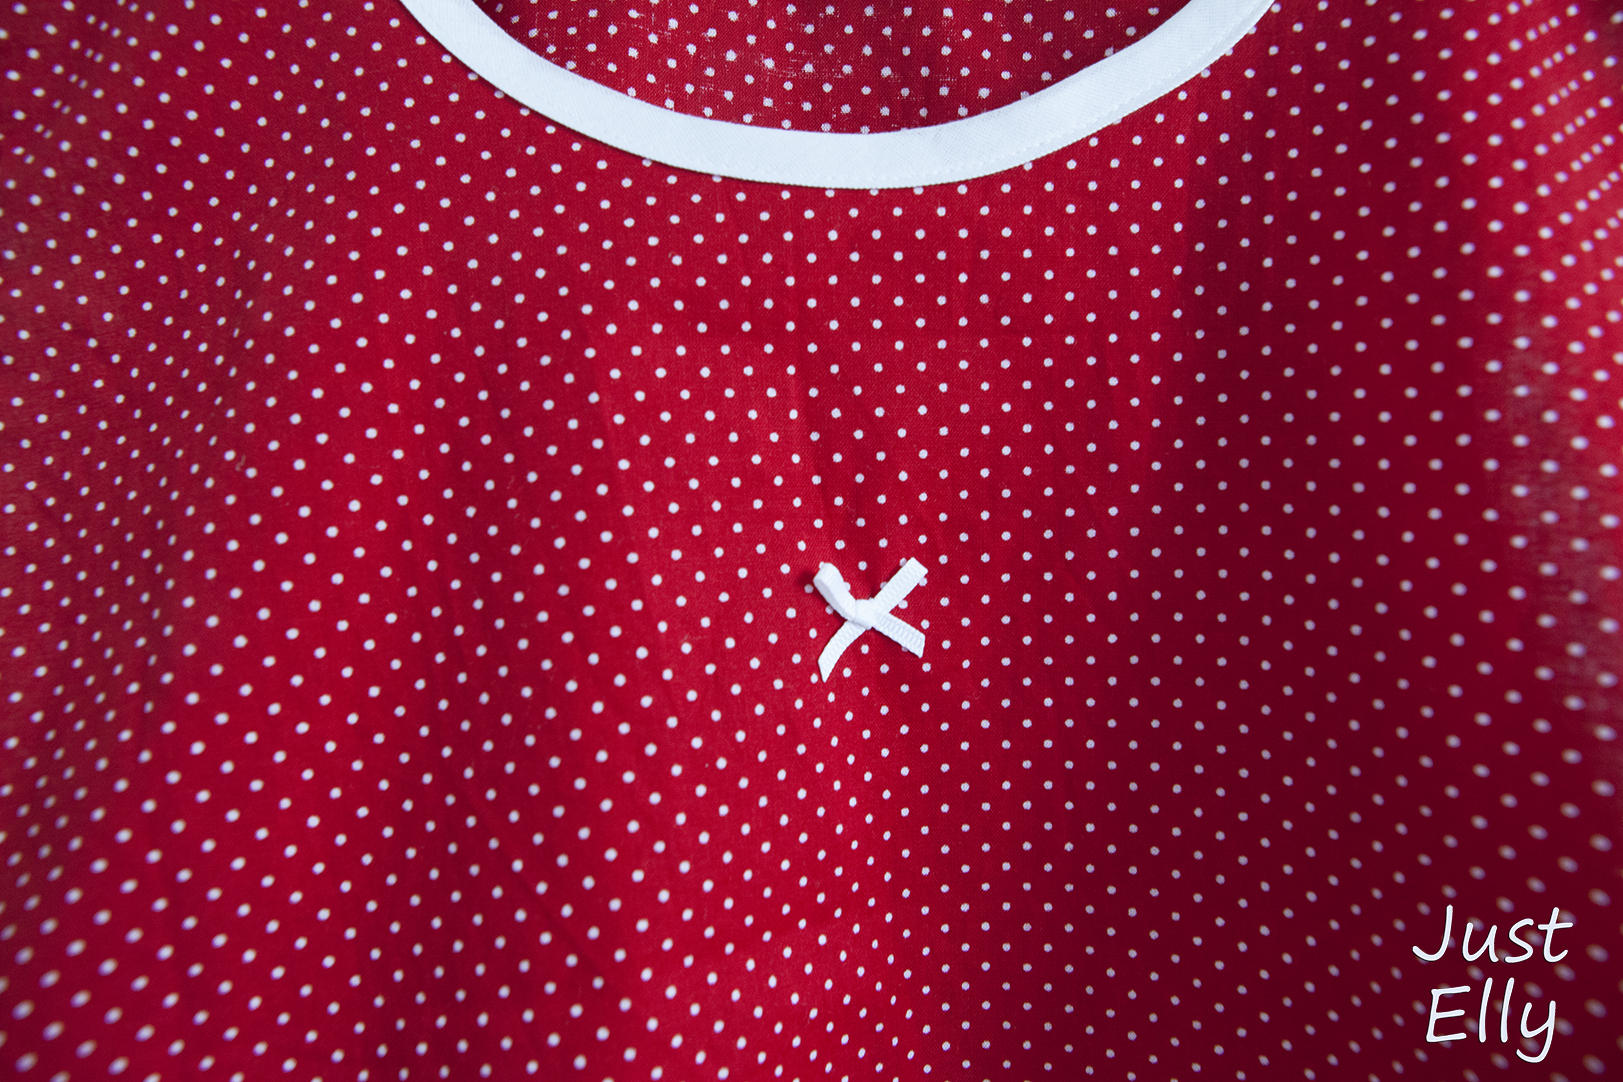
I adapted the pattern slightly because my fabrics are cotton and not jersey.
Here is the result. I added some decoration so that it doesn’t look so boring with just the fabric.
I like the result ❤


And once again I have chosen a pattern that I really like.
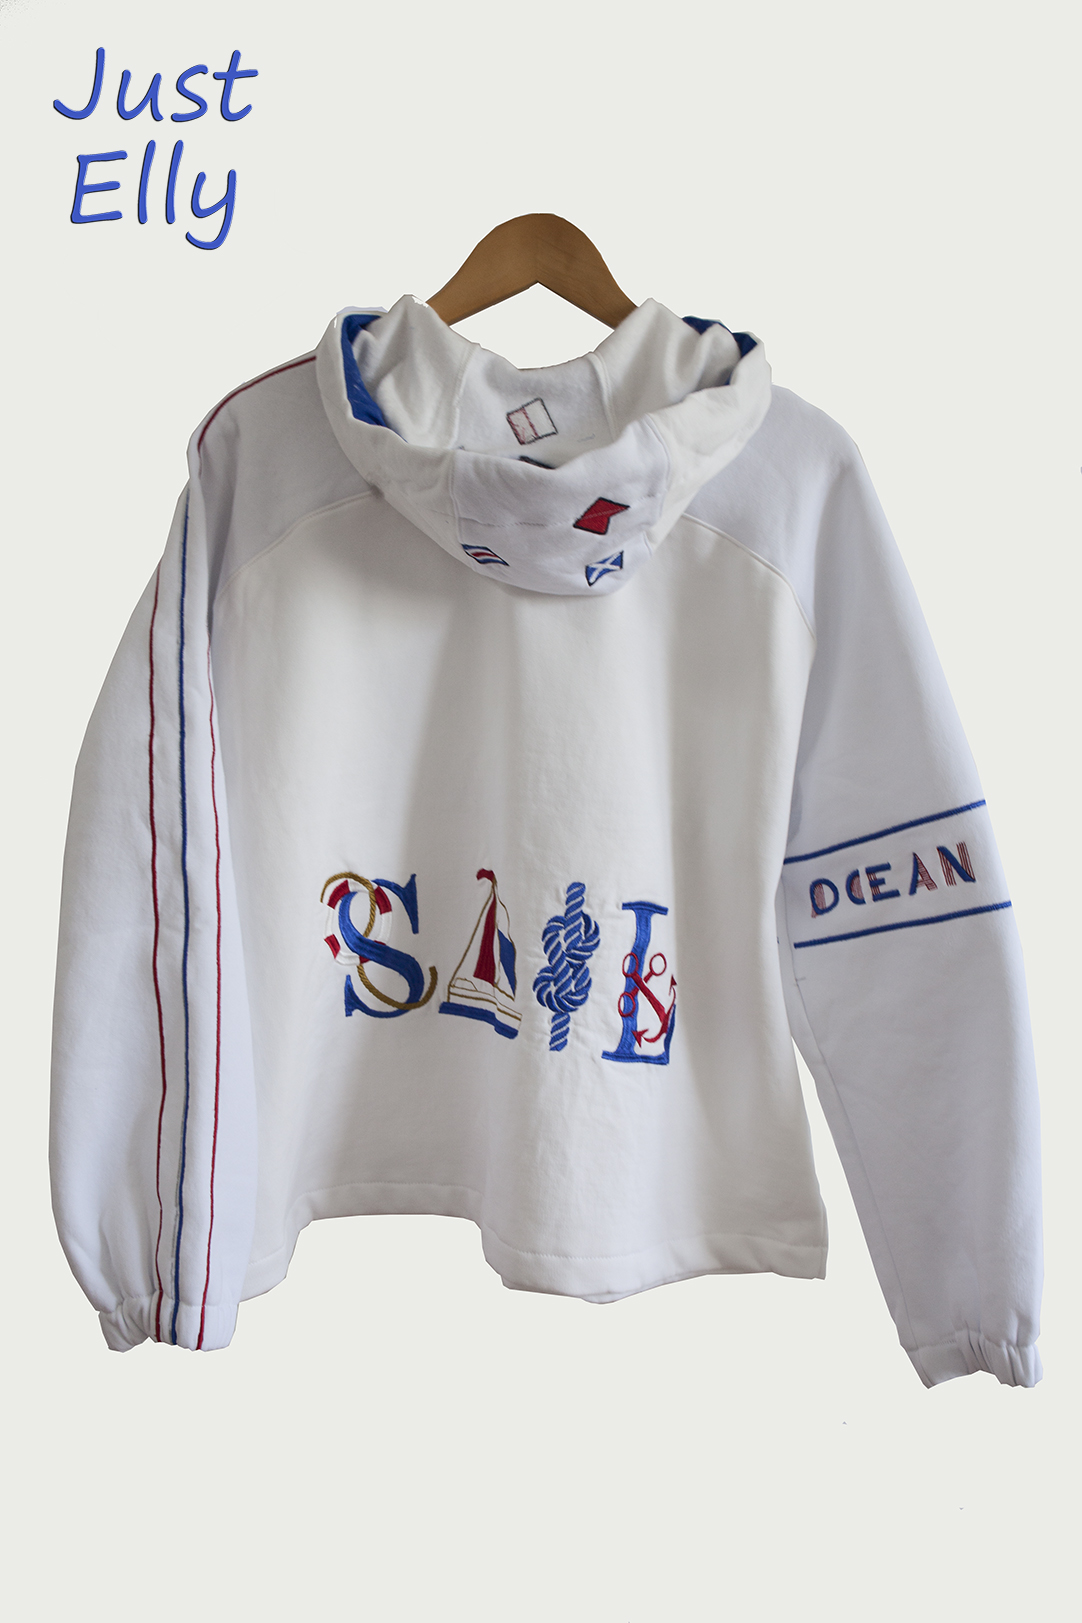
I had a lot of problems with this hoodie. I’m still not quite sure whether I like the end result as it is now.
You can see exactly what my problem is with the hood! Two different shades of white.

When I made the holes for the cord on the hood, I hadn’t paid attention and also made the hole through the embroidered middle section. Stupid me!
I ordered 4!!!!! different white fabrics, but all of them were not the same white color as my original.
So I made the new middle section with it.
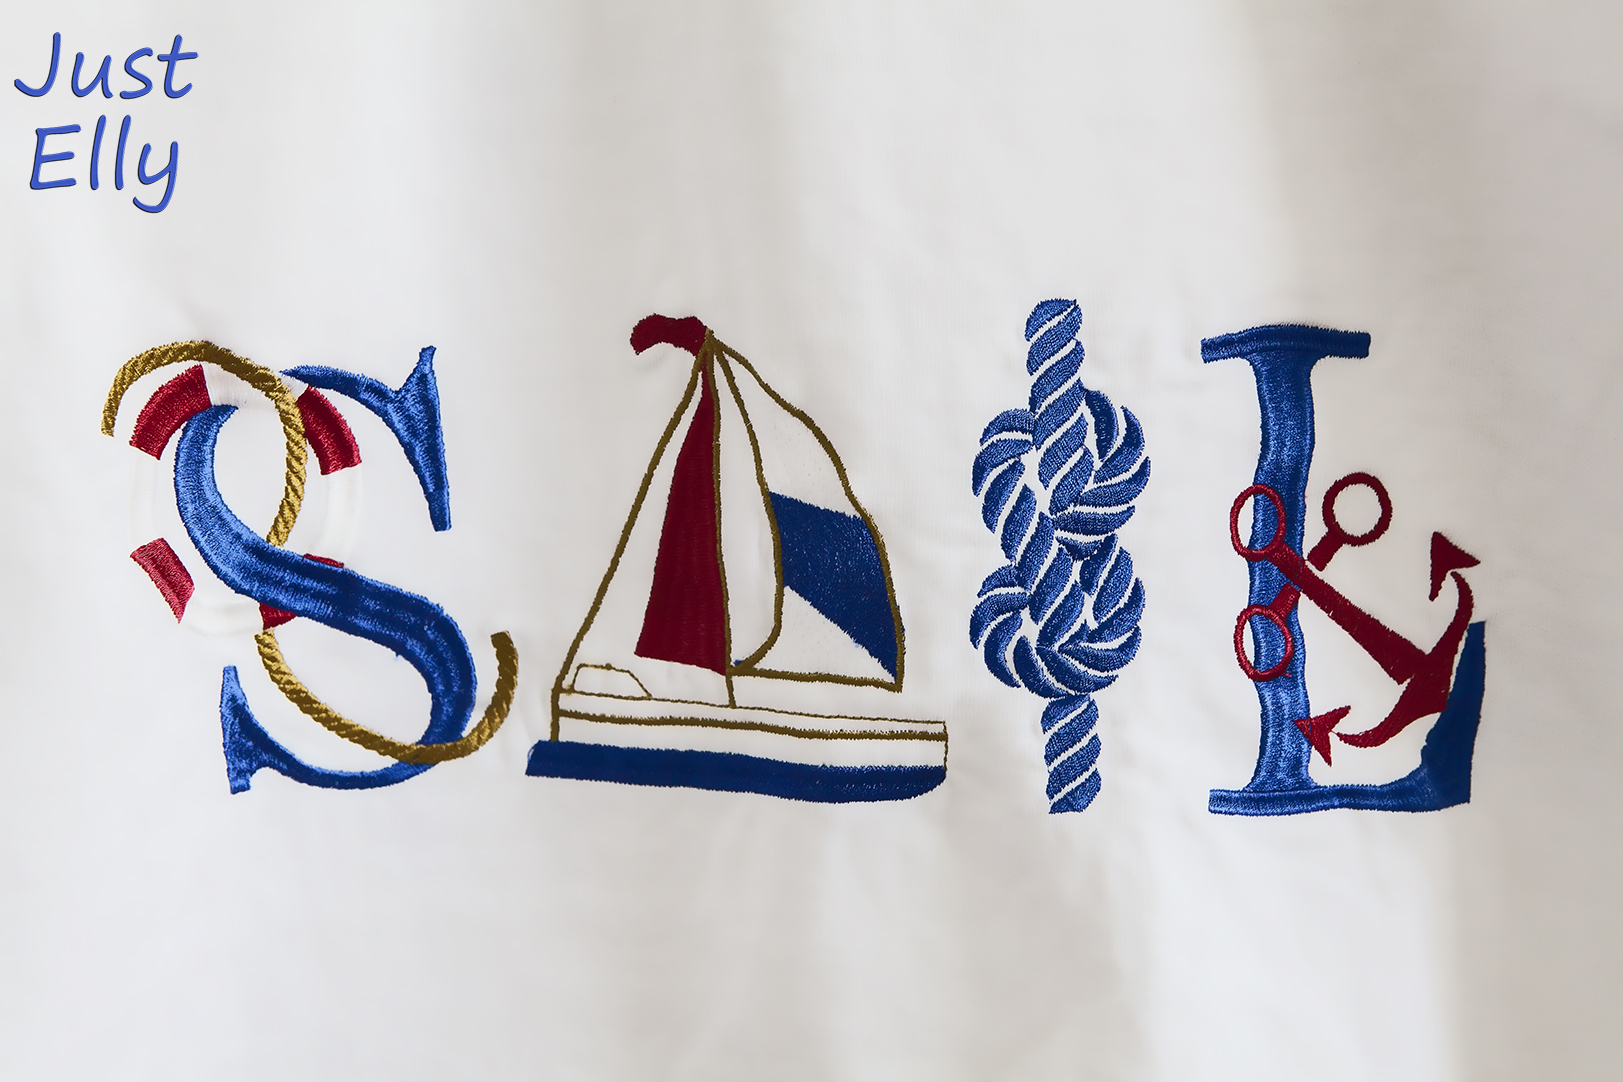
But then things got really bad. I made markings on all the pieces with blue sewing chalk so that I knew where the embroidery had to be. Then I ironed embroidery stabilizer onto the back and embroidered all the pieces.
When ALL the embroidery was done, I wanted to wash out the blue chalk in the washing machine. But it didn’t work! Not even after two washes.
Google then told me that this chalk should NEVER be ironed. Unfortunately, I had never noticed this before because I had never marked the right side of the fabric with it. At most for cutting, but it disappears when you sew.
So I had to cut out almost all the pieces again and re-embroider them. But this time I marked them with a pencil.
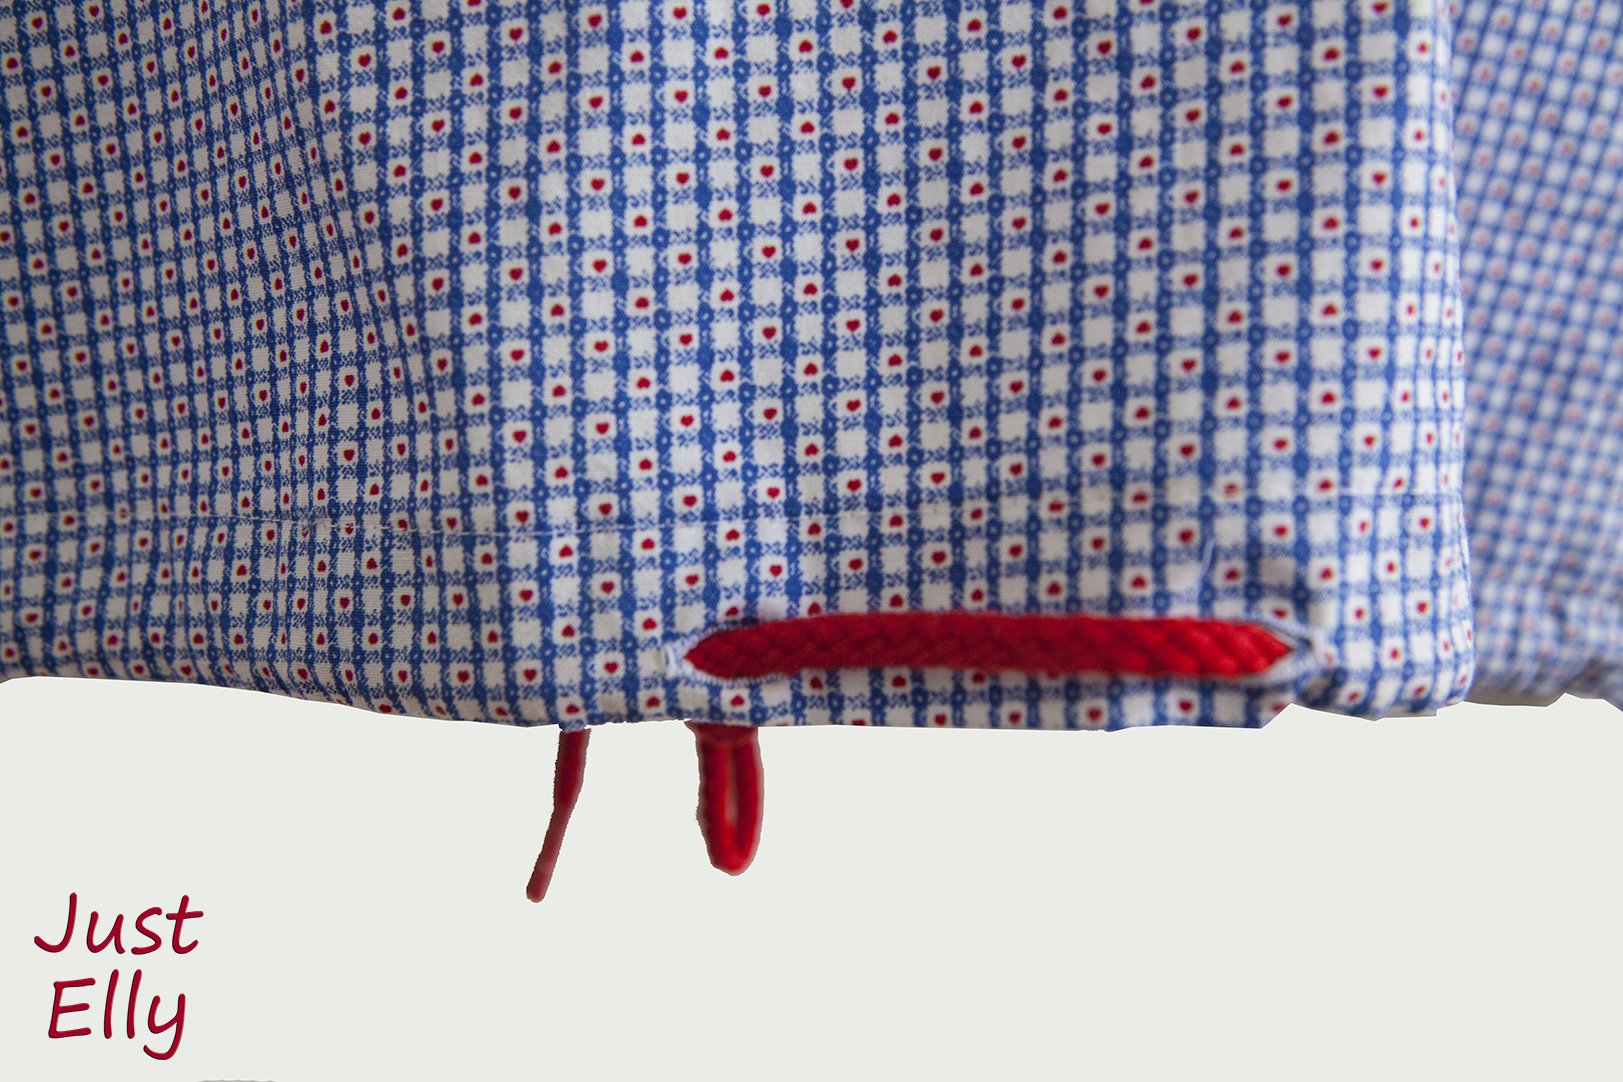
The only parts I kept are the back and the lower front.
You can still see the blue sewing chalk next to the top red line on the pocket!

If I decide to make the hoodie again, I will definitely do the lettering on the arm from top to bottom and no longer all the way around. It says ” Ocean is calling”. But you can’t really see it when you’re wearing the hoodie.

I still like this hoodie. But every time I look at it, I see the two different shades of white!
Here is the complete hoodie from the front and back. Oh yes, I still have to wash out the marks from the pencil that you can still see.

One Artist's Inspiration, Illustrations & Interests
I have been sewing for many years, I like making clothes from vintage patterns. and gardening
Sharing my love for sewing, fabric and handmade thrifts
blood, sweat, and glitter y'all
Just another day in the trenches...
My challenge: One year - I will not buy clothes - I will upcycle to make what I need - everything from underwear to evening wear! Join me for tips, exclusive BrawHem makes, and inevitably some hilarious disasters...
Three Friends. Three Lives. Three Whims.
adventures - textiles - pictures
