
Three months ago, the teacher left the sewing class. She took a job in another store. Unfortunately!
I wanted to do something very special for her as a thank you and to show her what I learned with her.
I’ve been thinking for a long time about what I could do for her.
Then I saw a Christmas cover for a wine bottle on the internet and wanted to sew something like that for her.
Unfortunately, I didn’t know if she was drinking wine at all. I never drink wine myself and if someone gave me a cover like that, I would never use it!
On my next visit to Ikea I saw the Grundtal container with the magnet on the bottom and I knew what I wanted to do:)
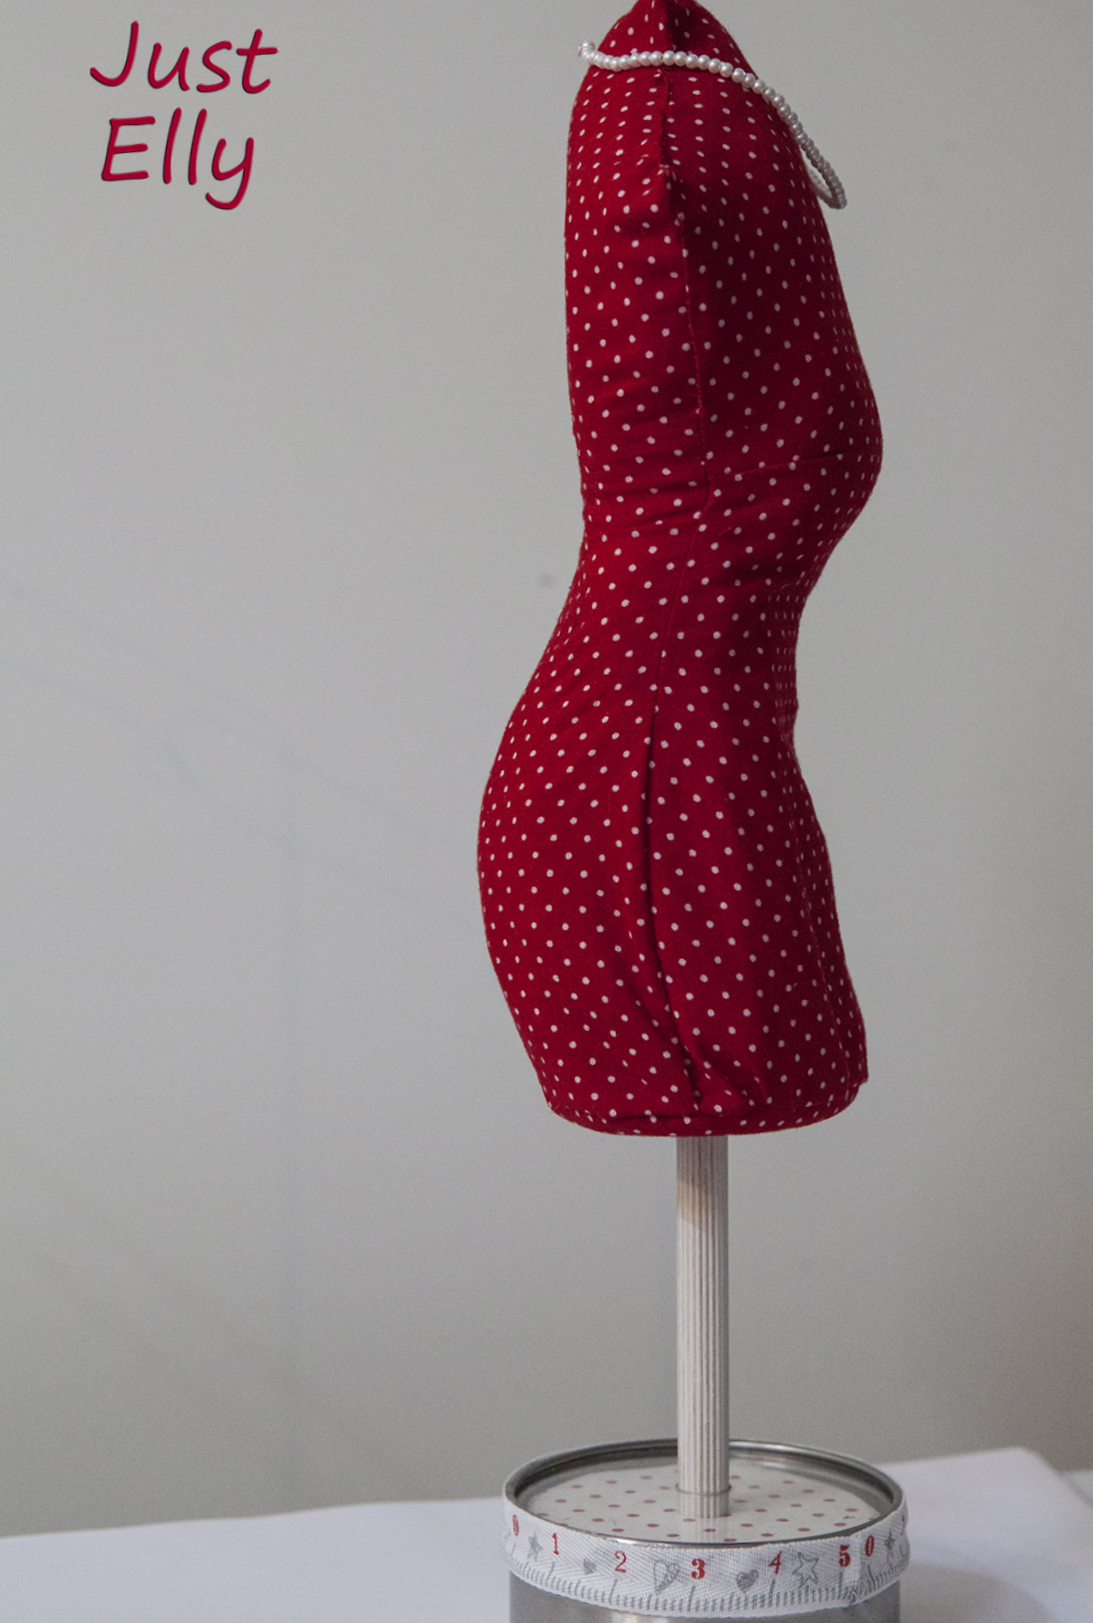
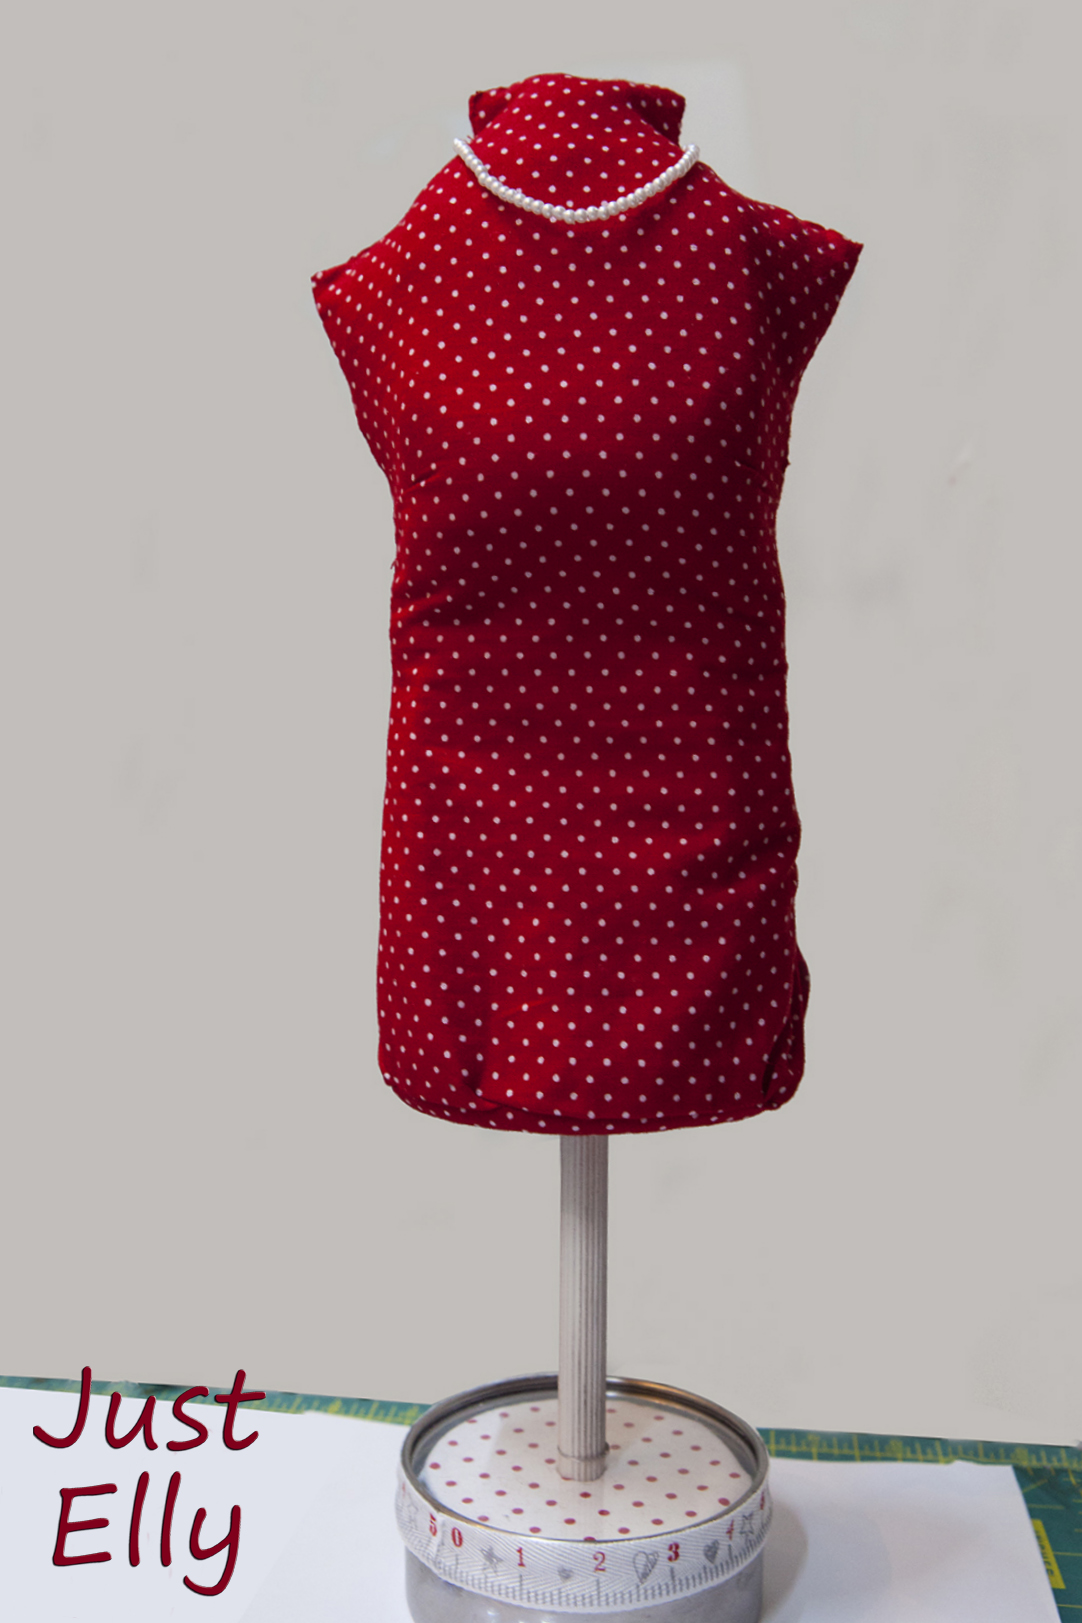
A FORM DRESS PINCUSHION !!!

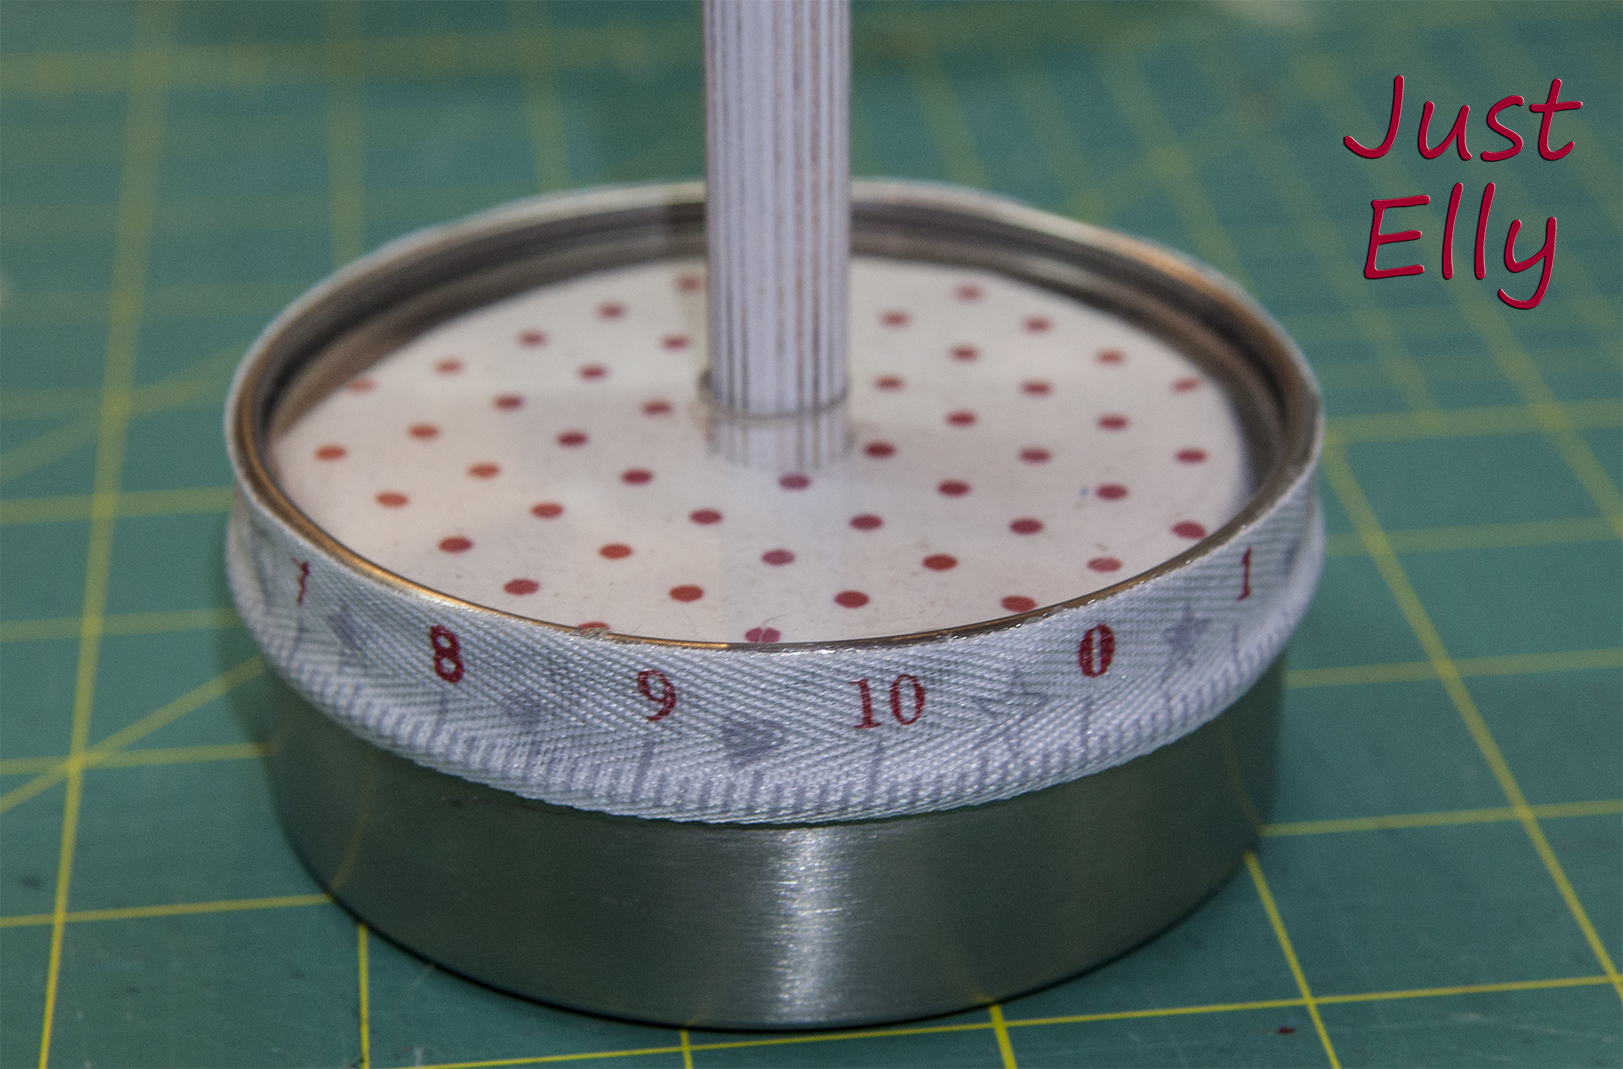
Ikea Grundtal
This pincushion is the second one I’ve made. The first one had to be finished so quickly that I didn’t have time to take photos for the tutorial.
That’s how I did it.
These things I needed:
1 Ikea Grundtal container
2 different fabrics
ribbon
1 round wooden pole 3/8″
1/8″ plywood
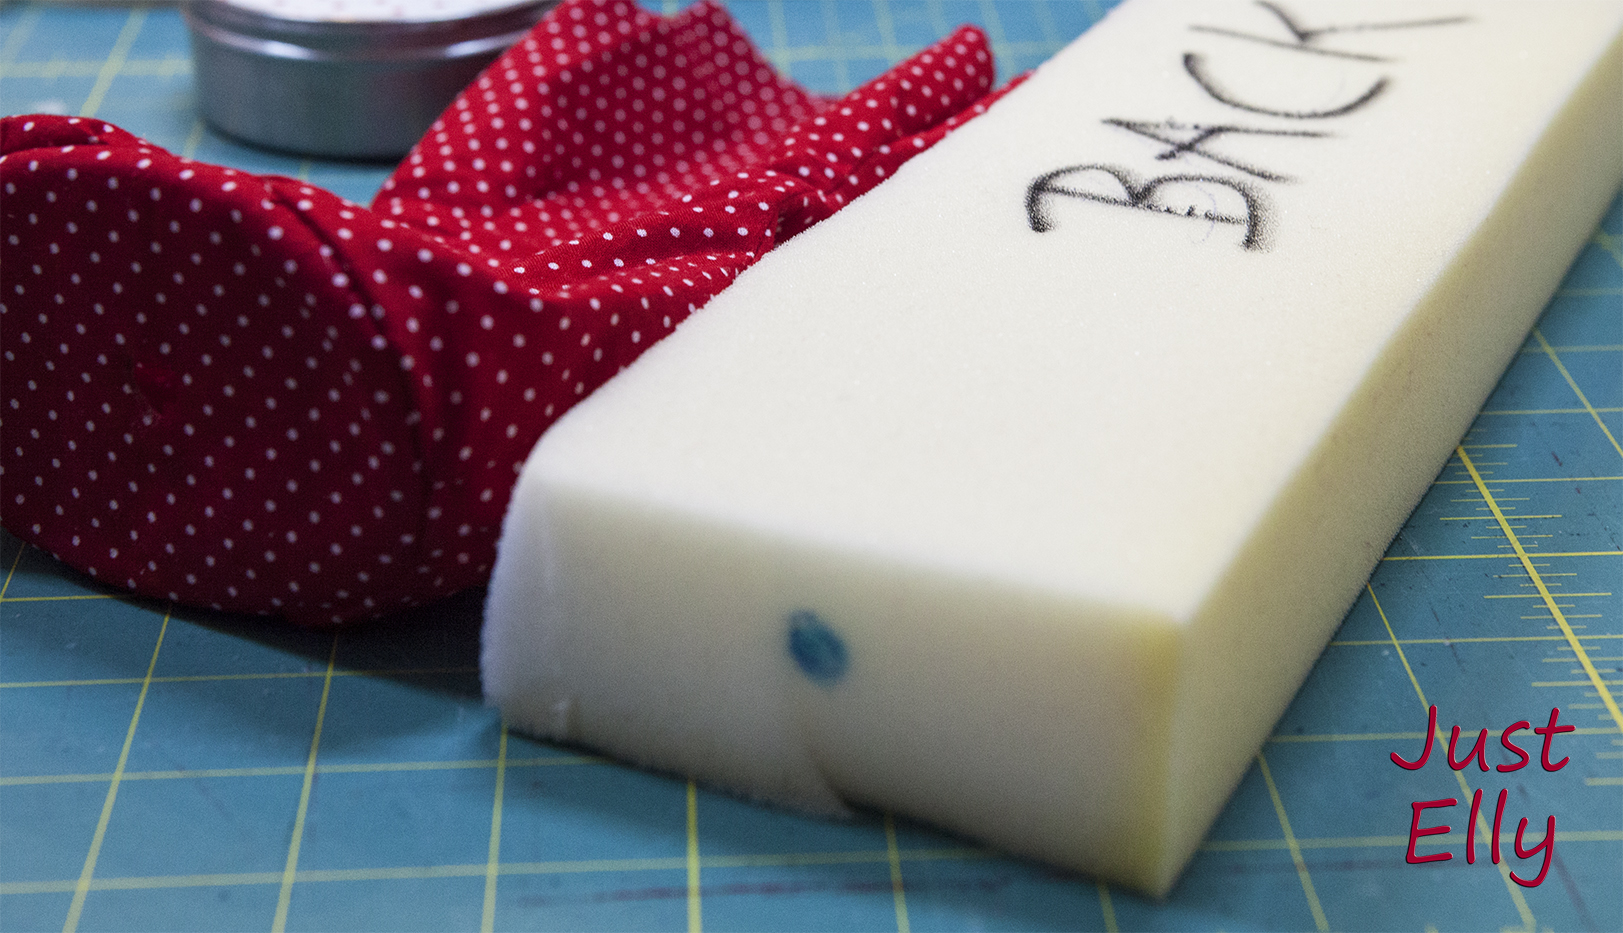
wood plate
foam padding 1 3/4″
glue
beads 1/8″

a collection of what I used
I used my form dress as model to make my pattern

My pattern has 10 inches. (I’ll explain the red marking later)
Front and back are identical. Only the darts are different. I have added half an inch

I started with my container.
A colleague sawed out the round piece of wood for the container and the oval plywood. Thanks again for this:)
The oval plywood should have the width of the container. It’s supposed to stabilize the doll.
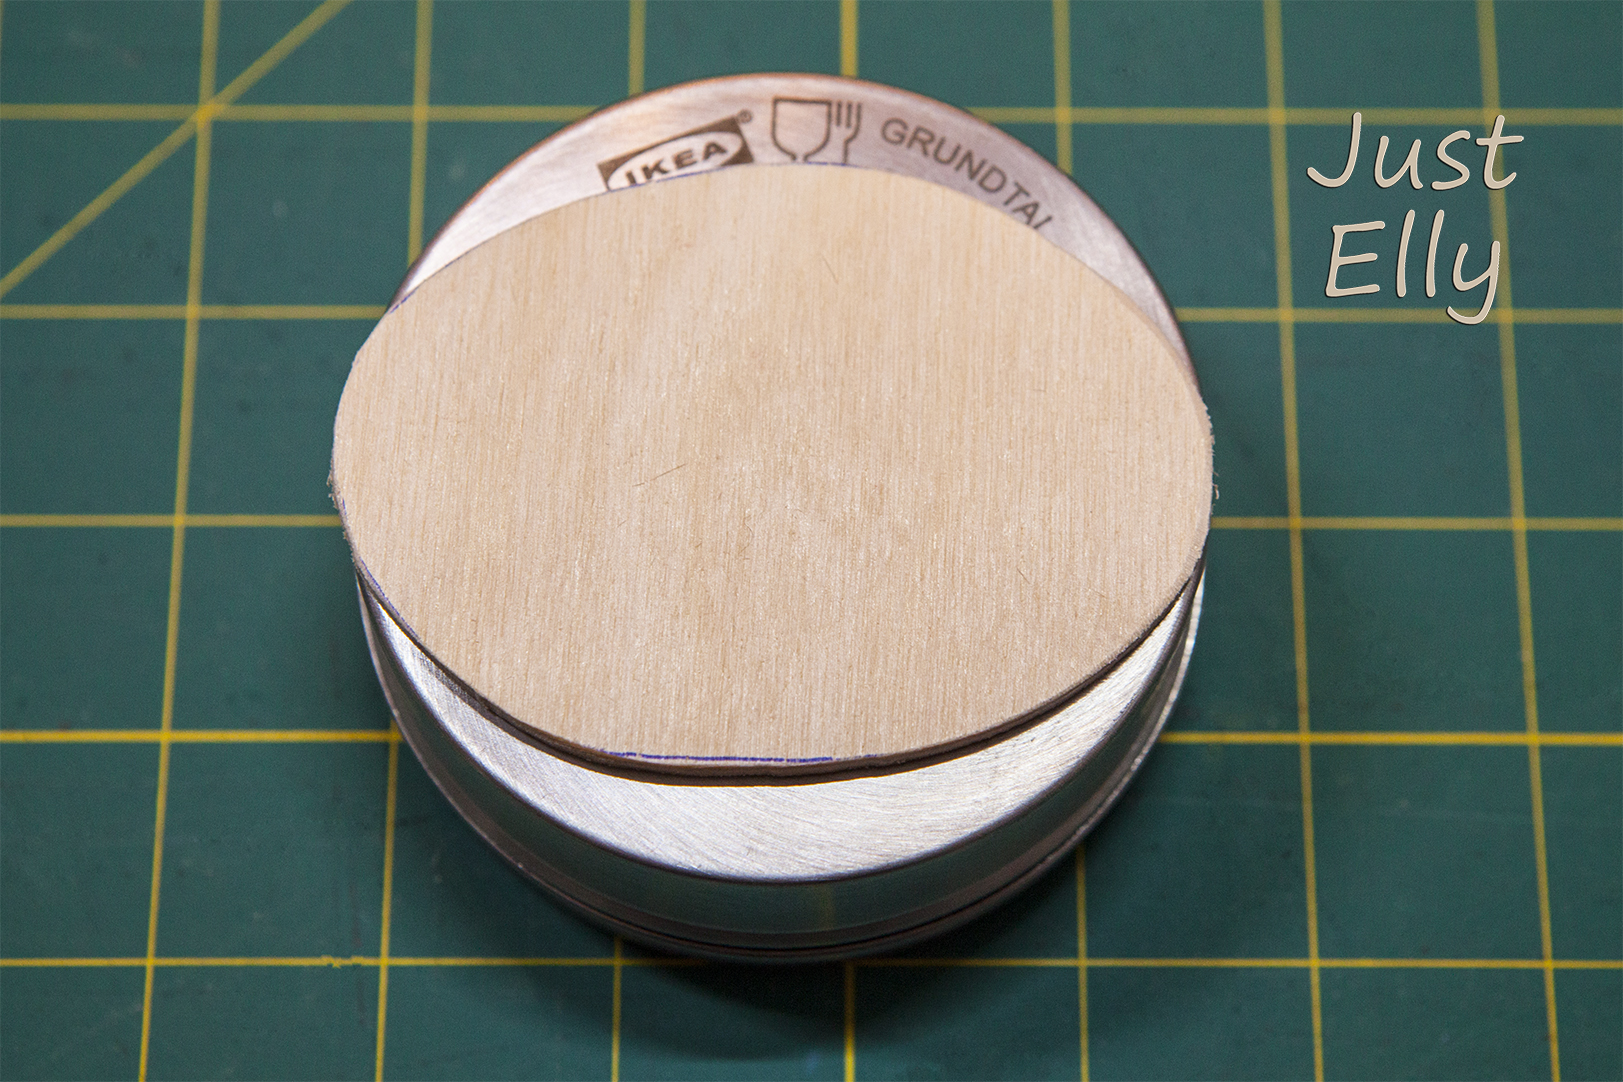
The round piece of wood is used to put the wooden stick in later. At the same time, the container should become heavier so that the doll does not fall over later.
I didn’t have any wooden panels of the right thickness for the container.
That’s why I took 2 wooden plates, which together had exactly the right thickness. (1/8 ” below the edge of the container)
My colleague used a hole saw to saw the 2 wooden plates. This was very helpful for me, because I had a marking exactly in the middle of the wood because of the drill in the middle of the hole saw.
To drill a 3/8″ hole through the container cover and the wooden plates, I put the cover between the two wooden plates. In this way, the plastic cover cannot break.
Then put the wooden plates in the container, put the cover on and insert the wooden stick through all 3 holes. Make sure that the wooden stick is really straight! If not, the dress doll will be crooked later on.


If you used two wooden plates like me, glue them together. Make sure that the drilled holes are exactly on top of each other.
Paint the wooden stick in the color you like.
Now glue and paint have to dry first. In this time you can start sewing.
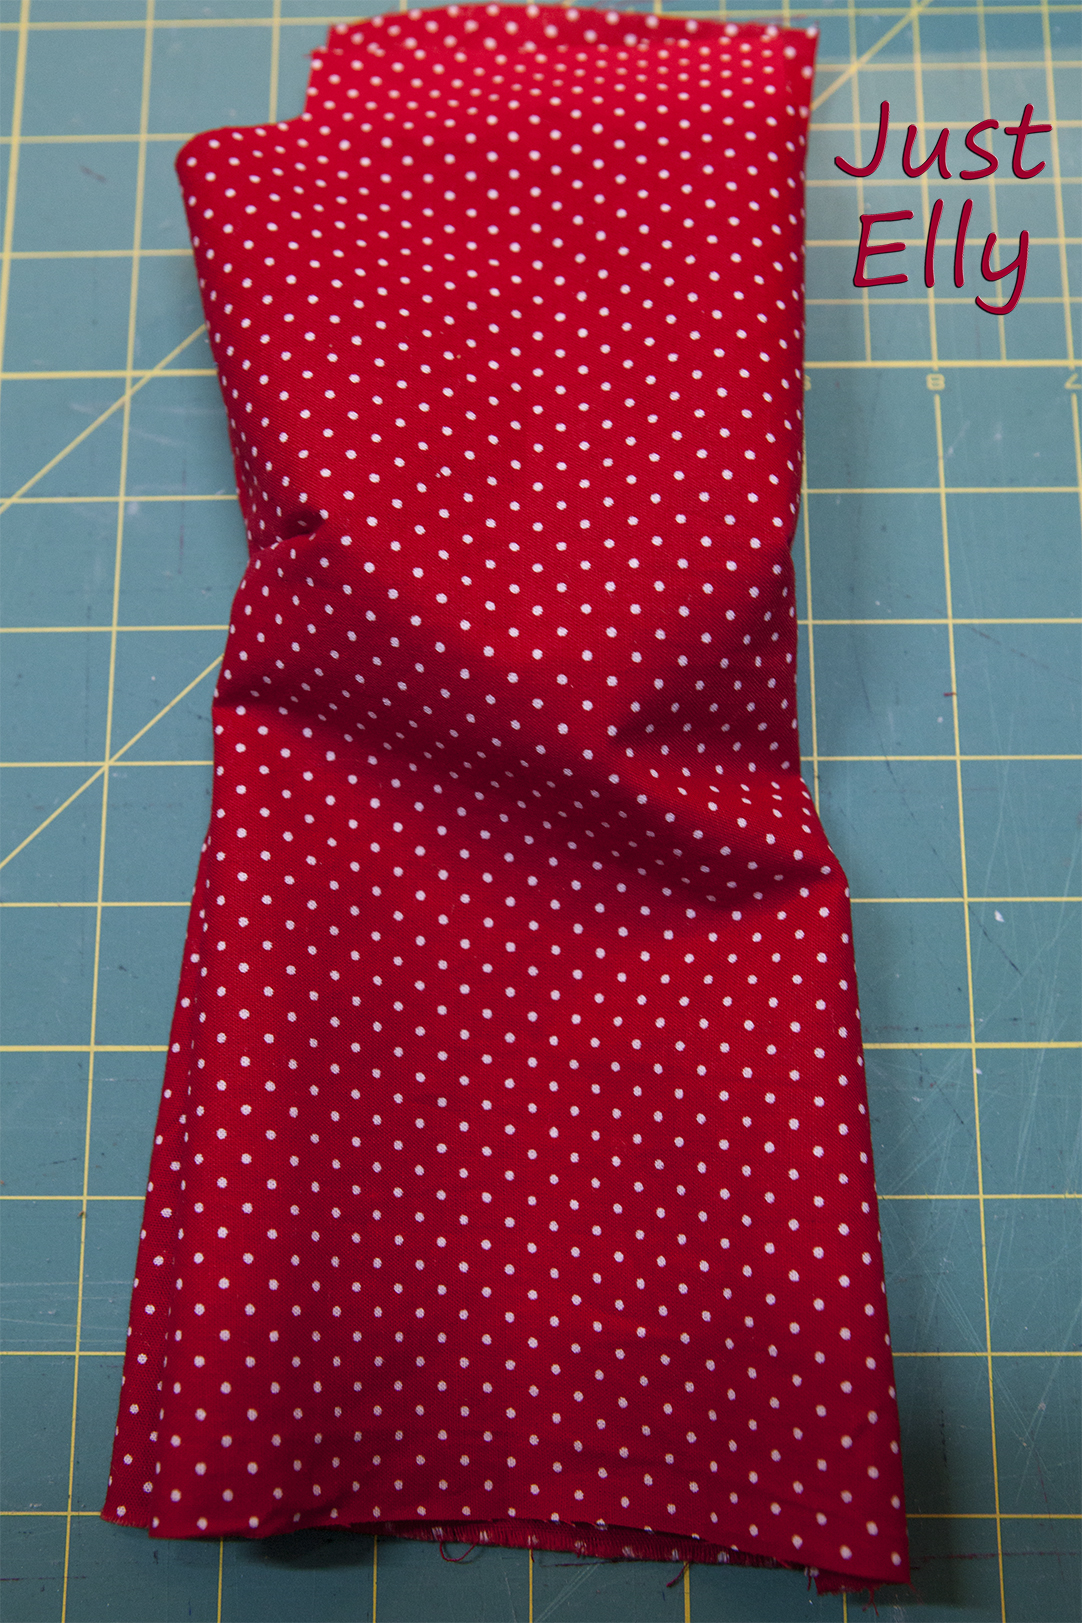
Cut out front and back parts. Sew the darts in both parts.
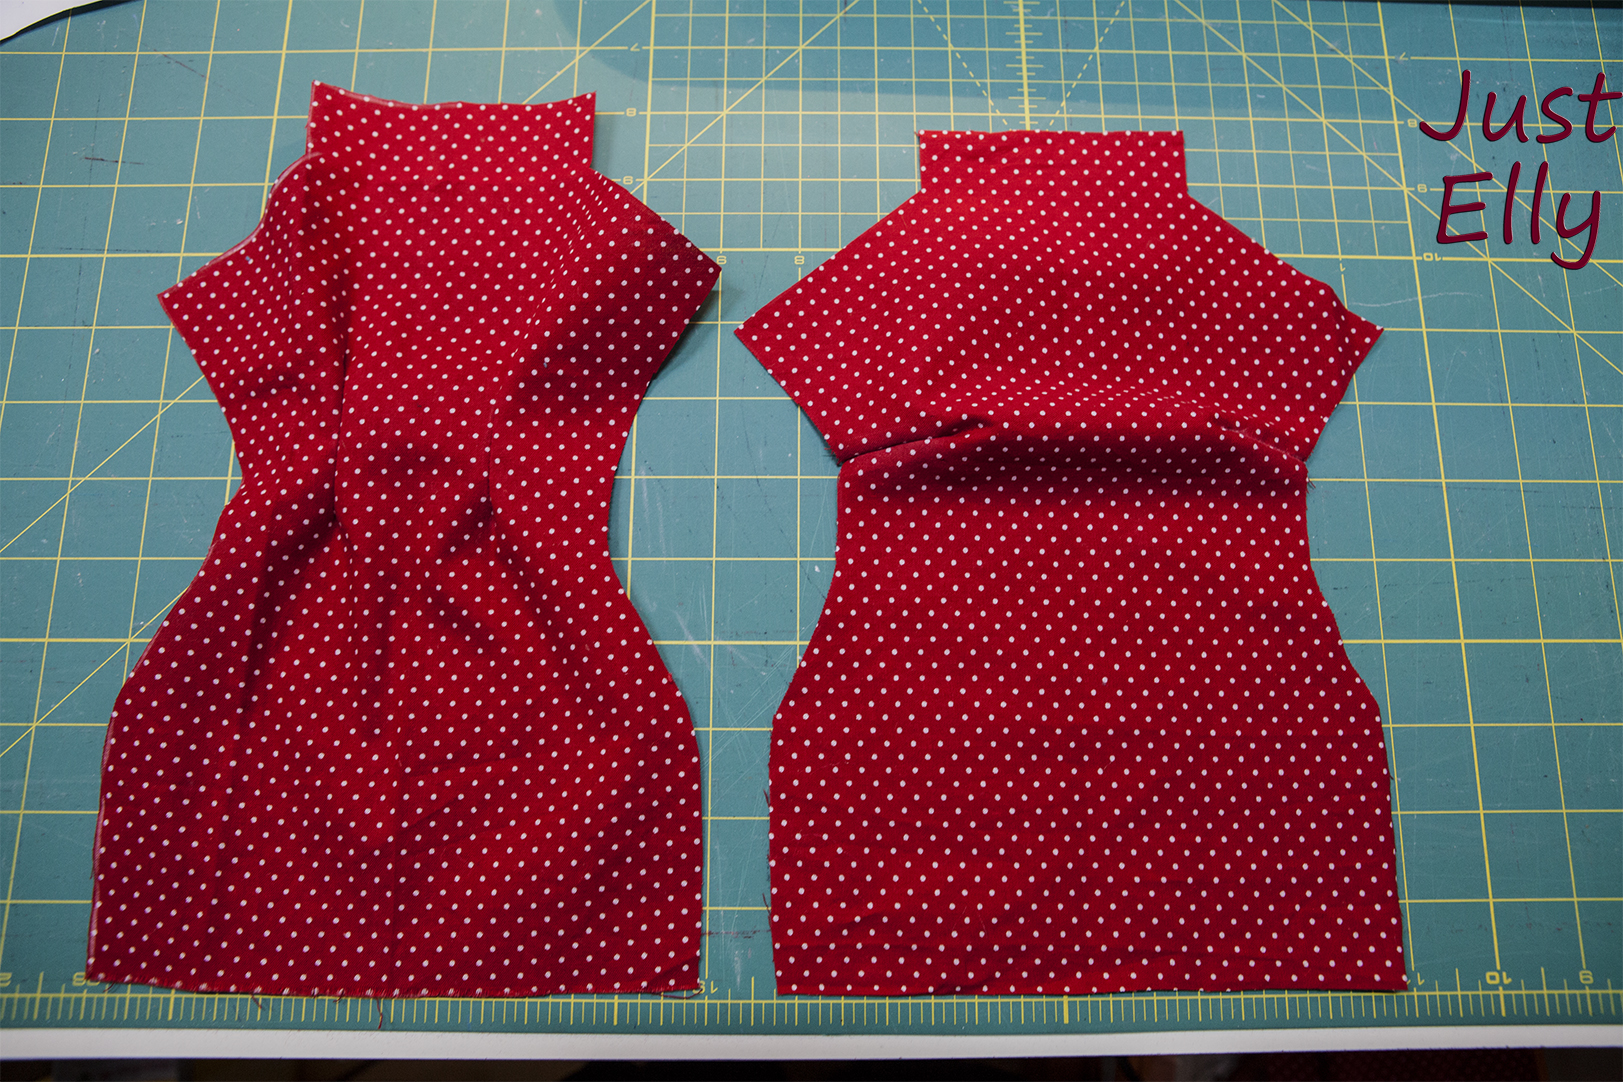
Close both sides together
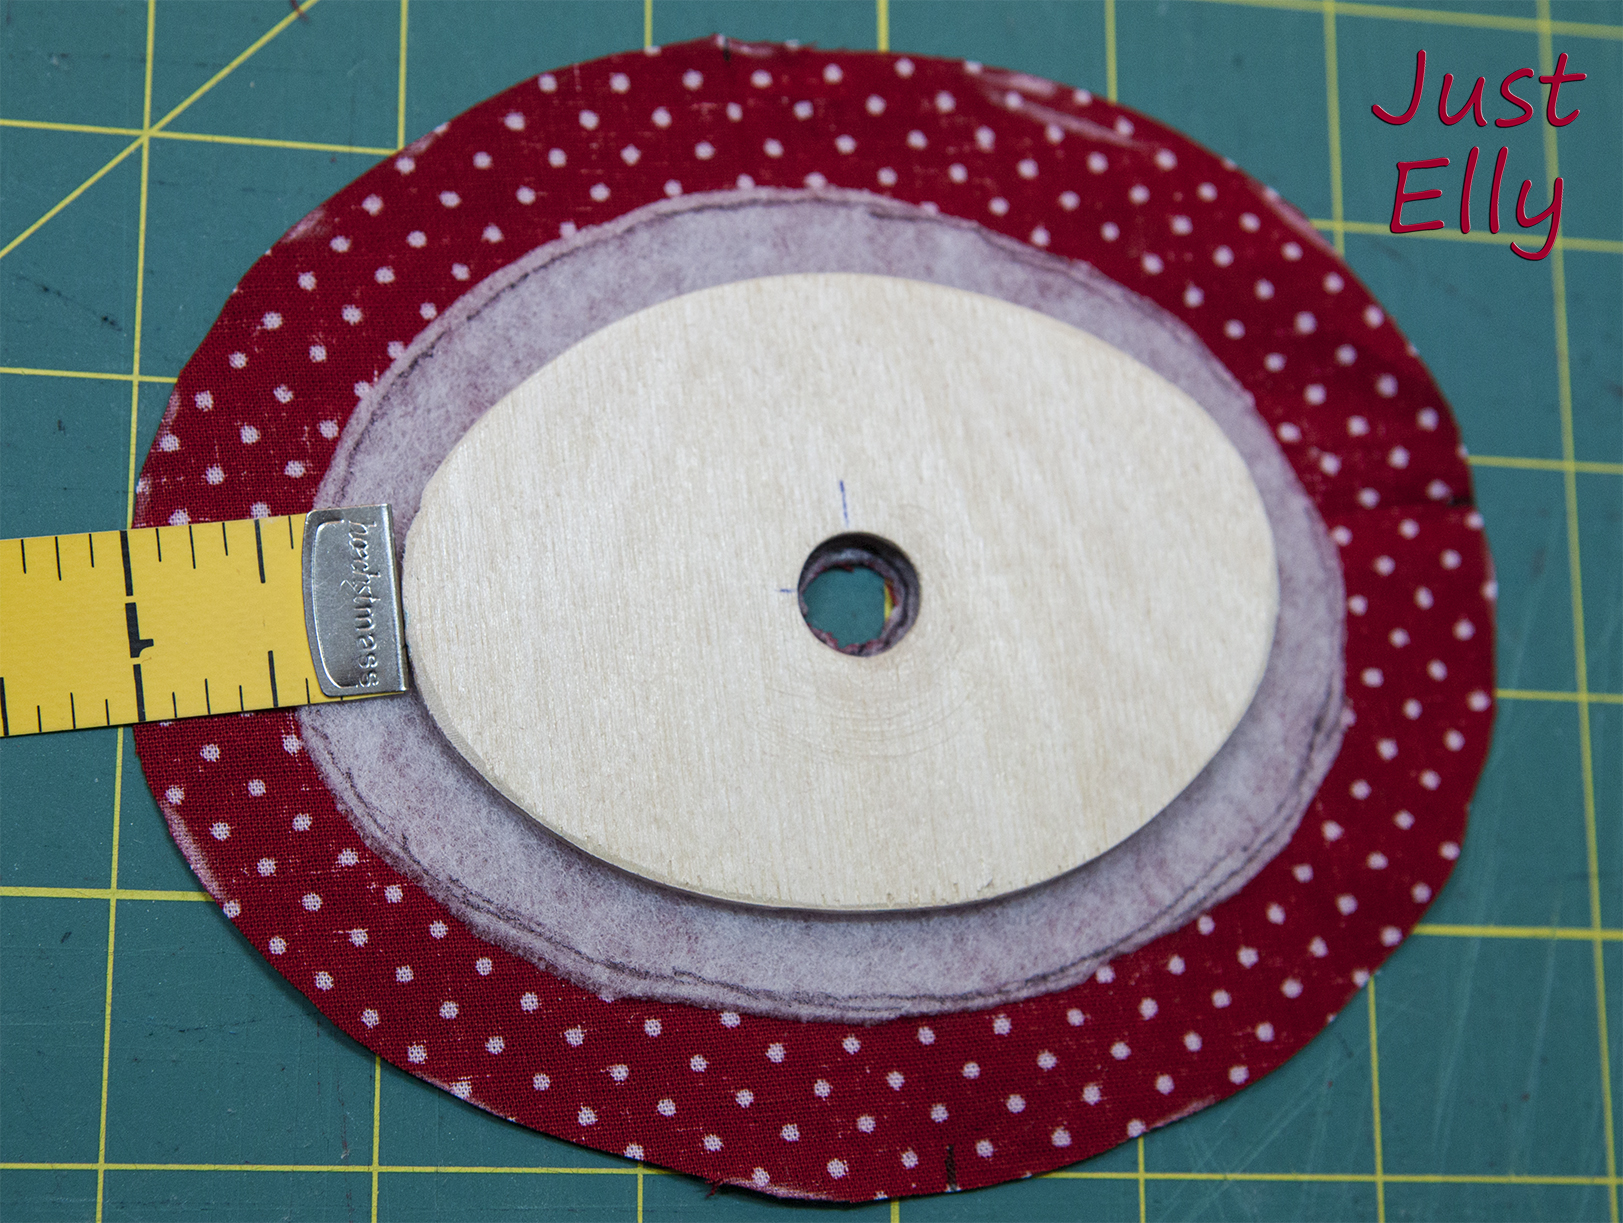
For the next step you need the oval plywood and a piece of vilene. Draw the outline and add 1/2″

Cut out the vilene and iron it on your fabric. Add 1/2″ to your fabric, too.
Now, you need to sew this piece of fabric on the bottom.
Glue the plywood on the vilene

Because the glue has to dry now we continue with the container

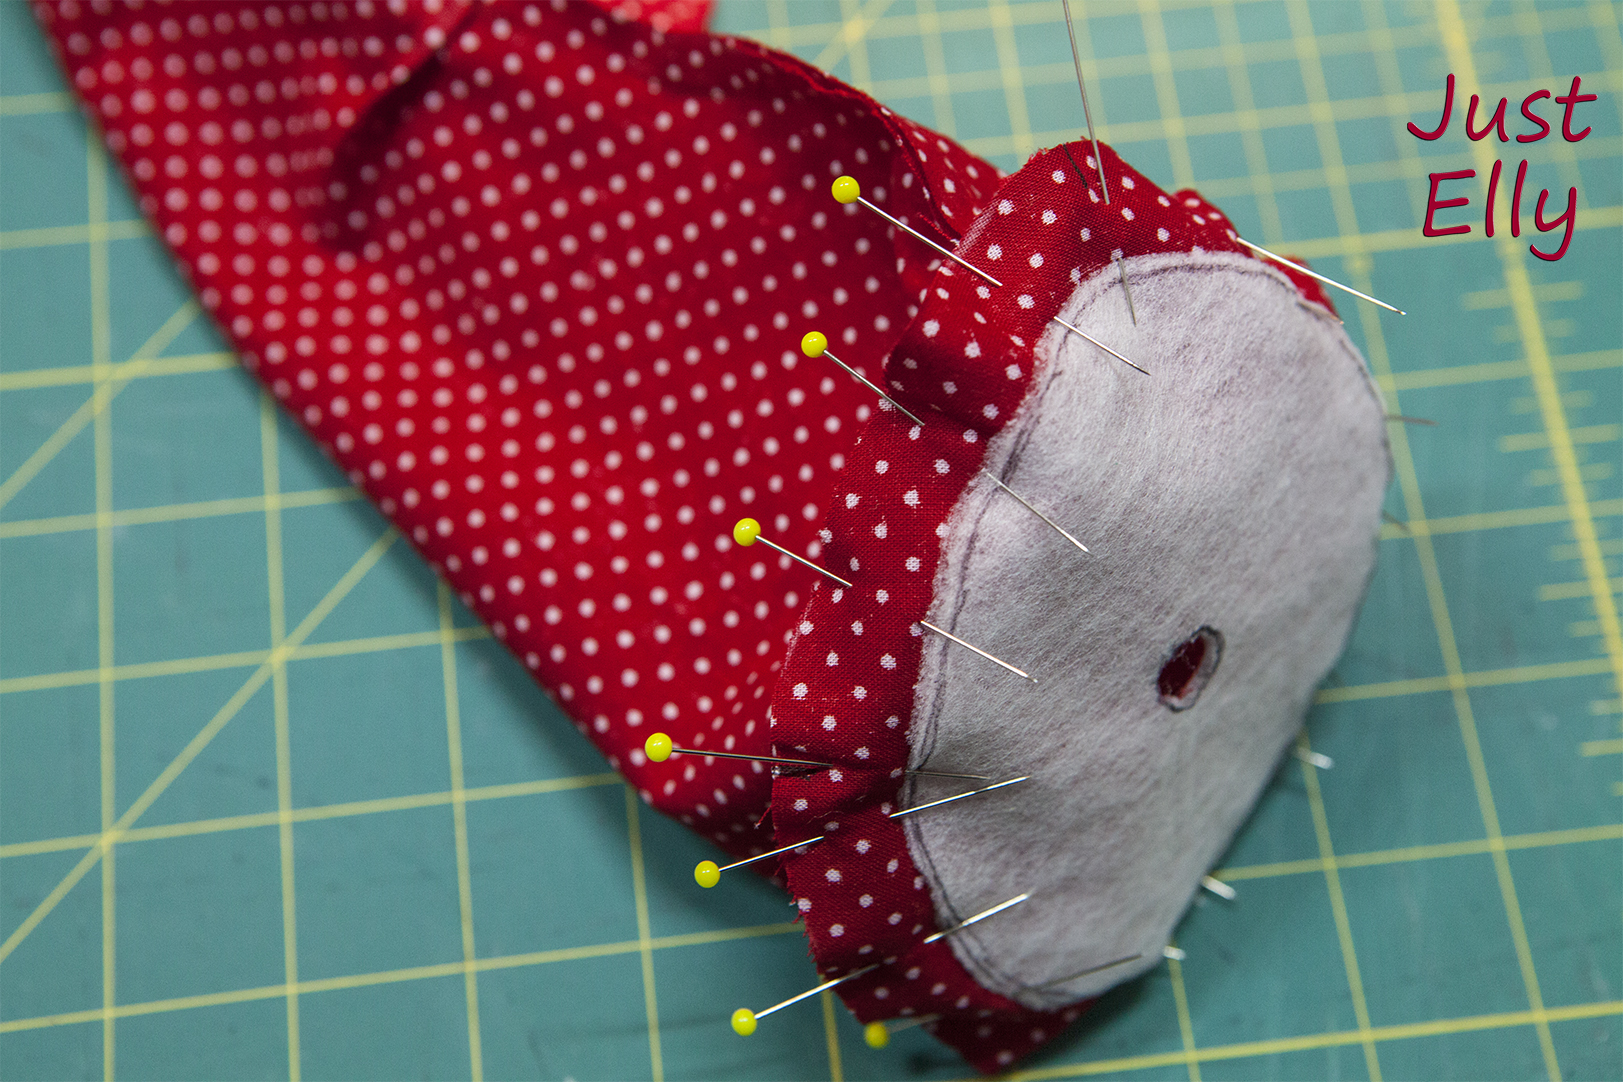
Cut a piece of fabric for the container. The fabric must be large enough to be placed around the sides of the wooden plates. Glue the fabric to the top of the plate.
When the glue has dried, cut the hole in the fabric from the wooden plate. The more precisely you cut, the more accurately you can fix it later in the center of the container.
Put glue in the container on the bottom and sides. Additionally on the sides of the fabric.
Now place the wooden plate exactly in the middle of the container. With a small screwdriver you can stuff the fabric in the sides.
Before you clamp the wooden plate, be sure that the hole is exactly in the middle. Do not exert too much pressure during clamping, otherwise the container will be damaged.
Let the glue dry for a few hours

I also glued the lid on the container.

Back to the “dress”
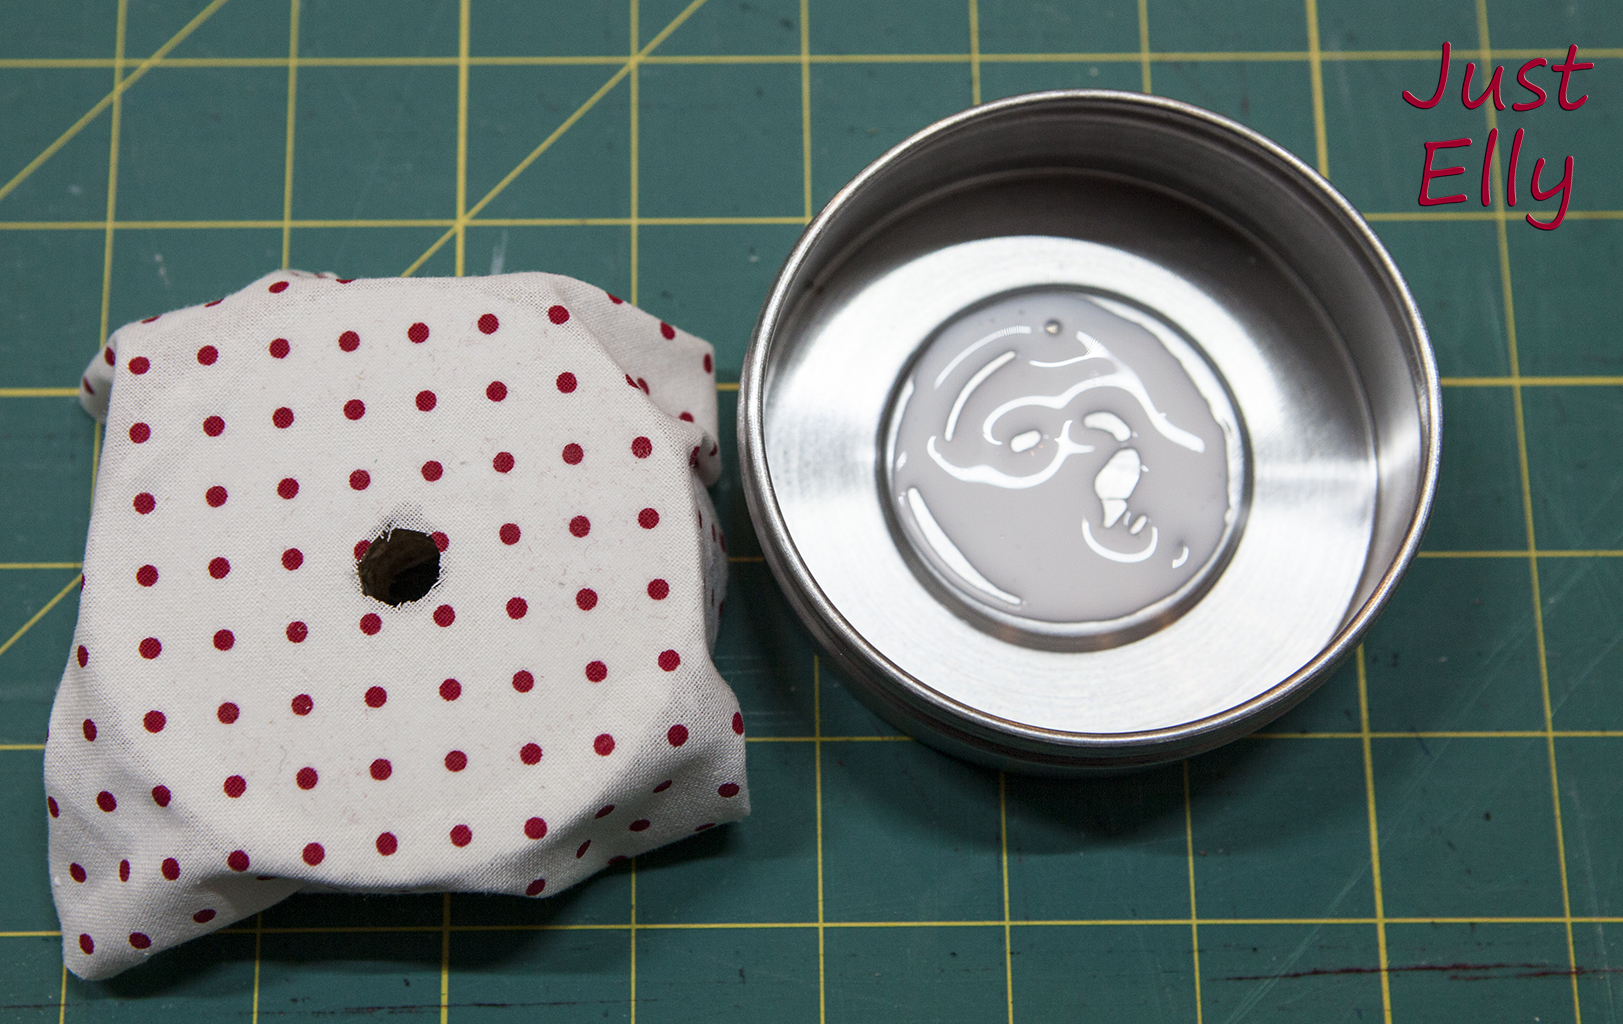
Cut out the hole in the fabric from the bottom of the plywood.
Take your foam and cut it out in the width of the dress.
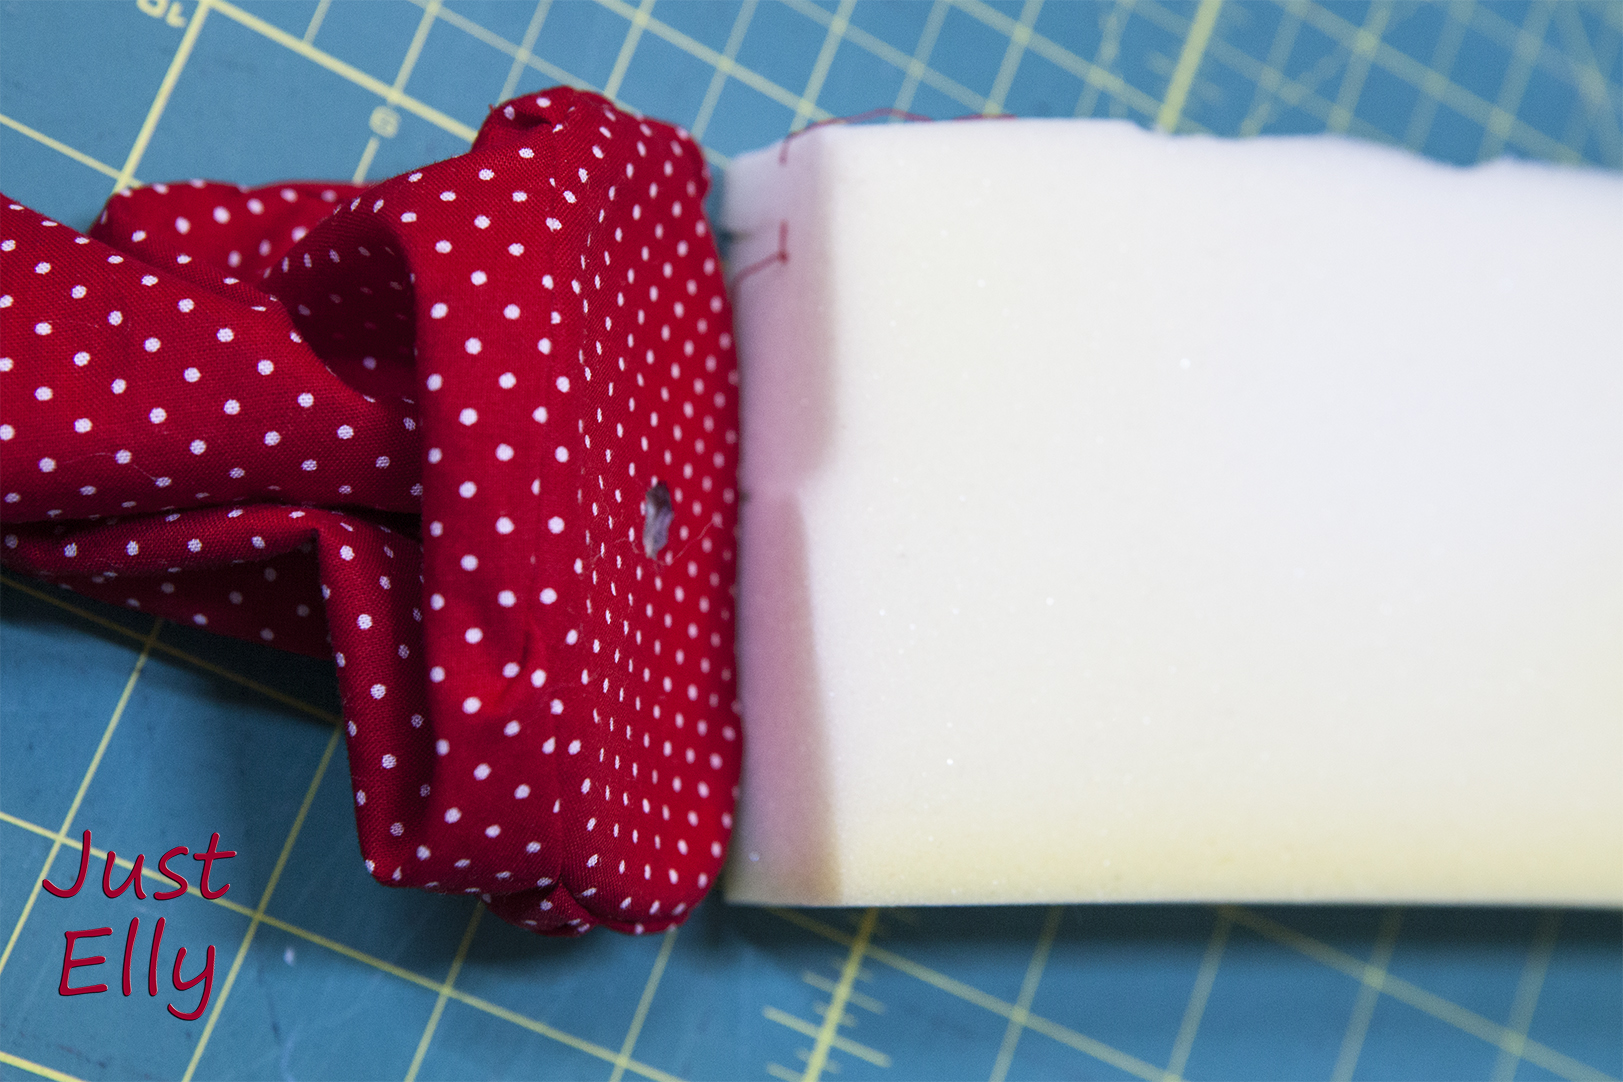
Put the foam into the dress and cut the length. Be sure the foam is in the bottom of the dress. Leave the foam one or two inches longer than the dress.
Now draw the hole from the bottom onto the foam.

Take out the foam and write on which side the front or back of the foam was.
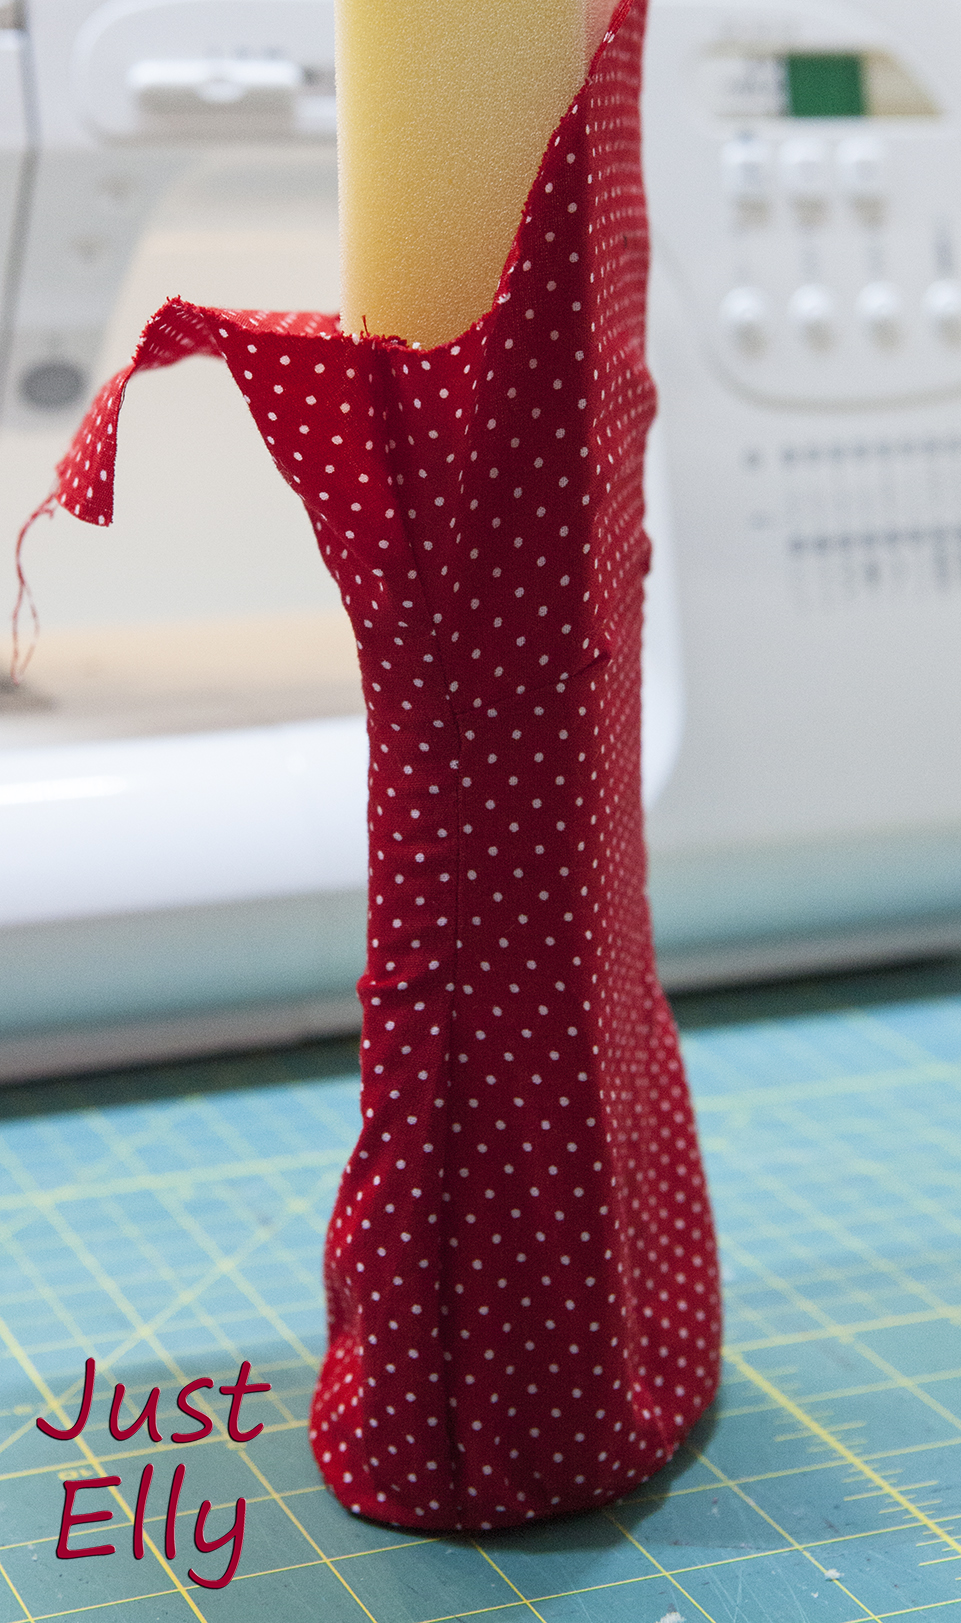
Take a big screwdriver and push it carefully and slowly through the foam. Start at the marked hole. Stay in the middle!
When you look at my doll, you realize that I didn’t stay in the middle: (
Use the screwdriver to move back and forth several times and remove the foam parts. Try to make sure that you get through the foam with the round wooden stick. If not, use the screwdriver again. Then it should be easy.

Now put the wooden stick with the foam into the container. Attach your dress to the foam and cut the foam in the length of the dress.
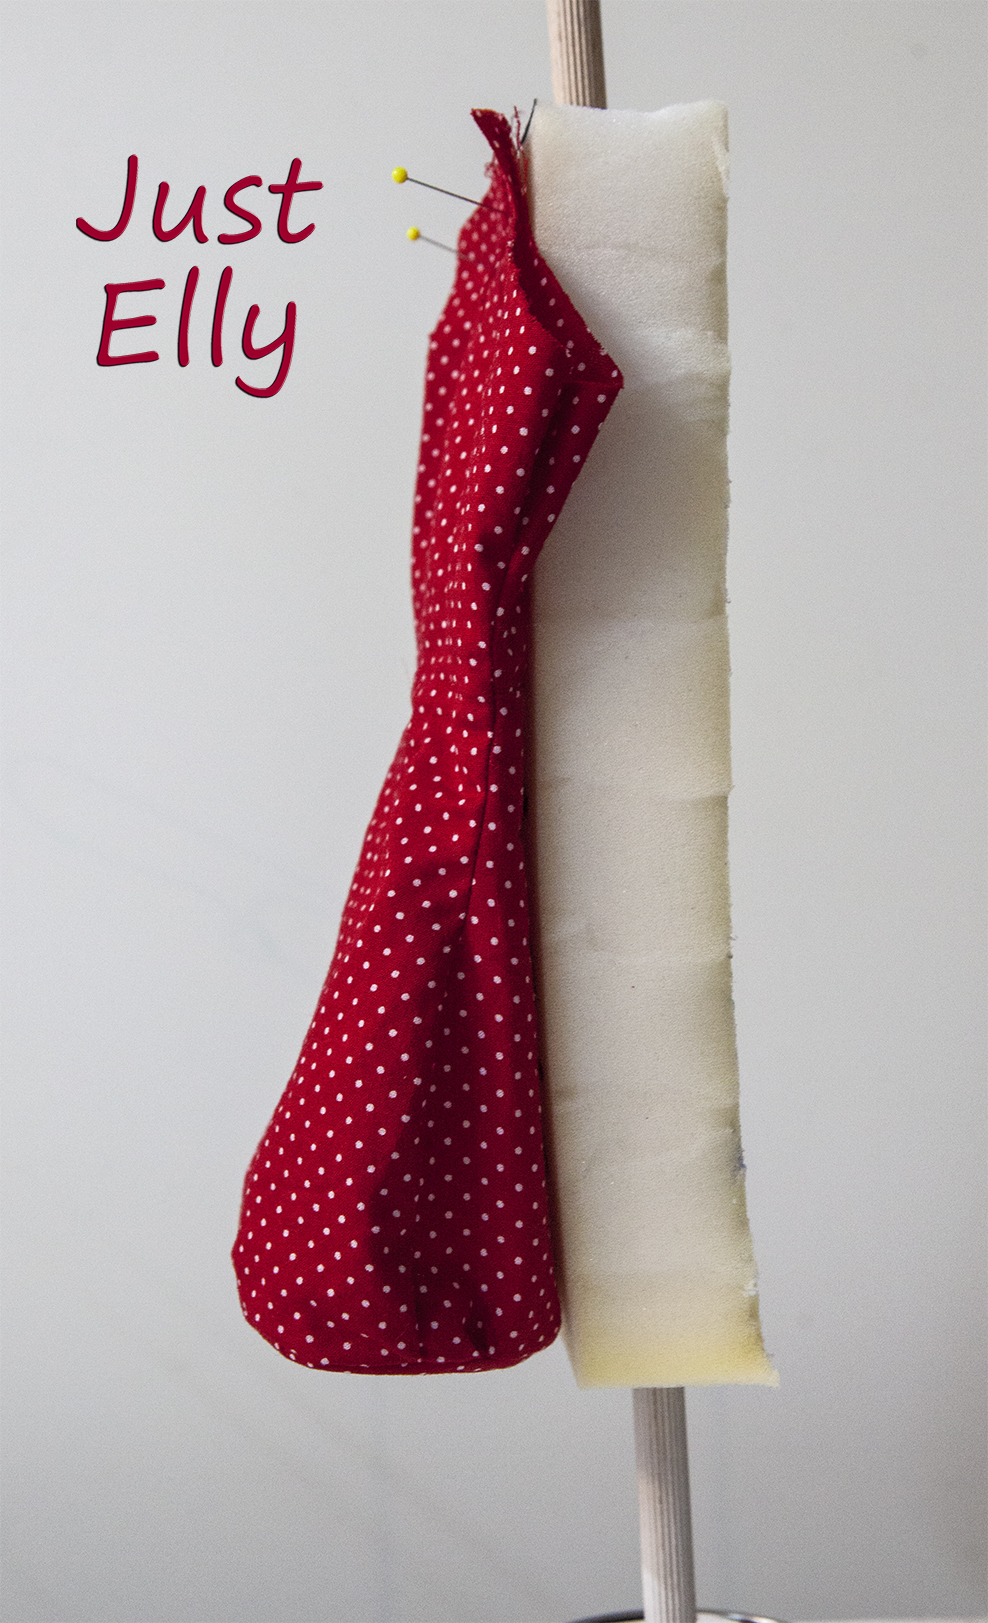
Now you have to decide where to put the dress on the wooden pole. I left enough space between the dress and the container so that I can reach there with my hand. Put a marker on the wooden pole at the top of the dress. Saw the wooden stick 1/2″ below this mark.

Glue the wooden pole into your container and let it dry.
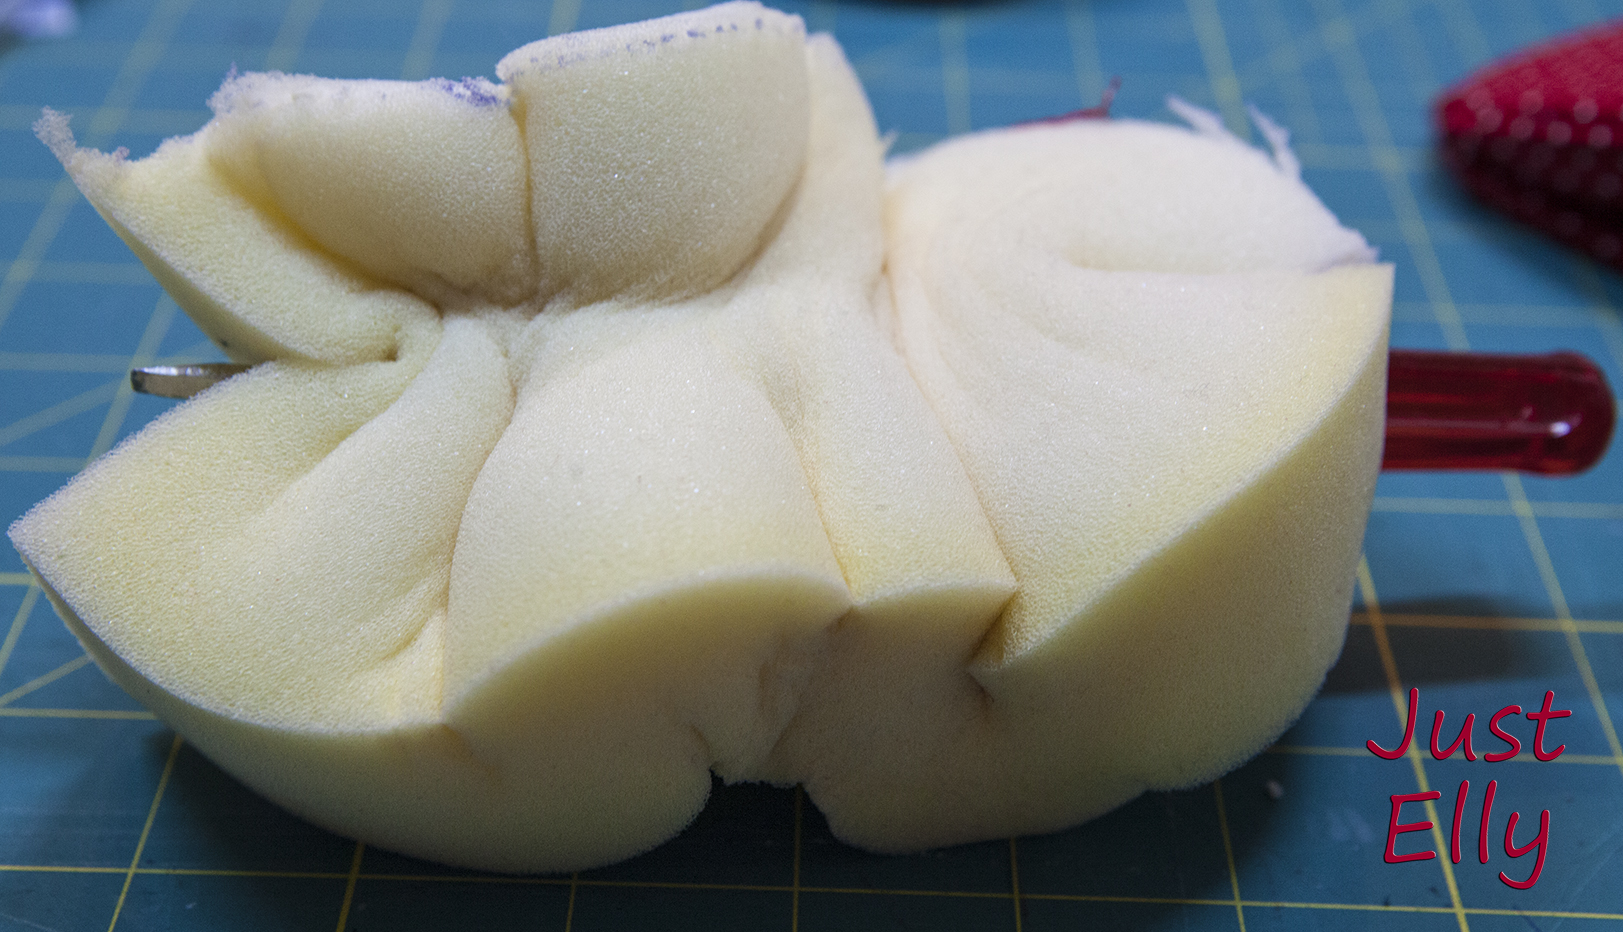
Cut ALL corners of the foam to give it an oval shape.
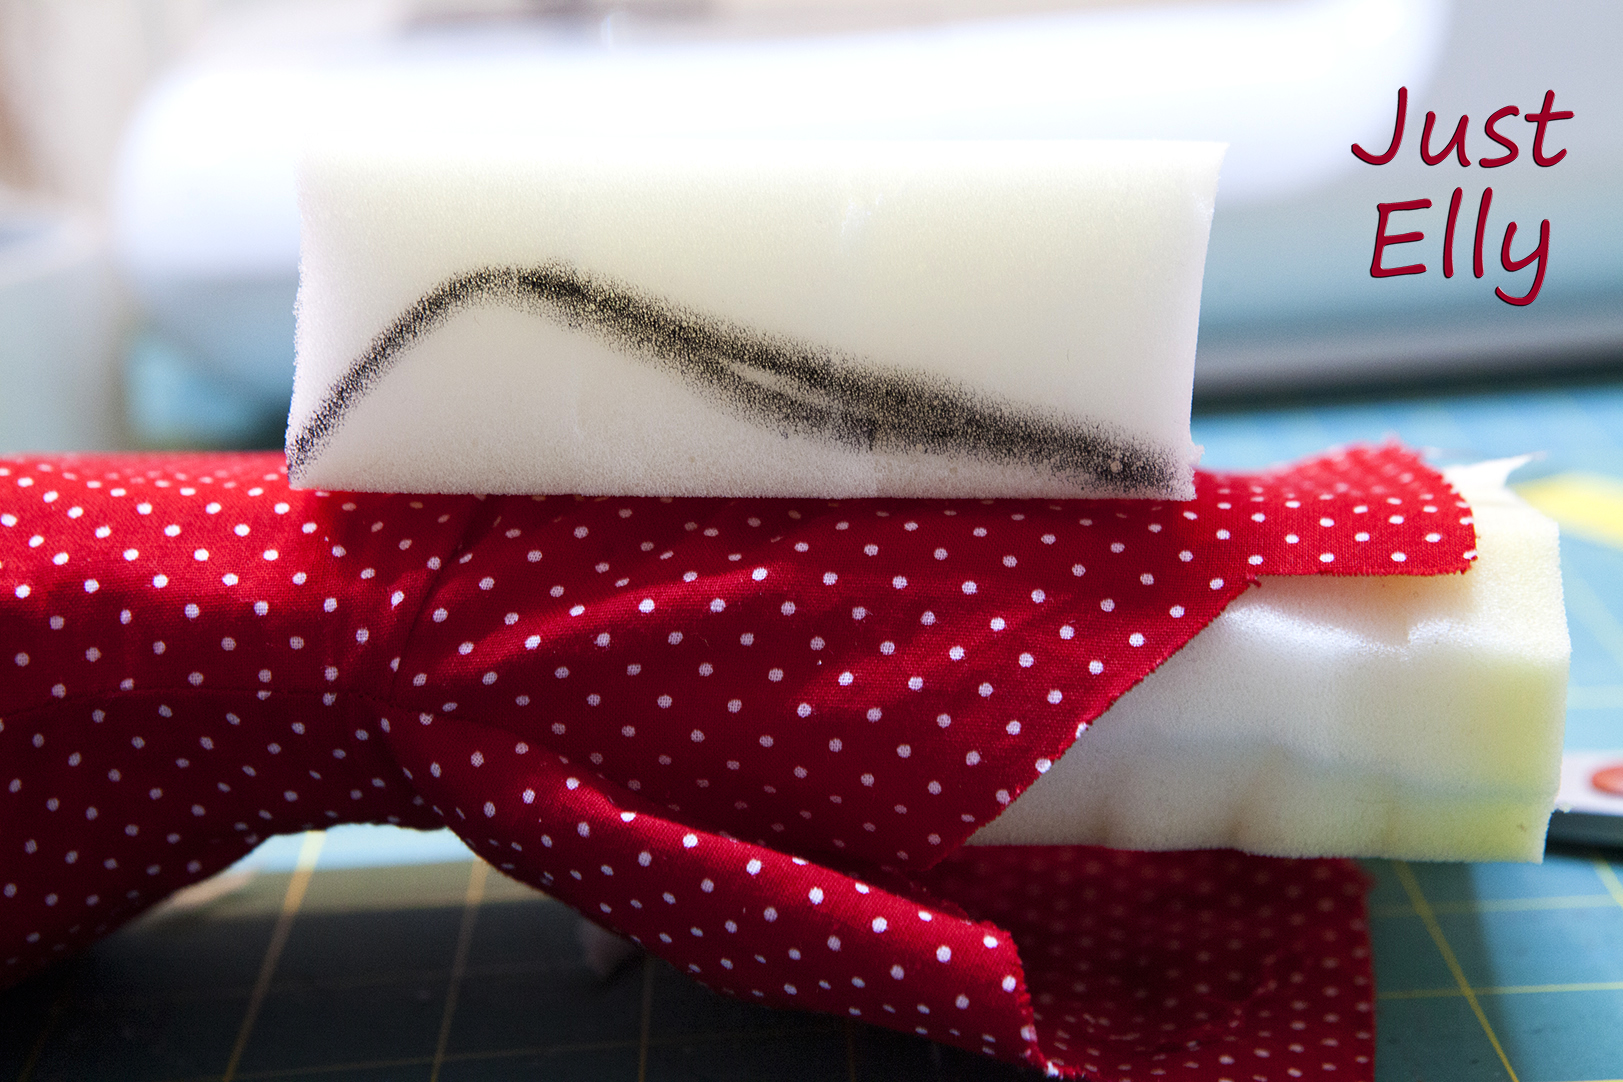
Start with the buttock.
Cut a 4″ half round piece of the foam

Round off this piece as shown in the pictures. Don’t cut everything at once. After each cut, put this piece into the dress and check if the result is acceptable. Small steps are important.


In the end it will look like this

The procedure with the chest is the same. Here too, a 4″ foam piece is needed. Don’t forget: little steps and check every cut with the dress.


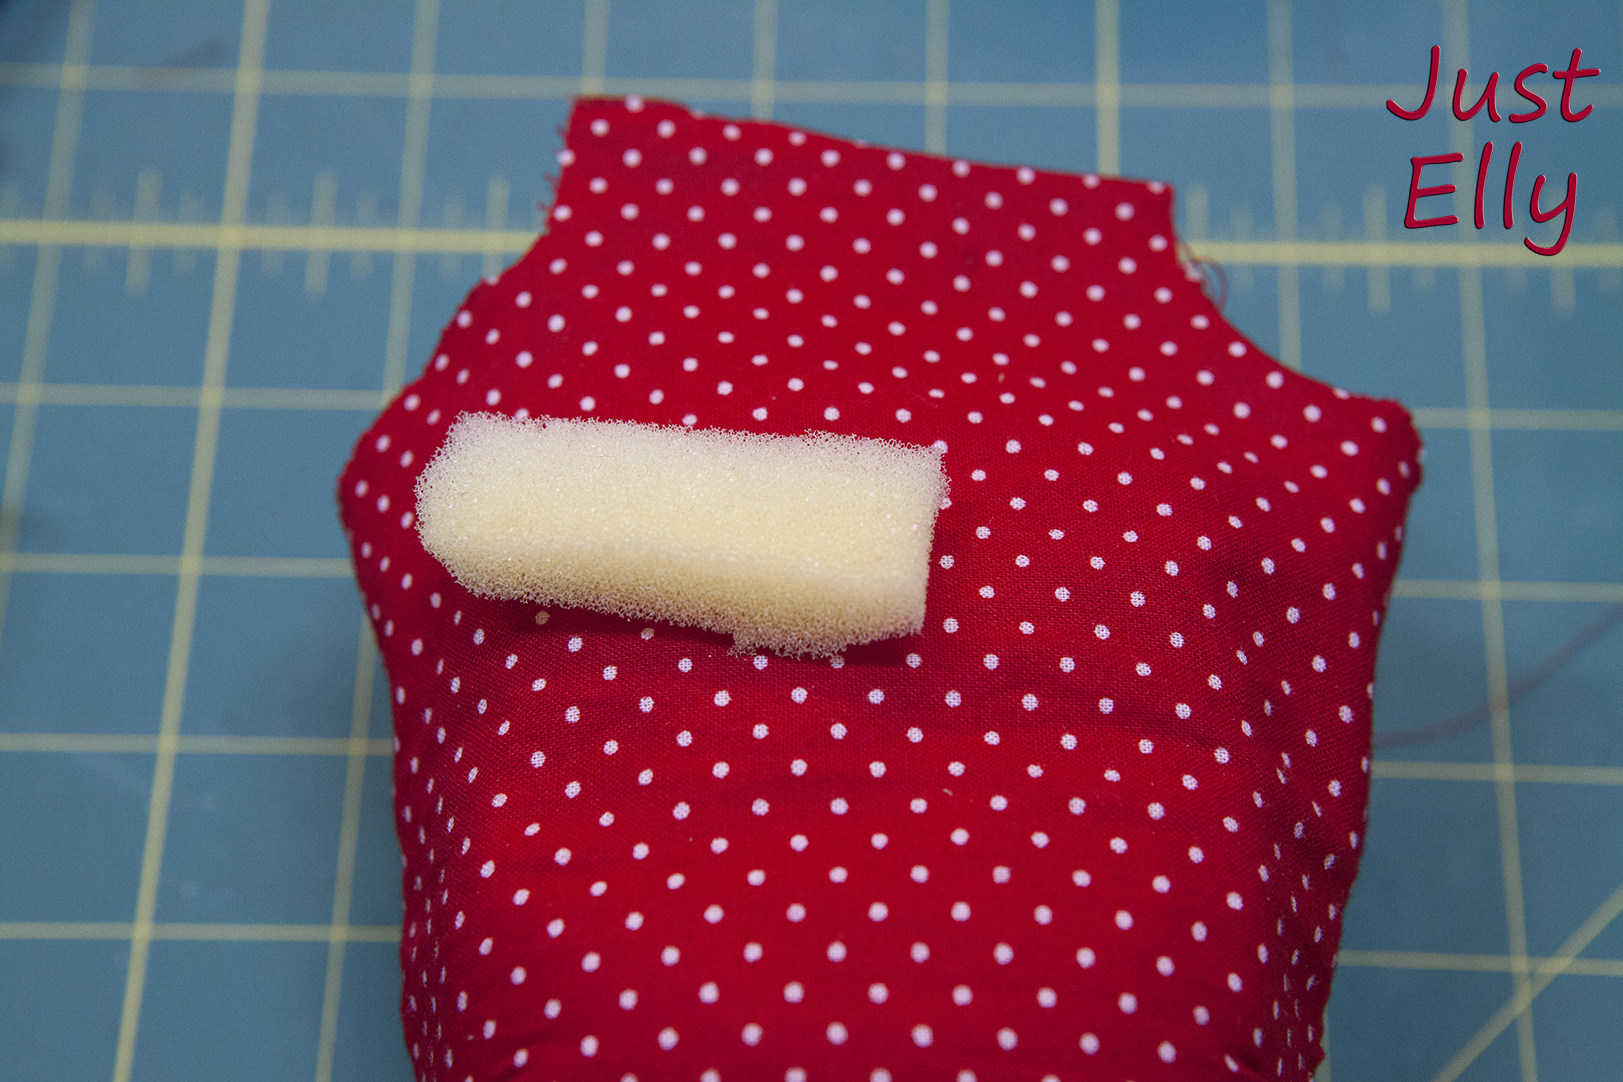
Now cut the shoulder and neck from the foam.

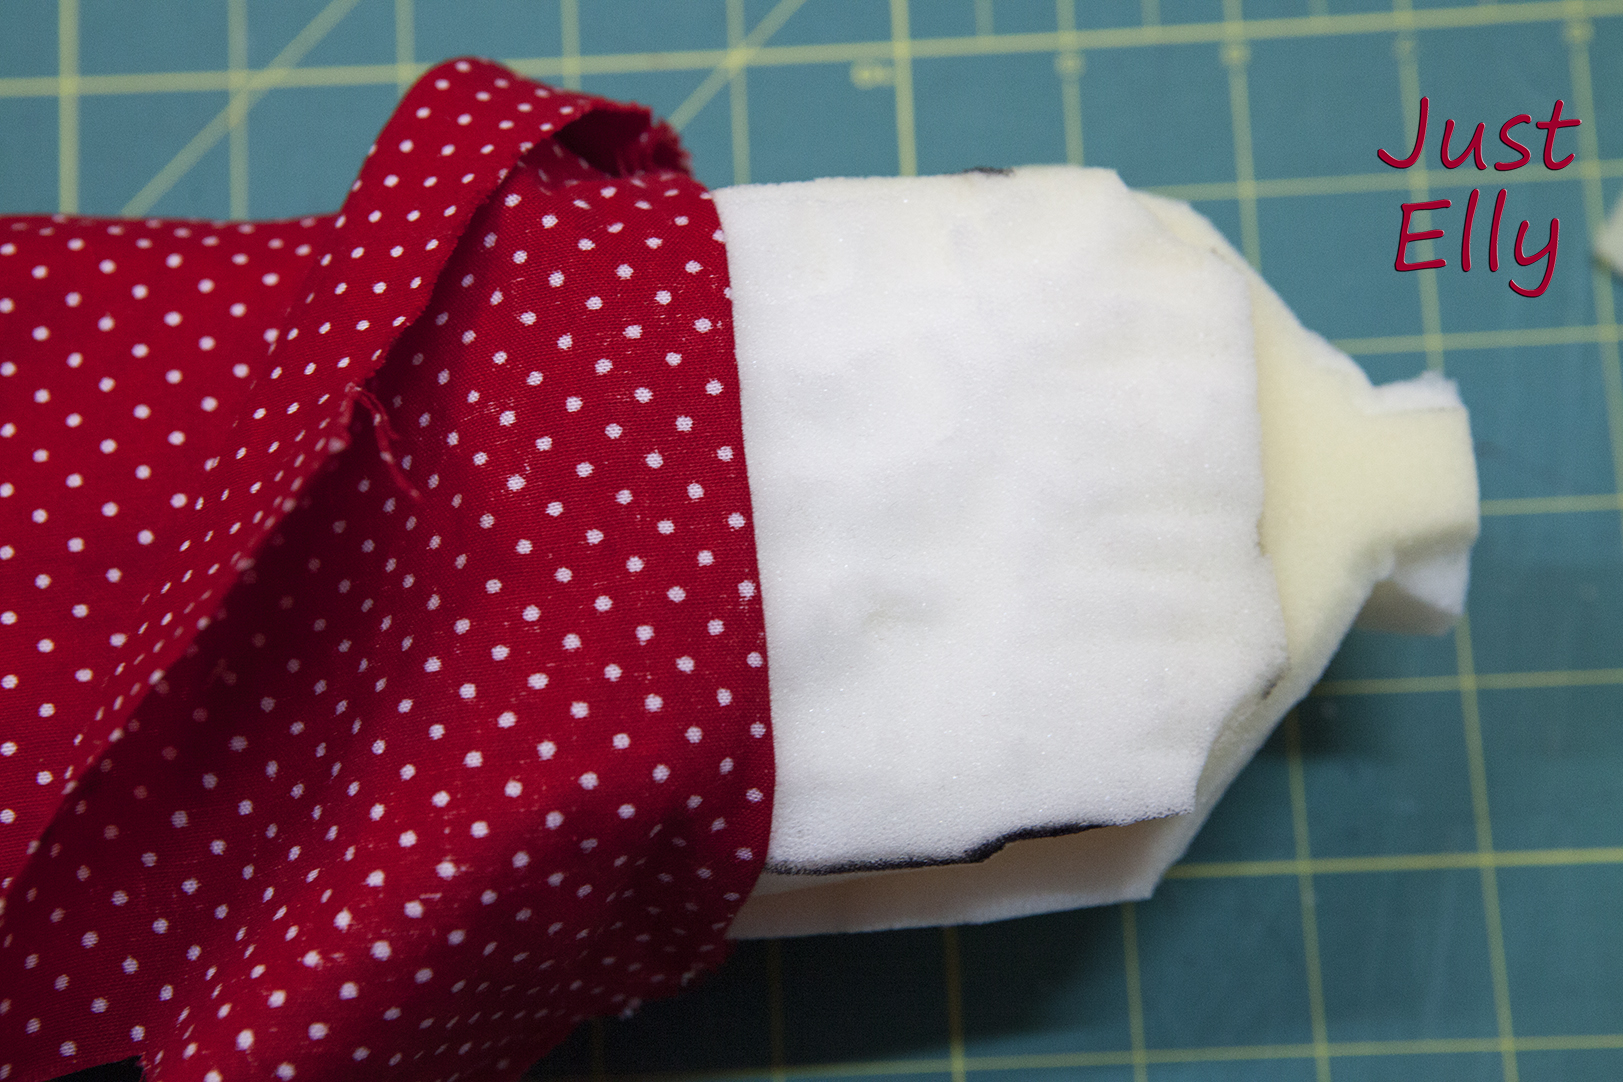
The next picture shows why I had the red mark on the pattern. The dress just doesn’t look so good!
Before the next step, remove the buttocks and chest from the dress and put the wooden stick through the dressed doll.
If you don’t do that, you have trouble finding the hole in the foam for the wooden stick.
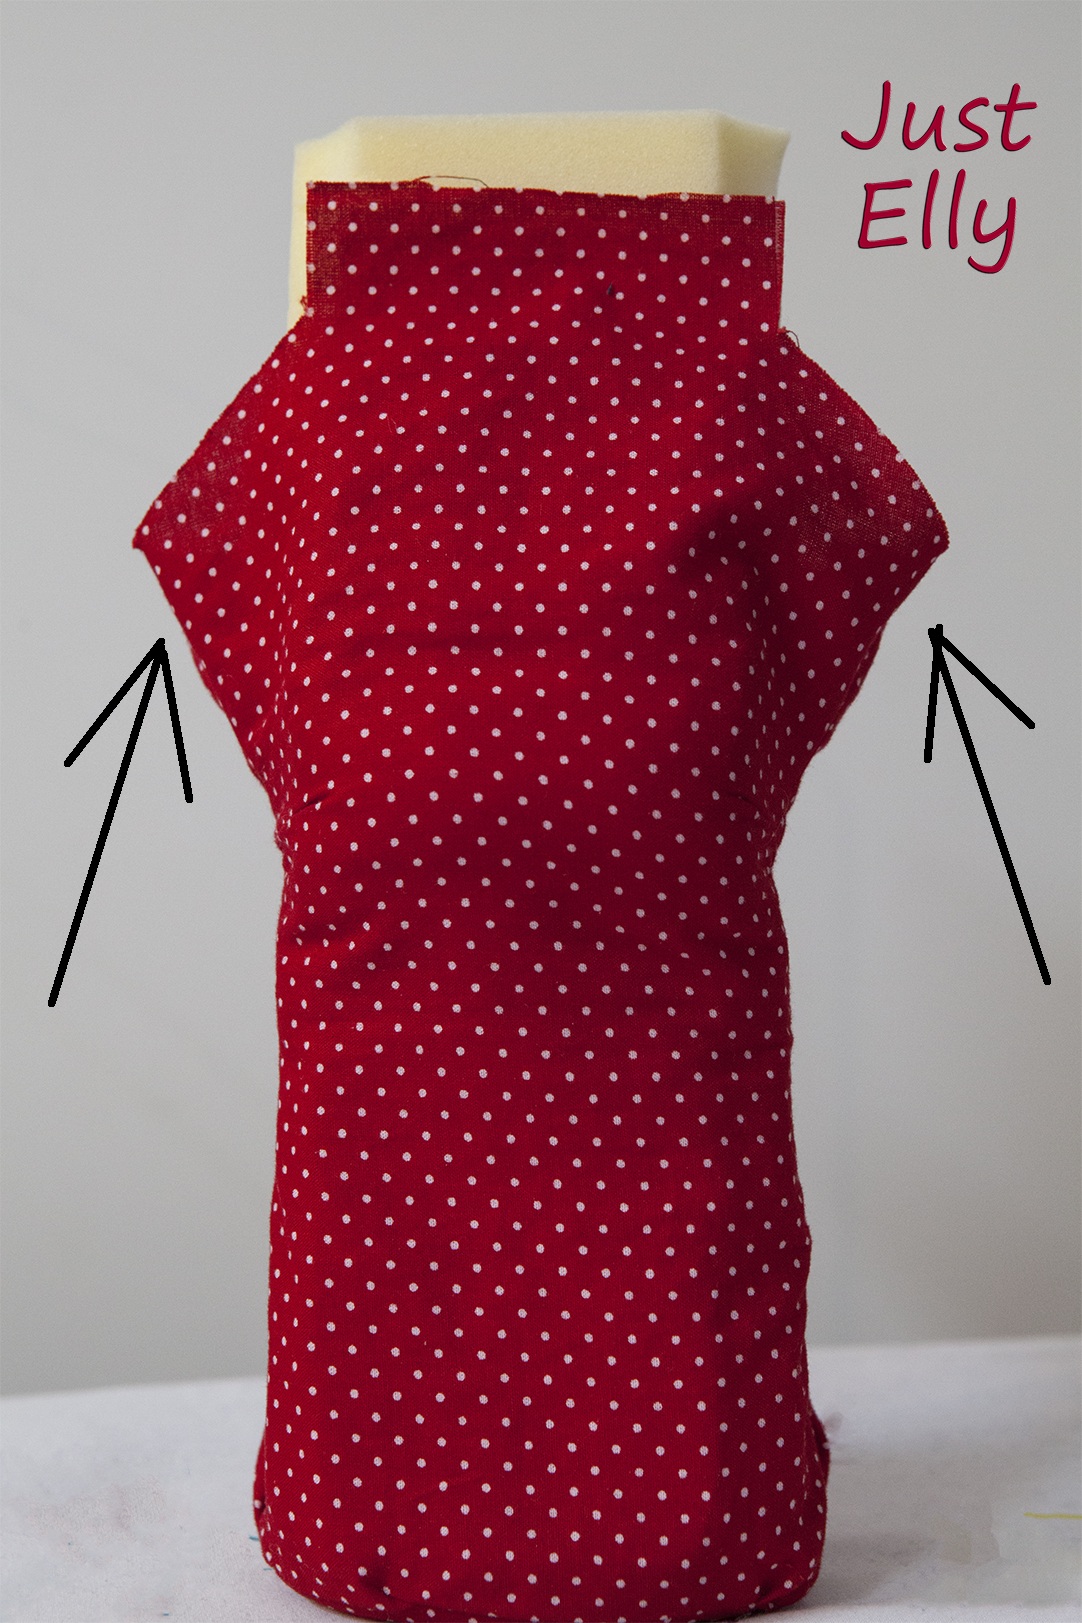
Now put your buttocks back in the doll and then the chest.
In order to “fix” my dress, I didn’t cut the fabric off but stuck it with needles and sewn it by hand.

Fill the sides of the chest with small pieces of foamed material.
Close the shoulders and neck also by hand.
I added a little decoration to my form dress
The ribbon is glued to the container lid
The necklace is made of very small beads and very thin metal wire.


And now my form dress pin cushion 🙂

I hope you like my tutorial 🙂
